@foreach ($user->orders as $order)
| {{ $order->ordered_at->toFormattedDateString() }} |
{{ $order->ourpay_id }} |
{{ $order->amount }} |
{{ $order->tax_amount }} |
{{ $order->refunded_amount }} |
{{ $order->refunded_tax_amount }} |
{{ $order->currency }} |
@endforeach
```
#### Check order status
You can check the status of an order by using the `status` attribute:
```php
$order->status;
```
Or you can use some of the helper methods offers by the `Order` model:
```php
$order->paid();
```
Aside from that, you can run two other checks: refunded, and partially refunded. If the order is refunded, you can utilize the refunded_at timestamp:
```blade
@if ($order->refunded())
Order {{ $order->ourpay_id }} was refunded on {{ $order->refunded_at->toFormattedDateString() }}
@endif
```
You may also see if an order was for a certain product:
```php
if ($order->hasProduct('product_id_123')) {
// ...
}
```
Or for an specific price:
```php
if ($order->hasPrice('price_id_123')) {
// ...
}
```
Furthermore, you can check if a consumer has purchased a specific product:
```php
if ($user->hasPurchasedProduct('product_id_123')) {
// ...
}
```
Or for an specific price:
```php
if ($user->hasPurchasedPrice('price_id_123')) {
// ...
}
```
### Subscriptions
#### Creating Subscriptions
Starting a subscription is simple. For this, we require our product's variant id. Copy the product id and start a new subscription checkout using your billable model:
```php
use Illuminate\Http\Request;
Route::get('/subscribe', function (Request $request) {
return $request->user()->subscribe('product_id_123');
});
```
When a customer completes their checkout, the incoming `SubscriptionCreated` event webhook connects it to your billable model in the database. You may then get the subscription from your billable model:
```php
$subscription = $user->subscription();
```
#### Checking Subscription Status
Once a consumer has subscribed to your services, you can use a variety of methods to check on the status of their subscription. The most basic example is to check if a customer has a valid subscription.
```php
if ($user->subscribed()) {
// ...
}
```
You can utilize this in a variety of locations in your app, such as middleware, rules, and so on, to provide services. To determine whether an individual subscription is valid, you can use the `valid` method:
```php
if ($user->subscription()->valid()) {
// ...
}
```
This method, like the subscribed method, returns true if your membership is active, on trial, past due, or cancelled during its grace period.
You may also check if a subscription is for a certain product:
```php
if ($user->subscription()->hasProduct('product_id_123')) {
// ...
}
```
Or for a certain price:
```php
if ($user->subscription()->hasPrice('price_id_123')) {
// ...
}
```
If you wish to check if a subscription is on a specific price while being valid, you can use:
```php
if ($user->subscribedToPrice('price_id_123')) {
// ...
}
```
Alternatively, if you use different [subscription types](#multiple-subscriptions), you can pass a type as an additional parameter:
```php
if ($user->subscribed('swimming')) {
// ...
}
if ($user->subscribedToPrice('price_id_123', 'swimming')) {
// ...
}
```
#### Cancelled Status
To see if a user has cancelled their subscription, you can use the cancelled method:
```php
if ($user->subscription()->cancelled()) {
// ...
}
```
When they are in their grace period, you can utilize the `onGracePeriod` check.
```php
if ($user->subscription()->onGracePeriod()) {
// ...
}
```
#### Past Due Status
If a recurring payment fails, the subscription will become past due. This indicates that the subscription is still valid, but your customer's payments will be retried automatically over a 21-day period.
```php
if ($user->subscription()->pastDue()) {
// ...
}
```
#### Subscription Scopes
There are several subscription scopes available for querying subscriptions in specific states:
```php
// Get all active subscriptions...
$subscriptions = Subscription::query()->active()->get();
// Get all of the cancelled subscriptions for a specific user...
$subscriptions = $user->subscriptions()->cancelled()->get();
```
Here's all available scopes:
```php
Subscription::query()->incomplete();
Subscription::query()->incompleteExpired();
Subscription::query()->onTrial();
Subscription::query()->active();
Subscription::query()->pastDue();
Subscription::query()->unpaid();
Subscription::query()->cancelled();
```
#### Changing Plans
When a consumer is on a monthly plan, they may desire to upgrade to a better plan, alter their payments to an annual plan, or drop to a lower-cost plan. In these cases, you can allow them to swap plans by giving a different product id to the `swap` method:
```php
use App\Models\User;
$user = User::find(1);
$user->subscription()->swap('product_id_123');
```
This will change the customer's subscription plan, however billing will not occur until the next payment cycle. If you want to immediately invoice the customer, you can use the `swapAndInvoice` method instead.
```php
$user = User::find(1);
$user->subscription()->swapAndInvoice('product_id_123');
```
#### Multiple Subscriptions
In certain situations, you may wish to allow your consumer to subscribe to numerous subscription kinds. For example, a gym may provide a swimming and weight lifting subscription. You can let your customers subscribe to one or both.
To handle the various subscriptions, you can offer a type of subscription as the second argument when creating a new one:
```php
$user = User::find(1);
$checkout = $user->subscribe('product_id_123', 'swimming');
```
You can now always refer to this specific subscription type by passing the type argument when getting it:
```php
$user = User::find(1);
// Retrieve the swimming subscription type...
$subscription = $user->subscription('swimming');
// Swap plans for the gym subscription type...
$user->subscription('gym')->swap('product_id_123');
// Cancel the swimming subscription...
$user->subscription('swimming')->cancel();
```
#### Cancelling Subscriptions
To cancel a subscription, call the `cancel` method.
```php
$user = User::find(1);
$user->subscription()->cancel();
```
This will cause your subscription to be cancelled. If you cancel your subscription in the middle of the cycle, it will enter a grace period, and the ends_at column will be updated. The customer will continue to have access to the services offered for the duration of the period. You may check the grace period by calling the `onGracePeriod` method:
```php
if ($user->subscription()->onGracePeriod()) {
// ...
}
```
OurPay does not offer immediate cancellation. To resume a subscription while it is still in its grace period, use the resume method.
```php
$user->subscription()->resume();
```
When a cancelled subscription approaches the end of its grace period, it becomes expired and cannot be resumed.
### Handling Webhooks
OurPay can send webhooks to your app, allowing you to react. By default, this package handles the majority of the work for you. If you have properly configured webhooks, it will listen for incoming events and update your database accordingly. We recommend activating all event kinds so you may easily upgrade in the future.
#### Webhook Events
- `Danestves\LaravelOurPay\Events\BenefitGrantCreated`
- `Danestves\LaravelOurPay\Events\BenefitGrantUpdated`
- `Danestves\LaravelOurPay\Events\BenefitGrantRevoked`
- `Danestves\LaravelOurPay\Events\OrderCreated`
- `Danestves\LaravelOurPay\Events\OrderRefunded`
- `Danestves\LaravelOurPay\Events\SubscriptionActive`
- `Danestves\LaravelOurPay\Events\SubscriptionCanceled`
- `Danestves\LaravelOurPay\Events\SubscriptionCreated`
- `Danestves\LaravelOurPay\Events\SubscriptionRevoked`
- `Danestves\LaravelOurPay\Events\SubscriptionUpdated`
Each of these events has a billable `$model` object and an event `$payload`. The subscription events also include the `$subscription` object. These can be accessed via the public properties.
If you wish to respond to these events, you must establish listeners for them. For example, you may wish to react when a subscription is updated.
```php
payload['type'] === 'subscription.updated') {
// Handle the incoming event...
}
}
}
```
The [OurPay documentation](https://docs.ourpay.dev/integrate/webhooks/events) includes an example payload.
Laravel v11 and up will automatically discover the listener. If you're using Laravel v10 or lower, you should configure it in your app's `EventServiceProvider`:
```php
[
OurPayEventListener::class,
],
];
}
```
## Testing
```bash Terminal
composer test
```
## Changelog
Please see [CHANGELOG](https://github.com/danestves/laravel-ourpay/blob/main/CHANGELOG.md) for more information on what has changed recently.
## License
The MIT License (MIT). Please see [License File](https://github.com/danestves/laravel-ourpay/blob/main/LICENSE.md) for more information.
# Next.js
Source: https://docs.ourpay.dev/integrate/sdk/adapters/nextjs
## Examples
- [With Next.js](https://github.com/sunnycodet/examples/tree/main/with-nextjs)
- [With Next.js and Upstash QStash](https://github.com/sunnycodet/examples/tree/main/with-nextjs-qstash-schedule-downgrades)
- [With Next.js, Better Auth and Cloudflare Workers](https://github.com/sunnycodet/examples/tree/main/with-nextjs-better-auth-cloudflare-workers)
## Installation
Install the required OurPay packages using the following command:
 ## Filter License Keys and Benefit Grants by Status
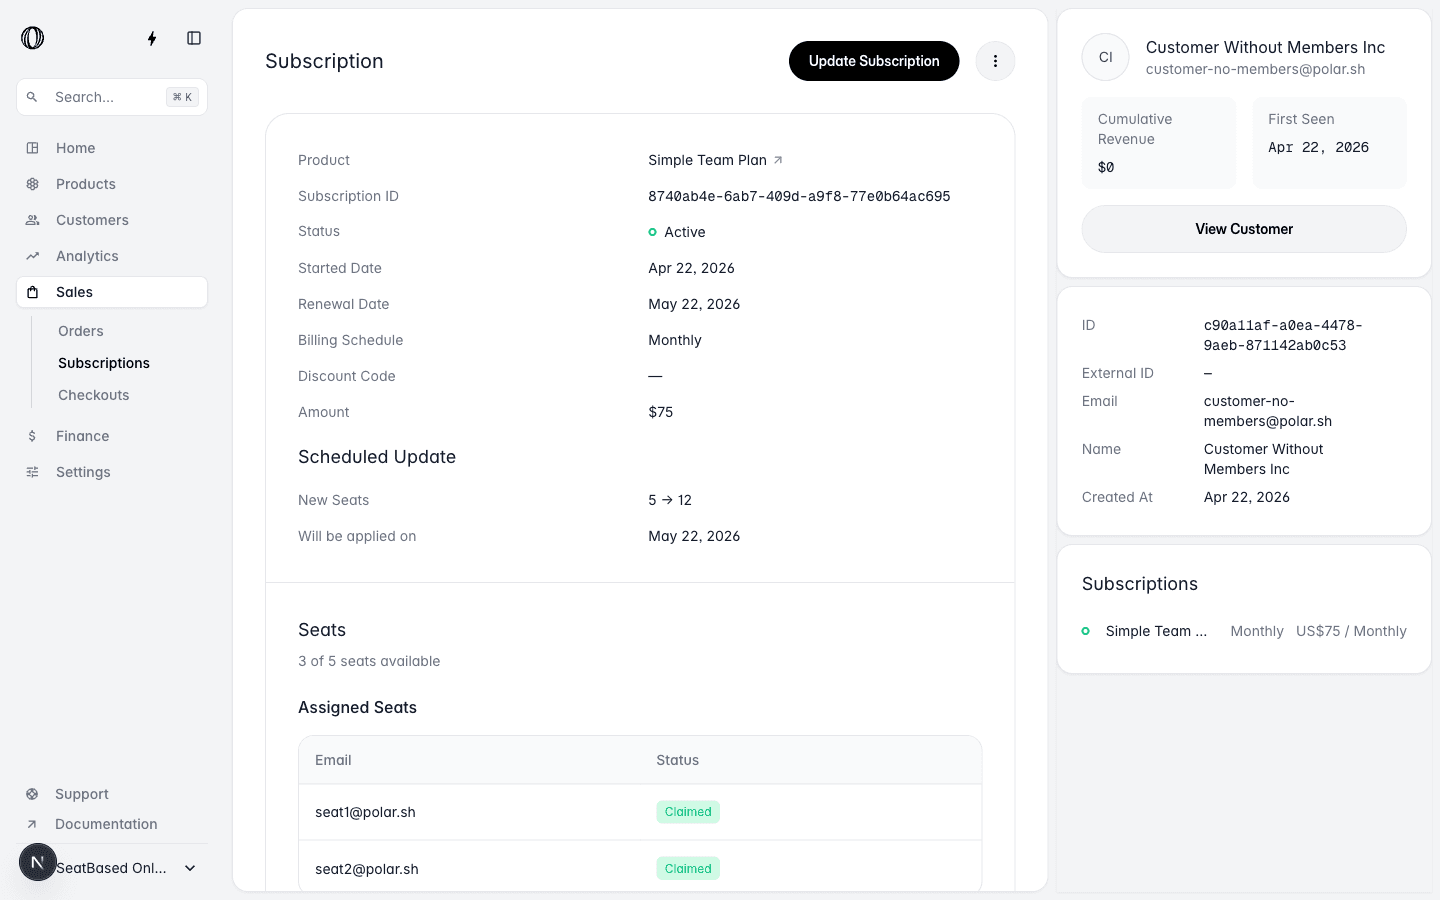
Merchants can now filter license keys and benefit grants by status (granted, revoked, disabled, pending) directly from the benefit detail page. The license key status filter is also exposed via the API. Finding revoked or pending entitlements across large customer bases is now a single dropdown click instead of scrolling pages of results.
## Filter License Keys and Benefit Grants by Status
Merchants can now filter license keys and benefit grants by status (granted, revoked, disabled, pending) directly from the benefit detail page. The license key status filter is also exposed via the API. Finding revoked or pending entitlements across large customer bases is now a single dropdown click instead of scrolling pages of results.
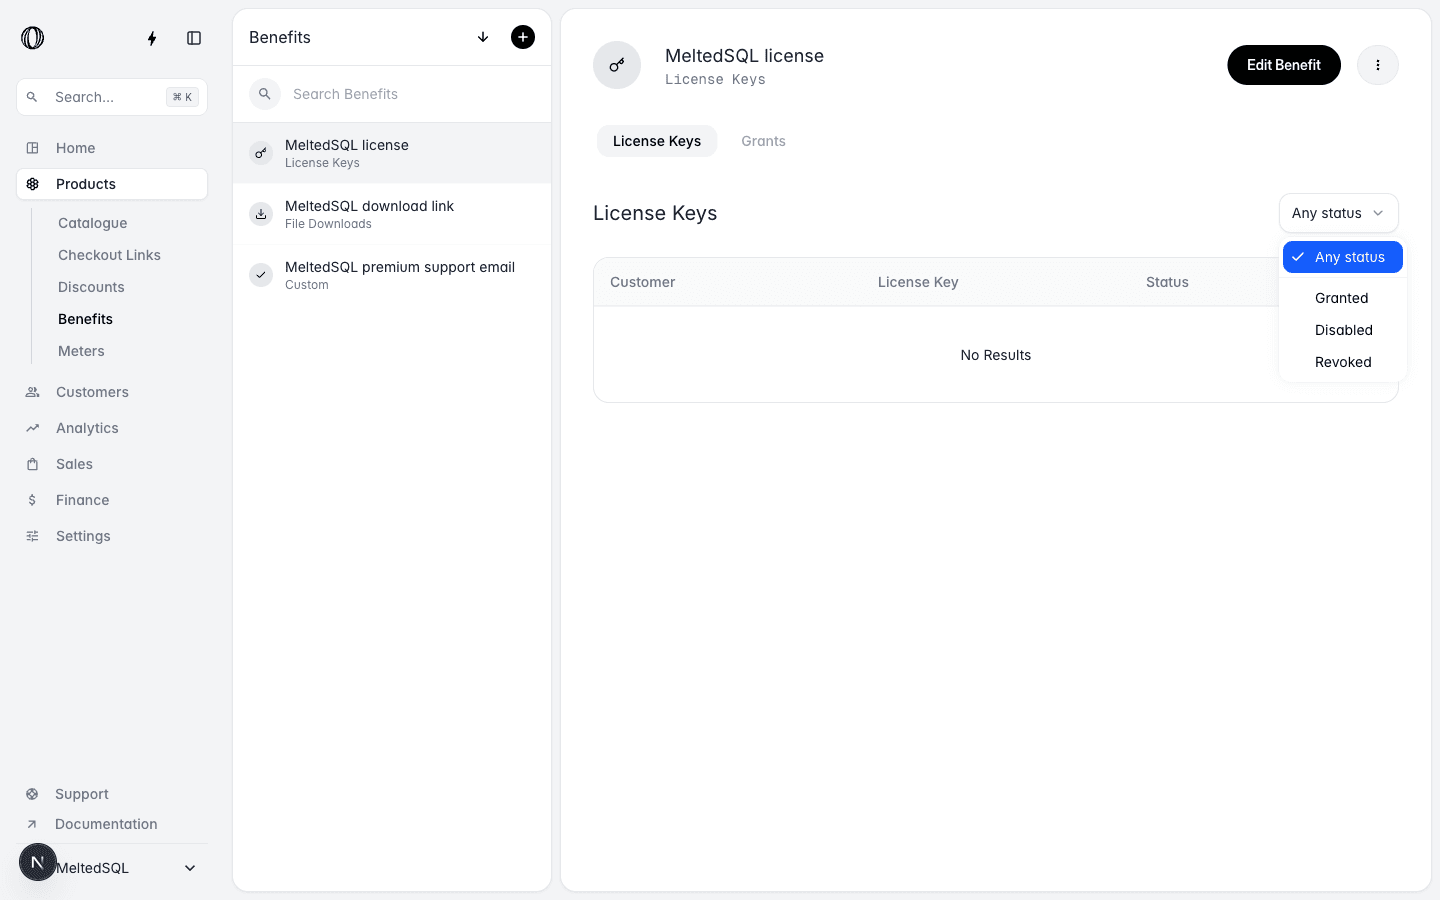 ## Invoice Support for Arabic, Hebrew, and CJK
Invoice PDFs now render Arabic, Hebrew, and CJK (Chinese, Japanese, Korean) glyphs correctly, with proper right-to-left shaping for Arabic and Hebrew. Merchants invoicing customers in these languages get professional, readable documents out of the box.
## Expanded Currency Support
Presentment currency coverage expanded by 80+ currencies, including EGP, KES, NGN, PKR, VND, UAH, and KZT. Merchants can now price products and display checkout in a much wider range of local currencies.
## Smarter Regional Currency Formatting
Localized checkout now respects regional IETF subtags (e.g. `en-CA`, `en-AU`) while keeping the merchant's chosen language. Currency symbols render as `CA$` or `A$` instead of a generic `$`, so buyers see the right currency framing for their region.
## Invoice Support for Arabic, Hebrew, and CJK
Invoice PDFs now render Arabic, Hebrew, and CJK (Chinese, Japanese, Korean) glyphs correctly, with proper right-to-left shaping for Arabic and Hebrew. Merchants invoicing customers in these languages get professional, readable documents out of the box.
## Expanded Currency Support
Presentment currency coverage expanded by 80+ currencies, including EGP, KES, NGN, PKR, VND, UAH, and KZT. Merchants can now price products and display checkout in a much wider range of local currencies.
## Smarter Regional Currency Formatting
Localized checkout now respects regional IETF subtags (e.g. `en-CA`, `en-AU`) while keeping the merchant's chosen language. Currency symbols render as `CA$` or `A$` instead of a generic `$`, so buyers see the right currency framing for their region.
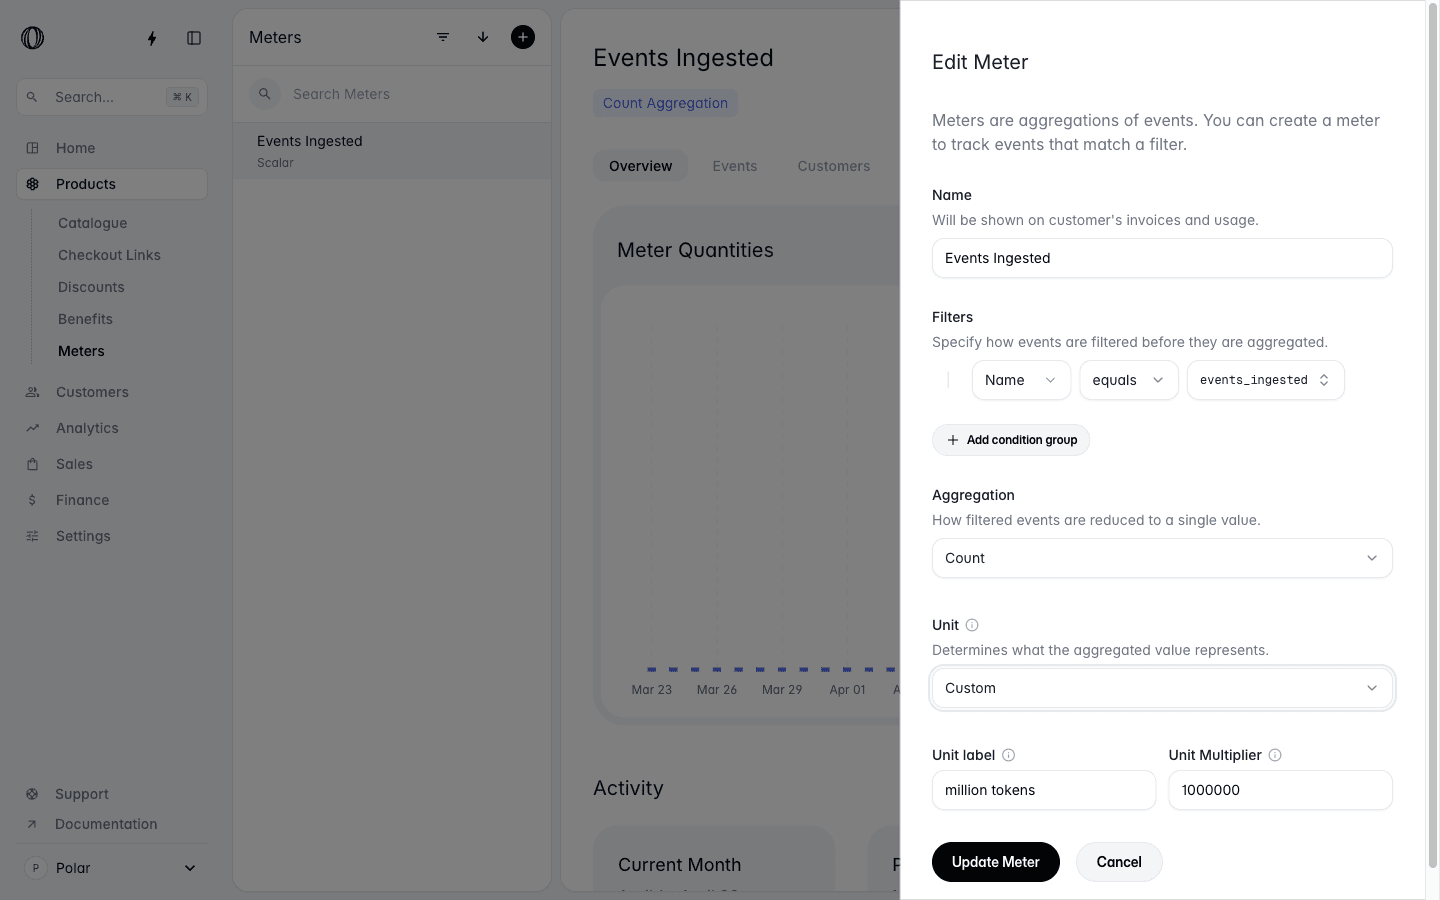 ## Self-Service Payout Account Management
Merchants can now create, switch between, and delete payout accounts directly from the Finance page. A new Manage modal lists every account on the user, lets you set the active one for the organization, and blocks deletion when an account still holds a balance or is linked to an organization. Useful for moving payouts to a new bank entity without contacting support.
## Customers Can Update Their Email Address
Customers can now change the email address on their account directly from the customer portal, with a verification step on the new address. No more support tickets to fix a typo or move billing to a new mailbox.
## Cost Insights: Customer Ranking and Variance Detection
Cost Insights now ranks customers by total cost so you can see which accounts are driving the bill, and a new variance API surfaces cost anomalies (sudden spikes or drops) on individual events. Cost values also render correctly on the leaf event detail page. An enhancement to the Cost Insights feature shipped last October.
## Self-Service Payout Account Management
Merchants can now create, switch between, and delete payout accounts directly from the Finance page. A new Manage modal lists every account on the user, lets you set the active one for the organization, and blocks deletion when an account still holds a balance or is linked to an organization. Useful for moving payouts to a new bank entity without contacting support.
## Customers Can Update Their Email Address
Customers can now change the email address on their account directly from the customer portal, with a verification step on the new address. No more support tickets to fix a typo or move billing to a new mailbox.
## Cost Insights: Customer Ranking and Variance Detection
Cost Insights now ranks customers by total cost so you can see which accounts are driving the bill, and a new variance API surfaces cost anomalies (sudden spikes or drops) on individual events. Cost values also render correctly on the leaf event detail page. An enhancement to the Cost Insights feature shipped last October.
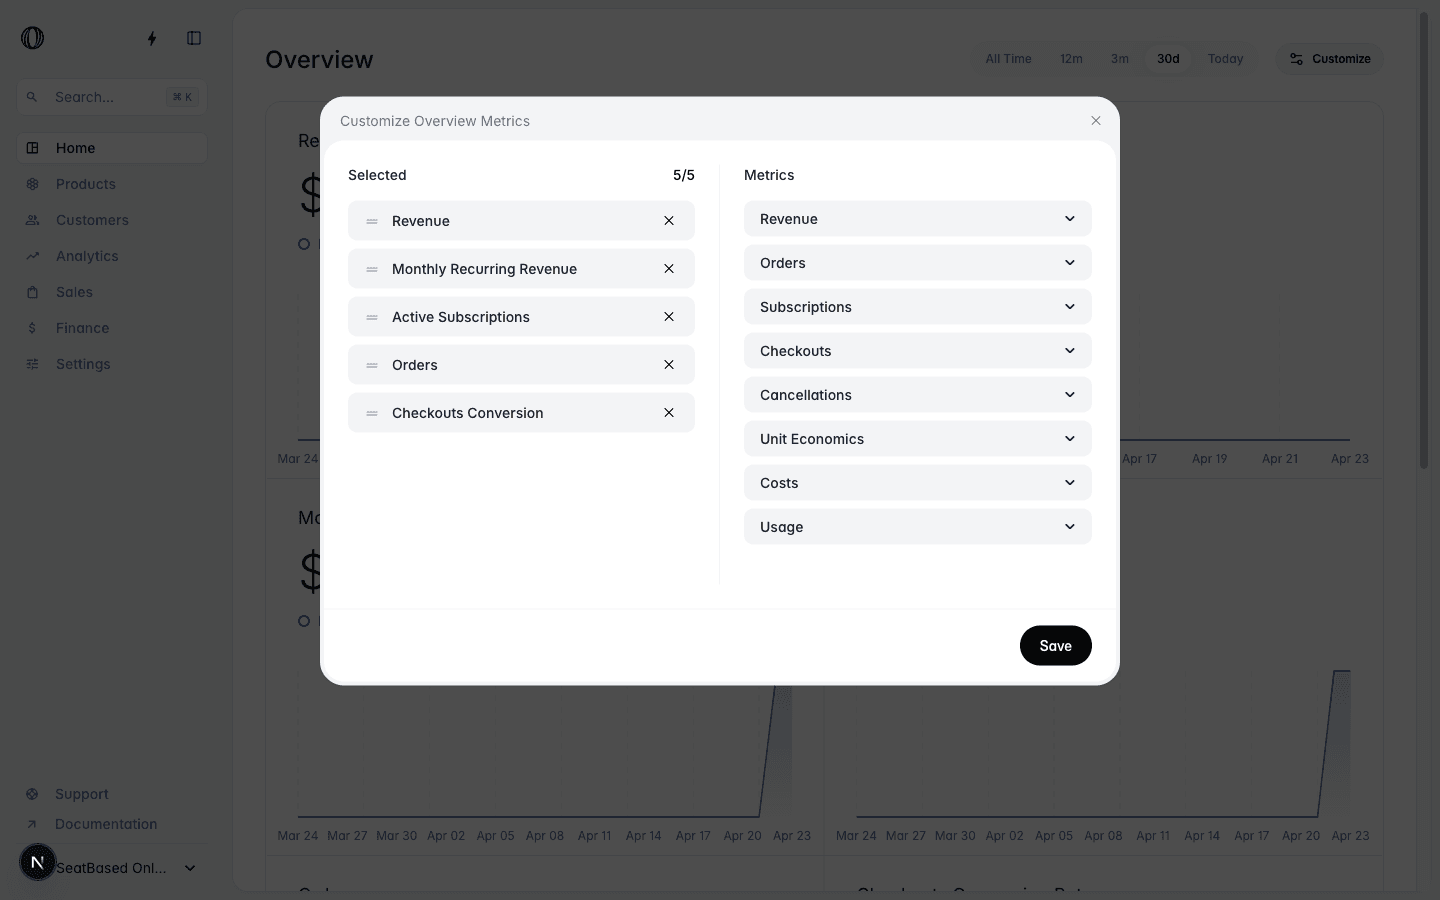 ## Schedule Subscription Updates for Next Cycle
Subscription changes (product swaps, price updates, seat changes) can now be scheduled to apply at the next billing cycle instead of taking effect immediately. The API exposes a new `next_period` proration behavior, and pending updates are returned on subscription objects and webhooks so external systems stay in sync.
## Tax-Inclusive Pricing
Merchants can now set a default tax behavior on their organization and price products with tax included in the displayed amount. Useful for regions and product categories where buyers expect to see the all-in price up front.
## Renewal and Trial Conversion Reminders
Customers on yearly or longer billing cycles now get an automatic reminder seven days before renewal. Trial subscribers get a heads-up three days before their trial ends (or one day for very short trials). Both reminders are toggleable per organization, helping reduce involuntary churn and surprise charges.
## GDPR Customer Data Export
A new Privacy section in the customer portal lets buyers download a complete JSON export of their personal data, subscriptions, orders, and benefit grants in one click. Helps merchants satisfy data portability obligations without manual exports.
## Cancellation Reason Drill-Down
Cancellation charts in the metrics dashboard are now interactive. Clicking on any reason or time bucket opens a detail modal showing the underlying subscriptions, customer comments, and dates. Merchants can finally connect a spike on the chart to the actual customers behind it.
## Korean Checkout
Checkout is now translated into Korean. Merchants selling to Korean buyers get a native buying experience, with product details, payment fields, and order summary all rendering in Korean.
## Multi-Currency Fixed Discounts
Fixed-amount discounts can now hold separate amounts per currency, matching the multi-currency pricing model that shipped in February. Run a $10 / 10 EUR / 10 GBP coupon as a single discount instead of juggling three.
## Schedule Subscription Updates for Next Cycle
Subscription changes (product swaps, price updates, seat changes) can now be scheduled to apply at the next billing cycle instead of taking effect immediately. The API exposes a new `next_period` proration behavior, and pending updates are returned on subscription objects and webhooks so external systems stay in sync.
## Tax-Inclusive Pricing
Merchants can now set a default tax behavior on their organization and price products with tax included in the displayed amount. Useful for regions and product categories where buyers expect to see the all-in price up front.
## Renewal and Trial Conversion Reminders
Customers on yearly or longer billing cycles now get an automatic reminder seven days before renewal. Trial subscribers get a heads-up three days before their trial ends (or one day for very short trials). Both reminders are toggleable per organization, helping reduce involuntary churn and surprise charges.
## GDPR Customer Data Export
A new Privacy section in the customer portal lets buyers download a complete JSON export of their personal data, subscriptions, orders, and benefit grants in one click. Helps merchants satisfy data portability obligations without manual exports.
## Cancellation Reason Drill-Down
Cancellation charts in the metrics dashboard are now interactive. Clicking on any reason or time bucket opens a detail modal showing the underlying subscriptions, customer comments, and dates. Merchants can finally connect a spike on the chart to the actual customers behind it.
## Korean Checkout
Checkout is now translated into Korean. Merchants selling to Korean buyers get a native buying experience, with product details, payment fields, and order summary all rendering in Korean.
## Multi-Currency Fixed Discounts
Fixed-amount discounts can now hold separate amounts per currency, matching the multi-currency pricing model that shipped in February. Run a $10 / 10 EUR / 10 GBP coupon as a single discount instead of juggling three.
 ## New IP ranges
From **October 27th, 2025**, [new IP ranges](https://docs.ourpay.dev/integrate/webhooks/delivery#ip-allowlist) will be added.
## Improved Subscription Cancellation Flow
[Benefits](https://docs.ourpay.dev/features/benefits/introduction) attached to the subscription [are now automatically revoked](https://github.com/sunnycodet/ourpay/pull/7271) when the subscription is canceled.
## Ability to specify External ID
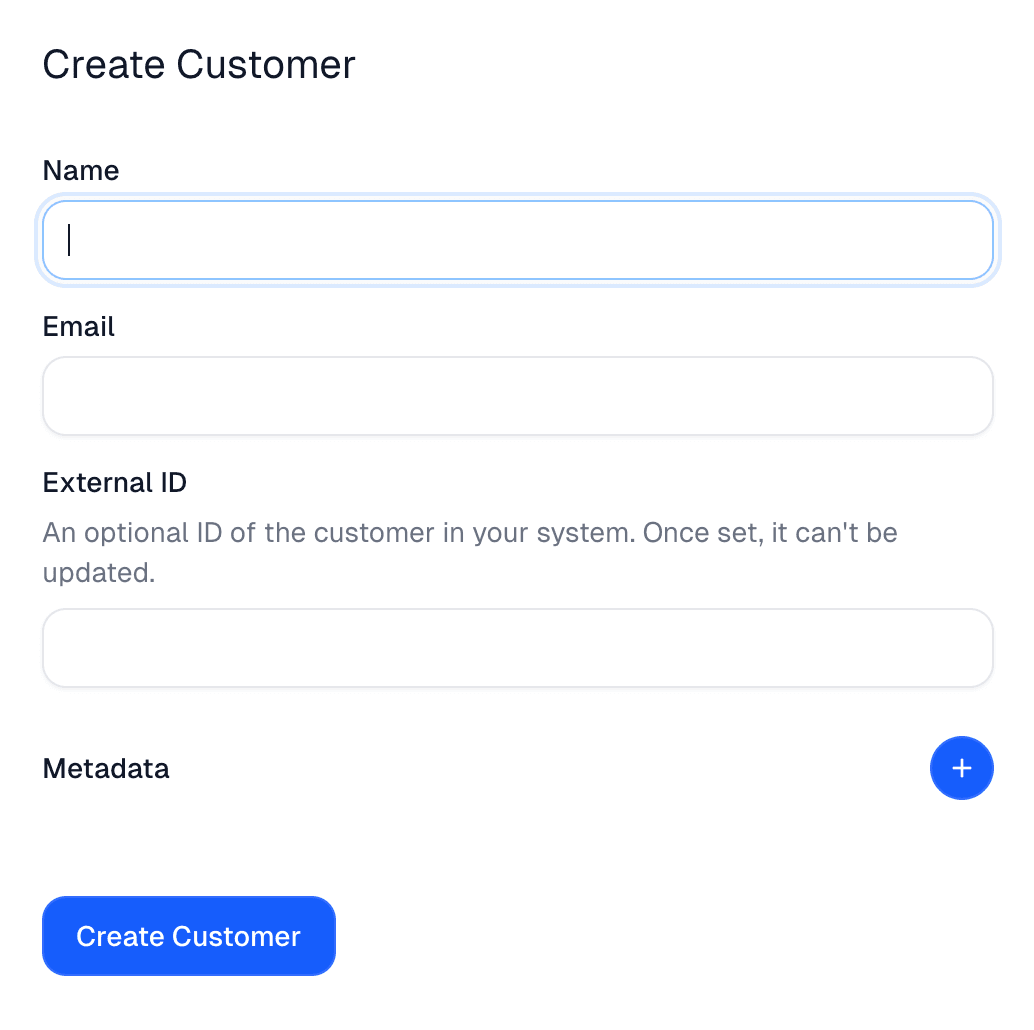
[External ID can now be specified](https://github.com/sunnycodet/ourpay/pull/7275) during creation of a customer via the dashboard.
## New IP ranges
From **October 27th, 2025**, [new IP ranges](https://docs.ourpay.dev/integrate/webhooks/delivery#ip-allowlist) will be added.
## Improved Subscription Cancellation Flow
[Benefits](https://docs.ourpay.dev/features/benefits/introduction) attached to the subscription [are now automatically revoked](https://github.com/sunnycodet/ourpay/pull/7271) when the subscription is canceled.
## Ability to specify External ID
[External ID can now be specified](https://github.com/sunnycodet/ourpay/pull/7275) during creation of a customer via the dashboard.
 ## Ability to set Return URL for Checkouts and Customer Portal
A Return URL can now be set while generating a [checkout session](https://docs.ourpay.dev/api-reference/checkouts/create-checkout-session#body-return-url-one-of-0) or a [customer portal session](https://docs.ourpay.dev/api-reference/customer-sessions/create-customer-session#body-one-of-0-return-url-one-of-0). This allows you to preserve the context for the end users who visit either if they wish to go back to the application.
## Ability to search Customers via their External ID
The [List Customers API](https://docs.ourpay.dev/api-reference/customers/list-customers) now accepts Customer's External ID [in the **query** parameter](https://docs.ourpay.dev/api-reference/customers/list-customers#parameter-one-of-0).
## Ability to disable automatic customer emails
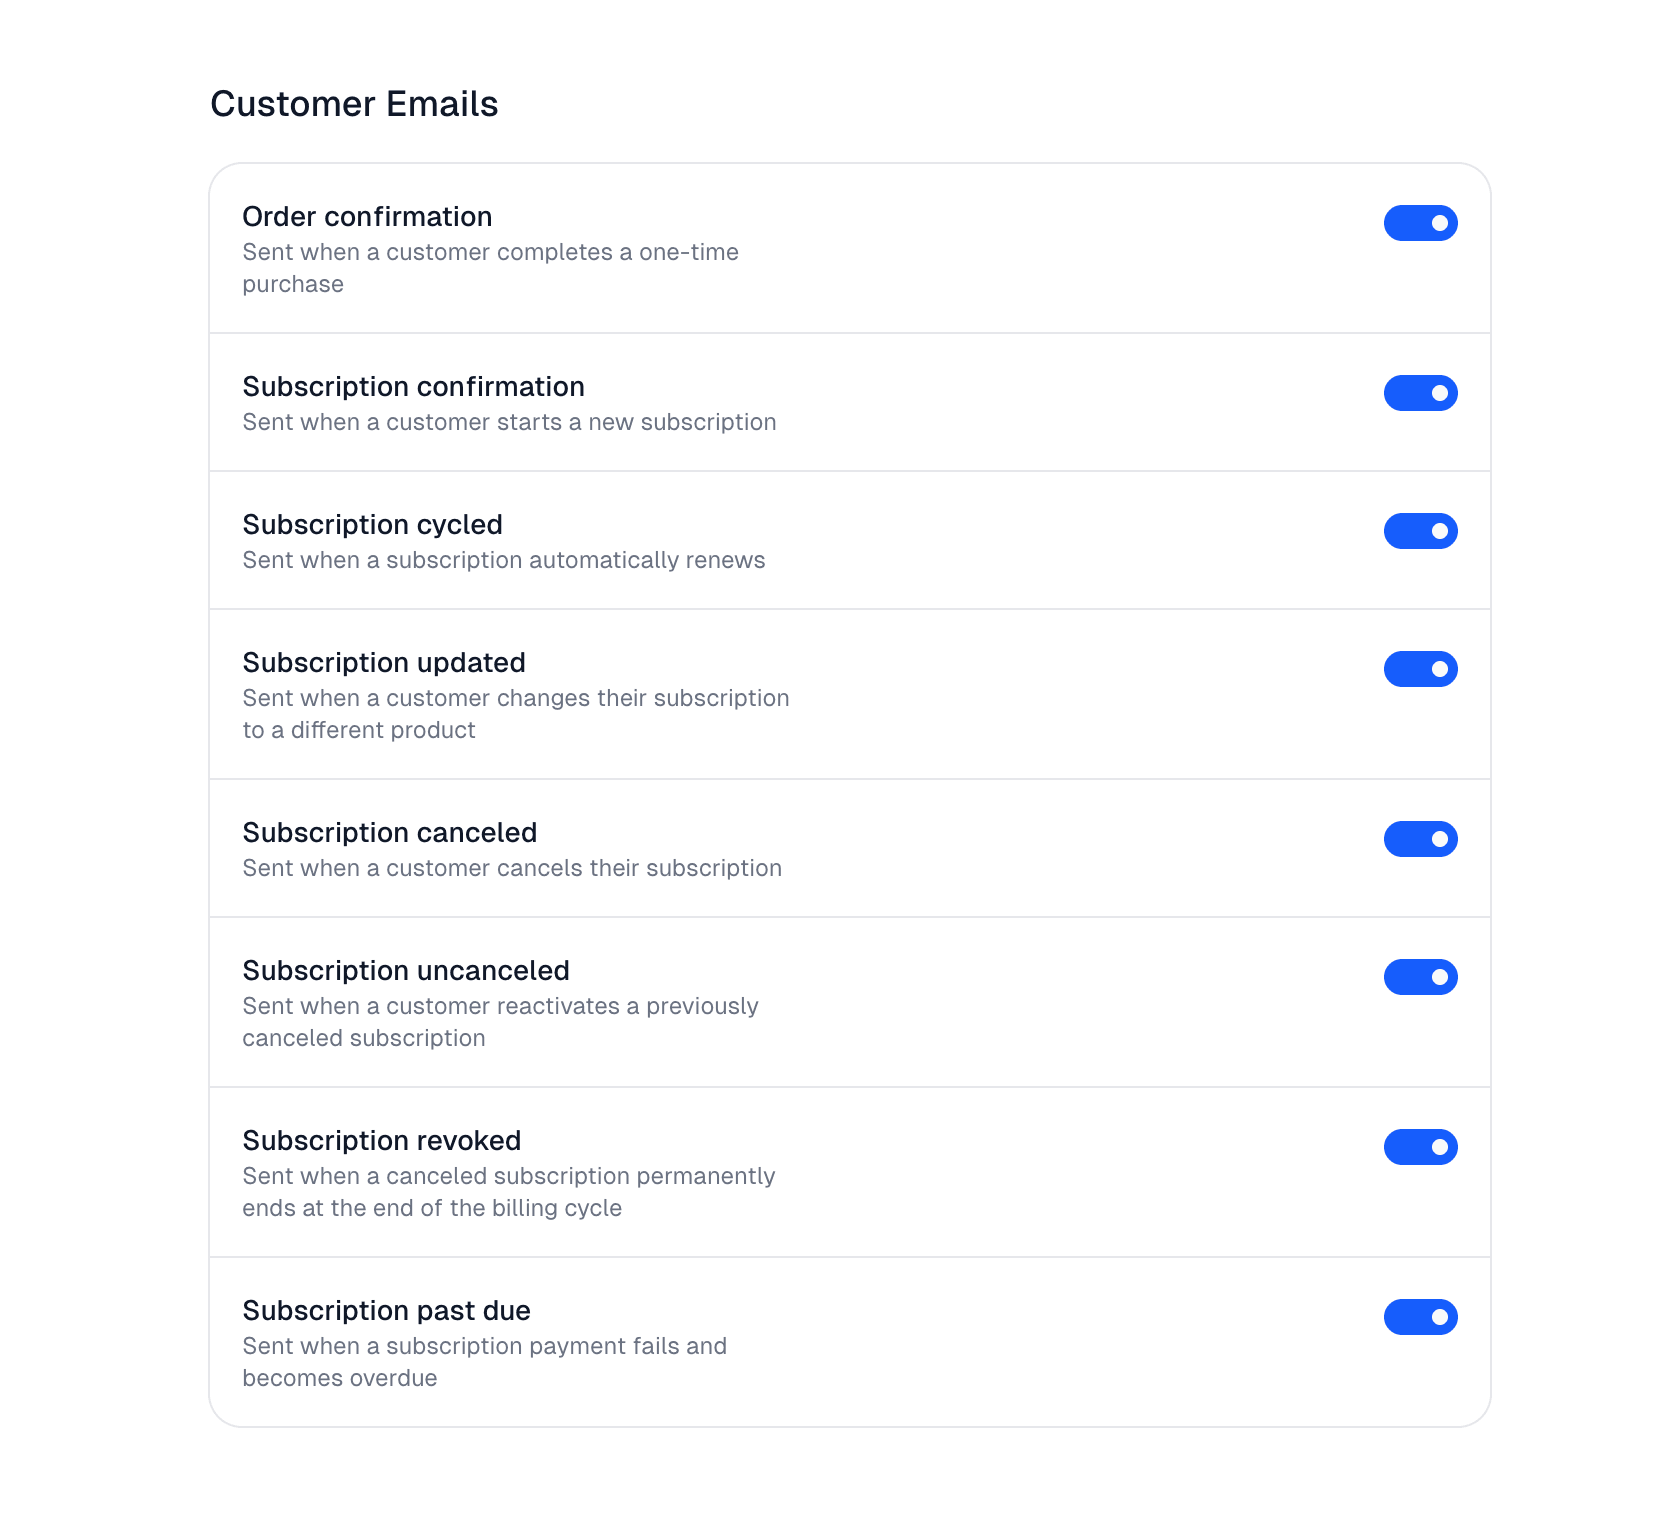
Via the organization settings, you can now disable the emails we automatically send to customers on certain events. This gives you the ability to own the communications with the customers.
## Ability to set Return URL for Checkouts and Customer Portal
A Return URL can now be set while generating a [checkout session](https://docs.ourpay.dev/api-reference/checkouts/create-checkout-session#body-return-url-one-of-0) or a [customer portal session](https://docs.ourpay.dev/api-reference/customer-sessions/create-customer-session#body-one-of-0-return-url-one-of-0). This allows you to preserve the context for the end users who visit either if they wish to go back to the application.
## Ability to search Customers via their External ID
The [List Customers API](https://docs.ourpay.dev/api-reference/customers/list-customers) now accepts Customer's External ID [in the **query** parameter](https://docs.ourpay.dev/api-reference/customers/list-customers#parameter-one-of-0).
## Ability to disable automatic customer emails
Via the organization settings, you can now disable the emails we automatically send to customers on certain events. This gives you the ability to own the communications with the customers.
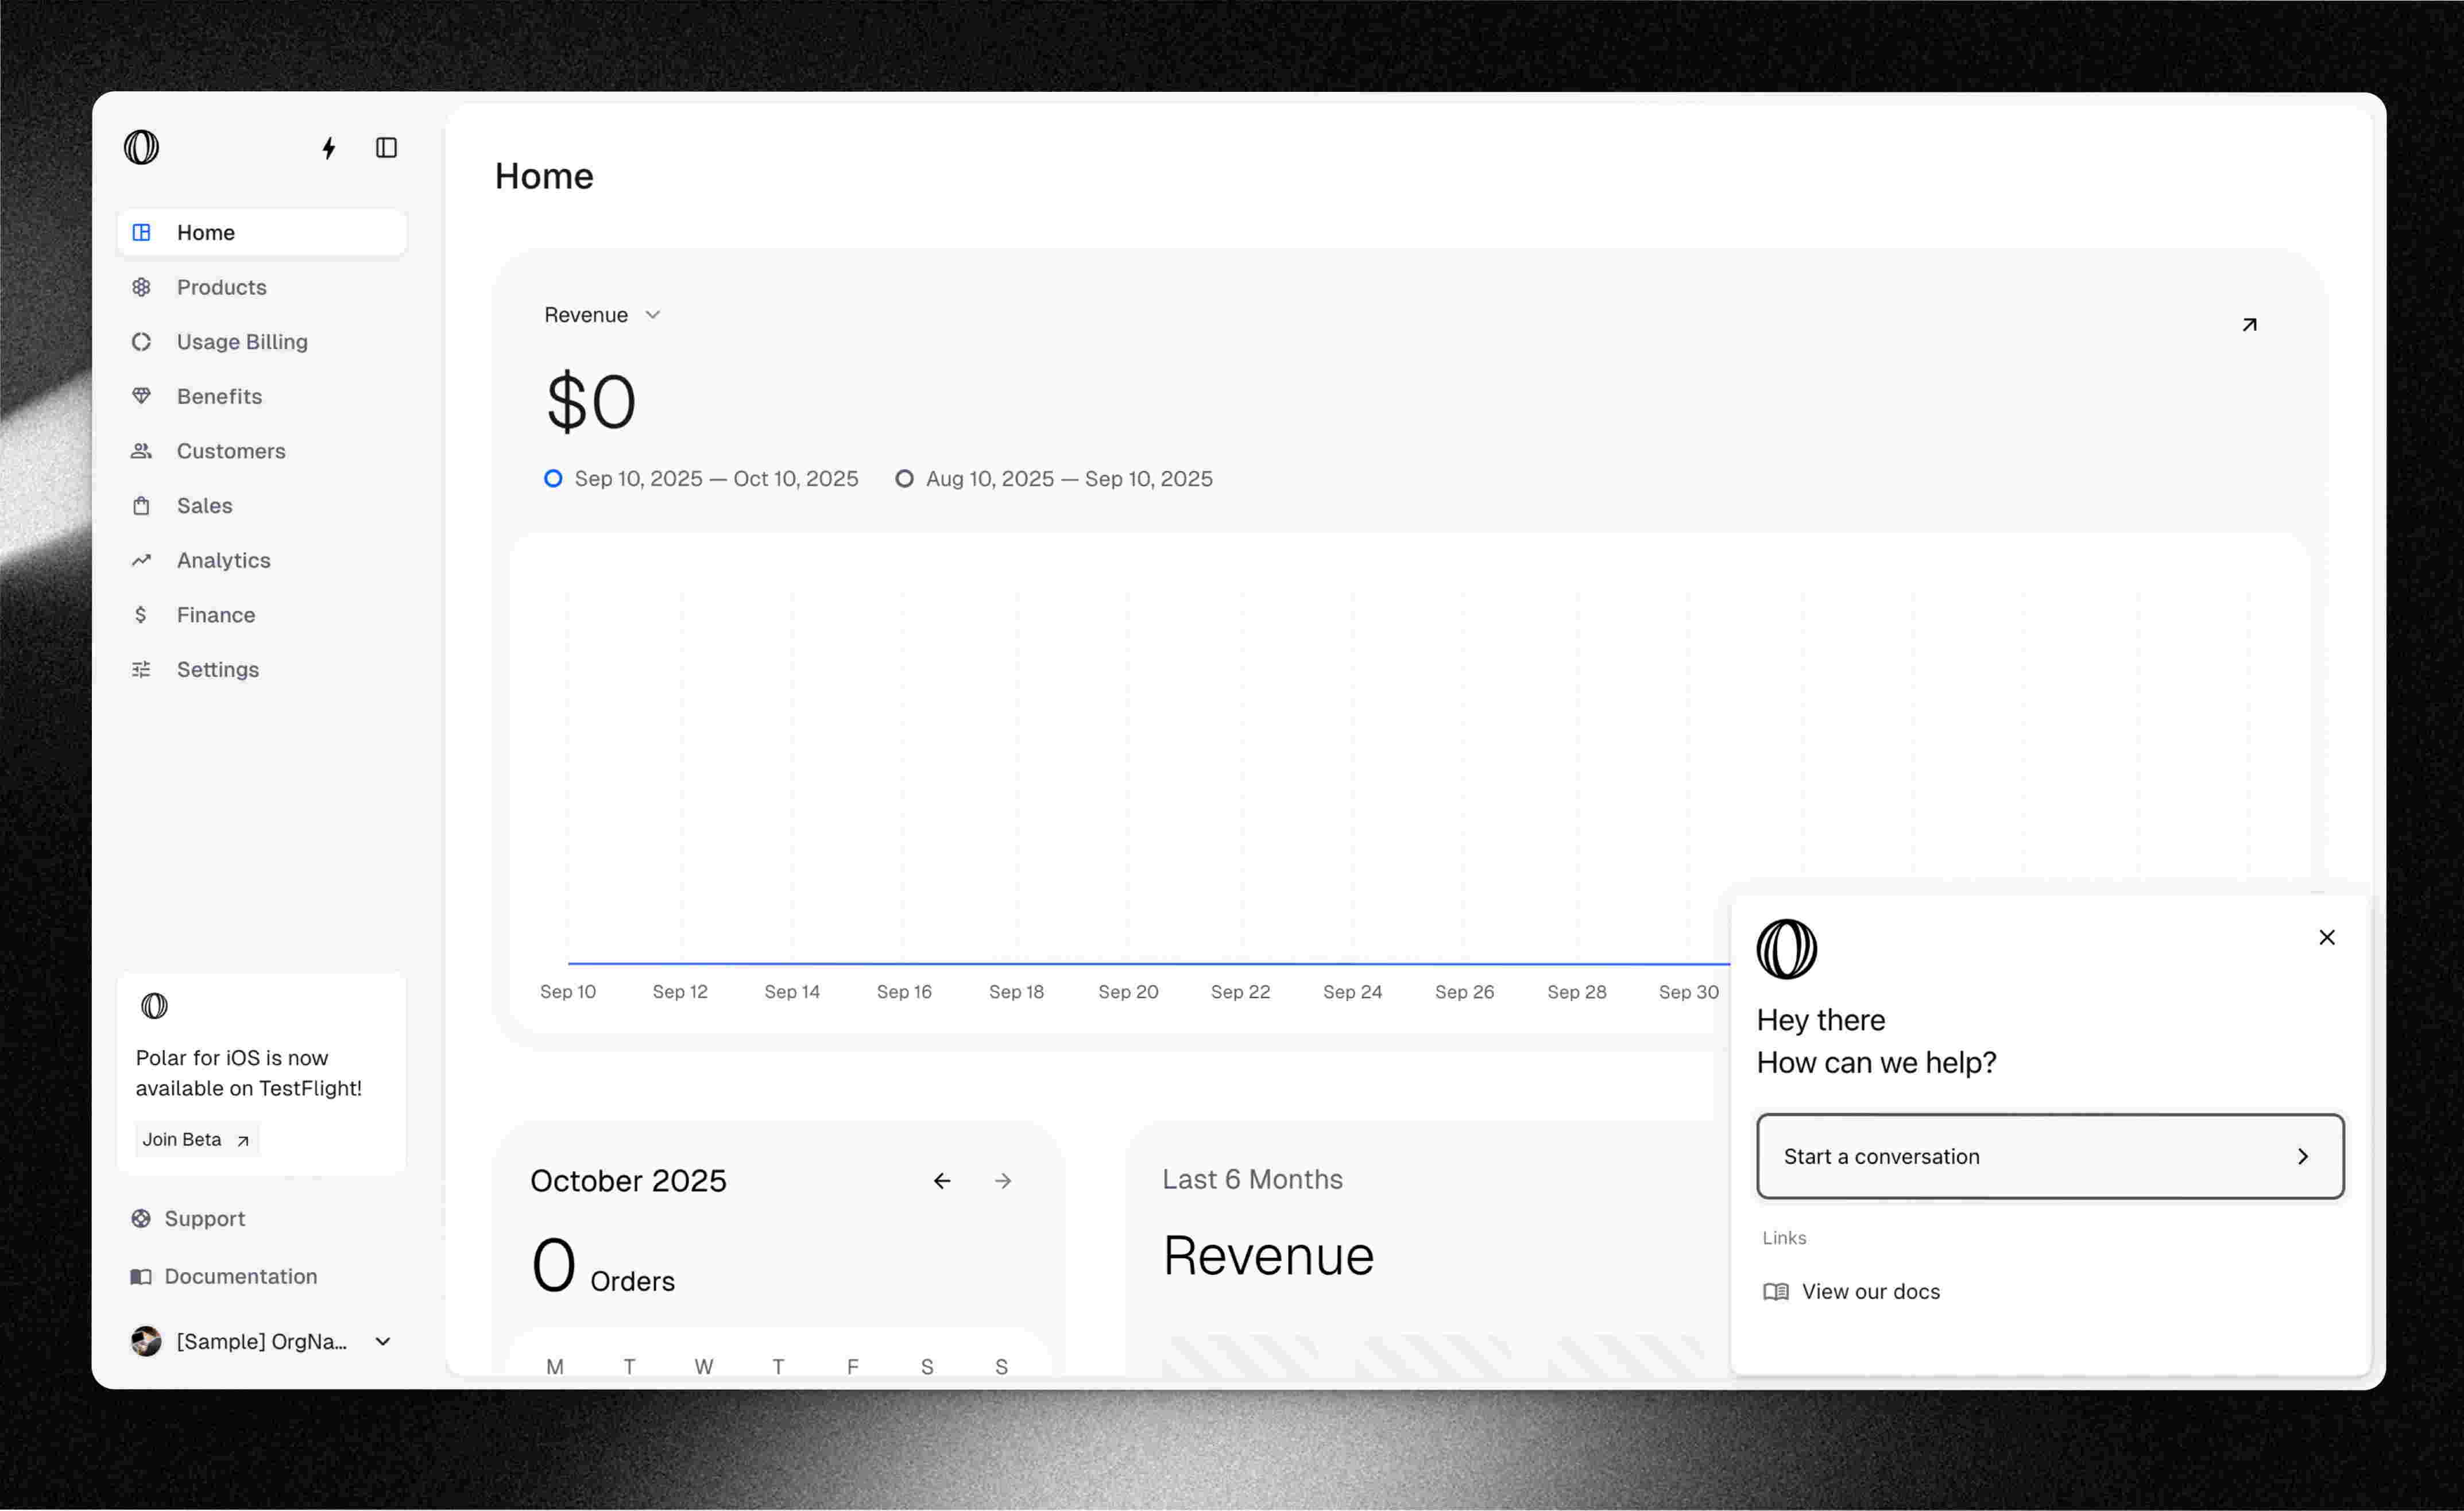 We're excited to introduce a chat widget to the OurPay dashboard, making it easier than ever for merchants to get help directly within the product.
## Improved Checkout Flow for Invalid Discount Code
Previously, if you entered an invalid discount code during checkout, you couldn't continue even after removing the code. Now, clearing the discount input lets you proceed smoothly with the checkout process.
## Improved Customer Portal Rate Limits
We've made several improvements to the Customer Portal to handle authentication rate limits more gracefully:
- The portal now clearly shows 401 and 429 errors on the OTP (one-time password) page.
- If you hit a 429 (too many requests), you'll be redirected to a clear `/too-many-requests` page.
We're excited to introduce a chat widget to the OurPay dashboard, making it easier than ever for merchants to get help directly within the product.
## Improved Checkout Flow for Invalid Discount Code
Previously, if you entered an invalid discount code during checkout, you couldn't continue even after removing the code. Now, clearing the discount input lets you proceed smoothly with the checkout process.
## Improved Customer Portal Rate Limits
We've made several improvements to the Customer Portal to handle authentication rate limits more gracefully:
- The portal now clearly shows 401 and 429 errors on the OTP (one-time password) page.
- If you hit a 429 (too many requests), you'll be redirected to a clear `/too-many-requests` page.
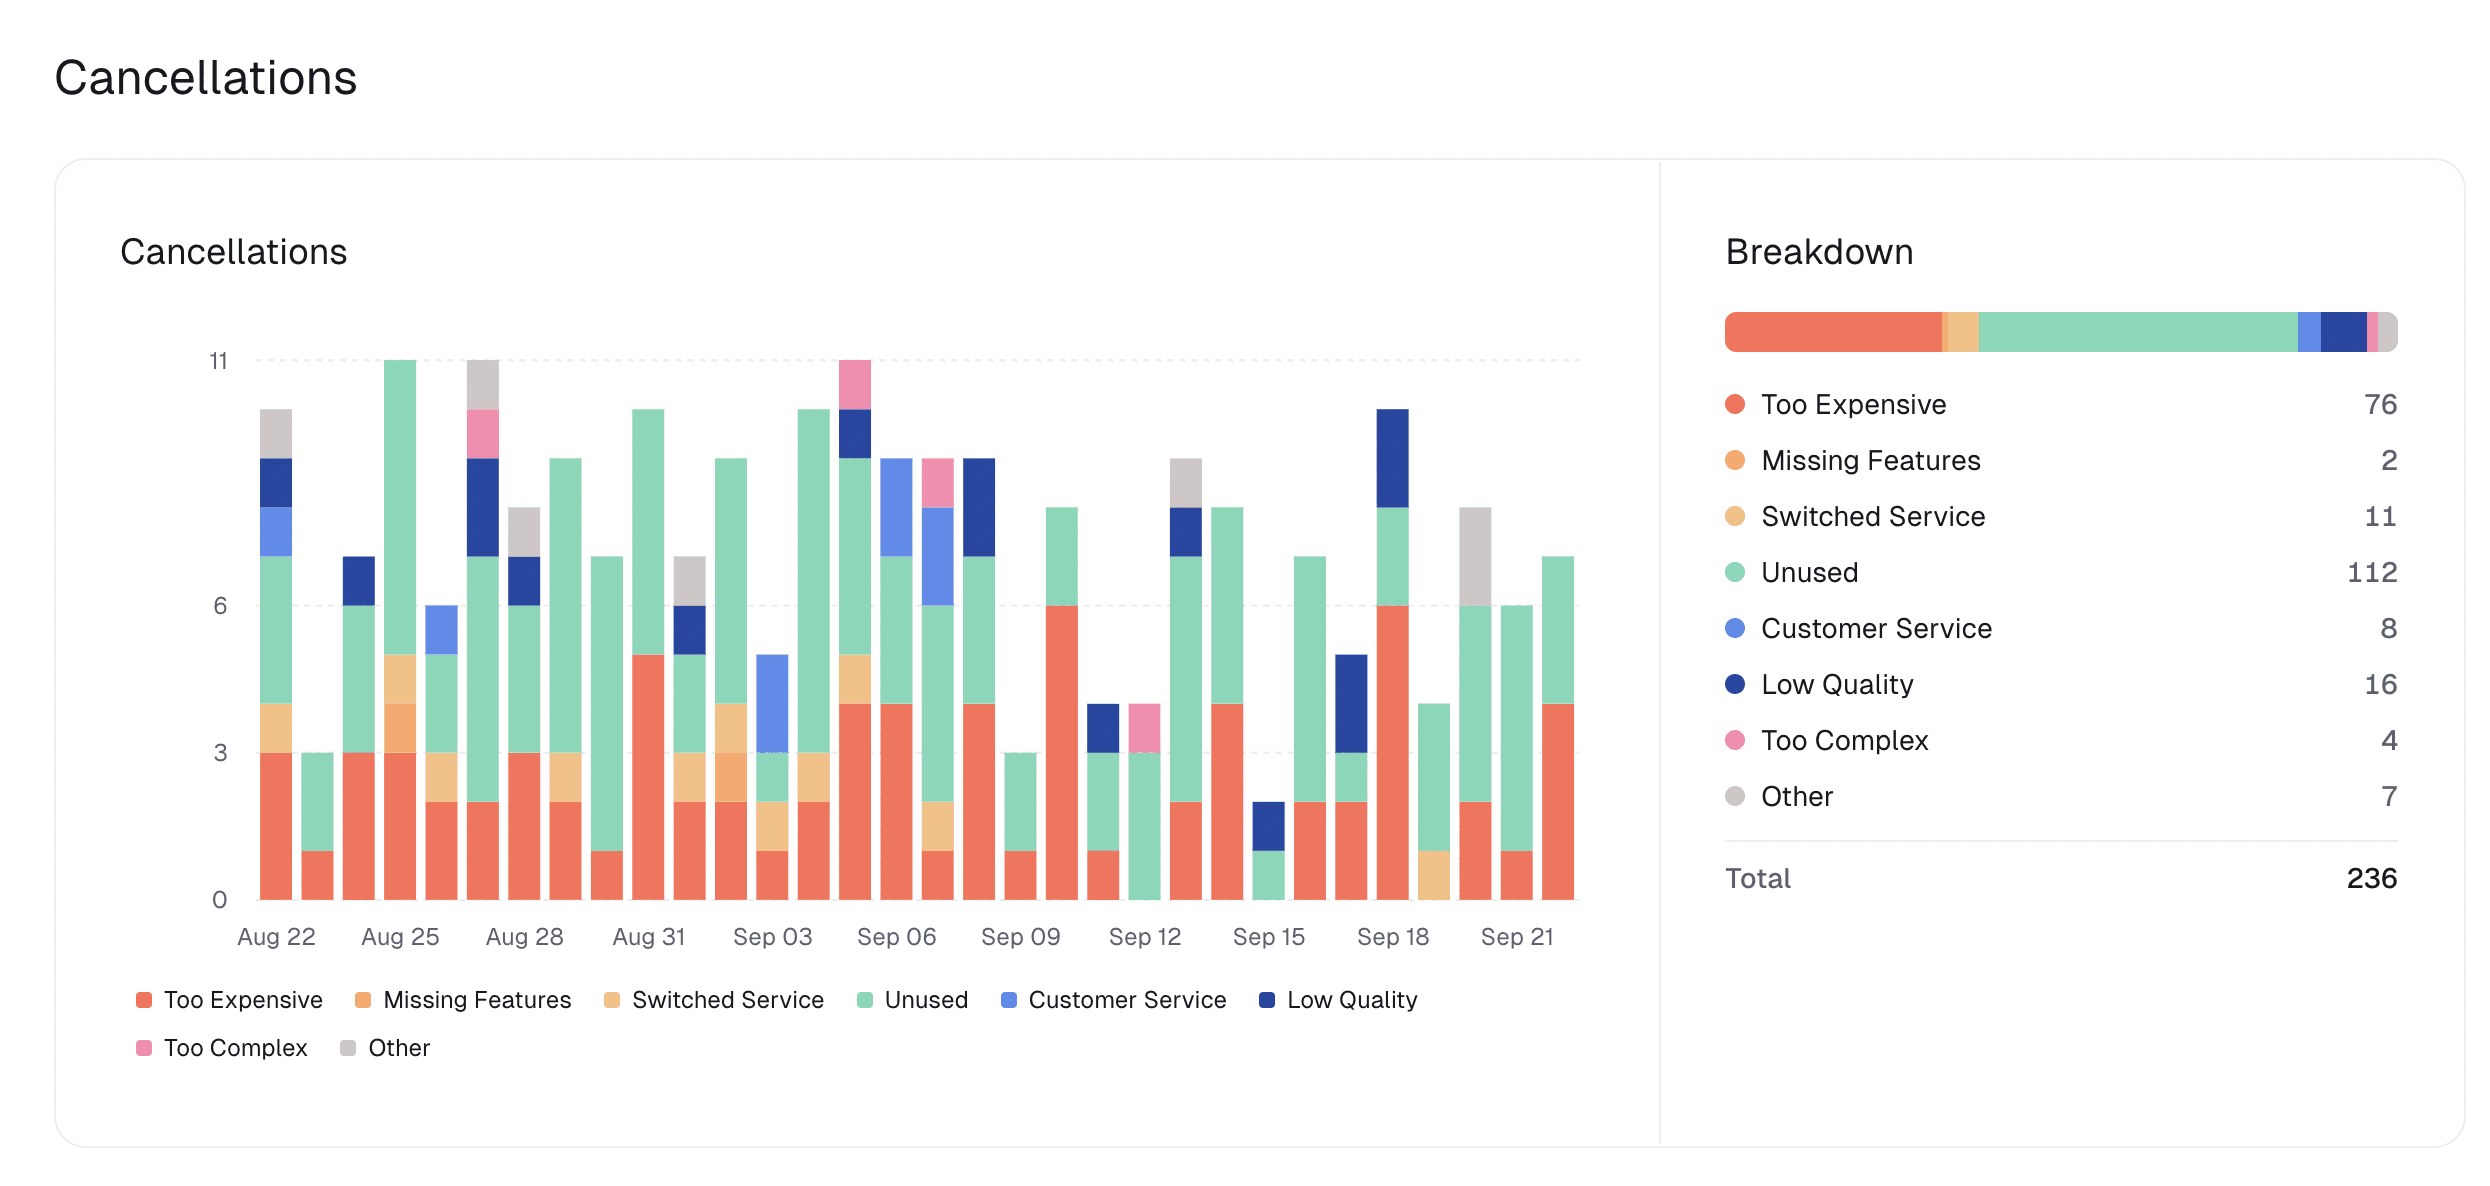 We've added detailed cancellation metrics, giving you clearer insights into subscription cancellations and their impact on your business performance.
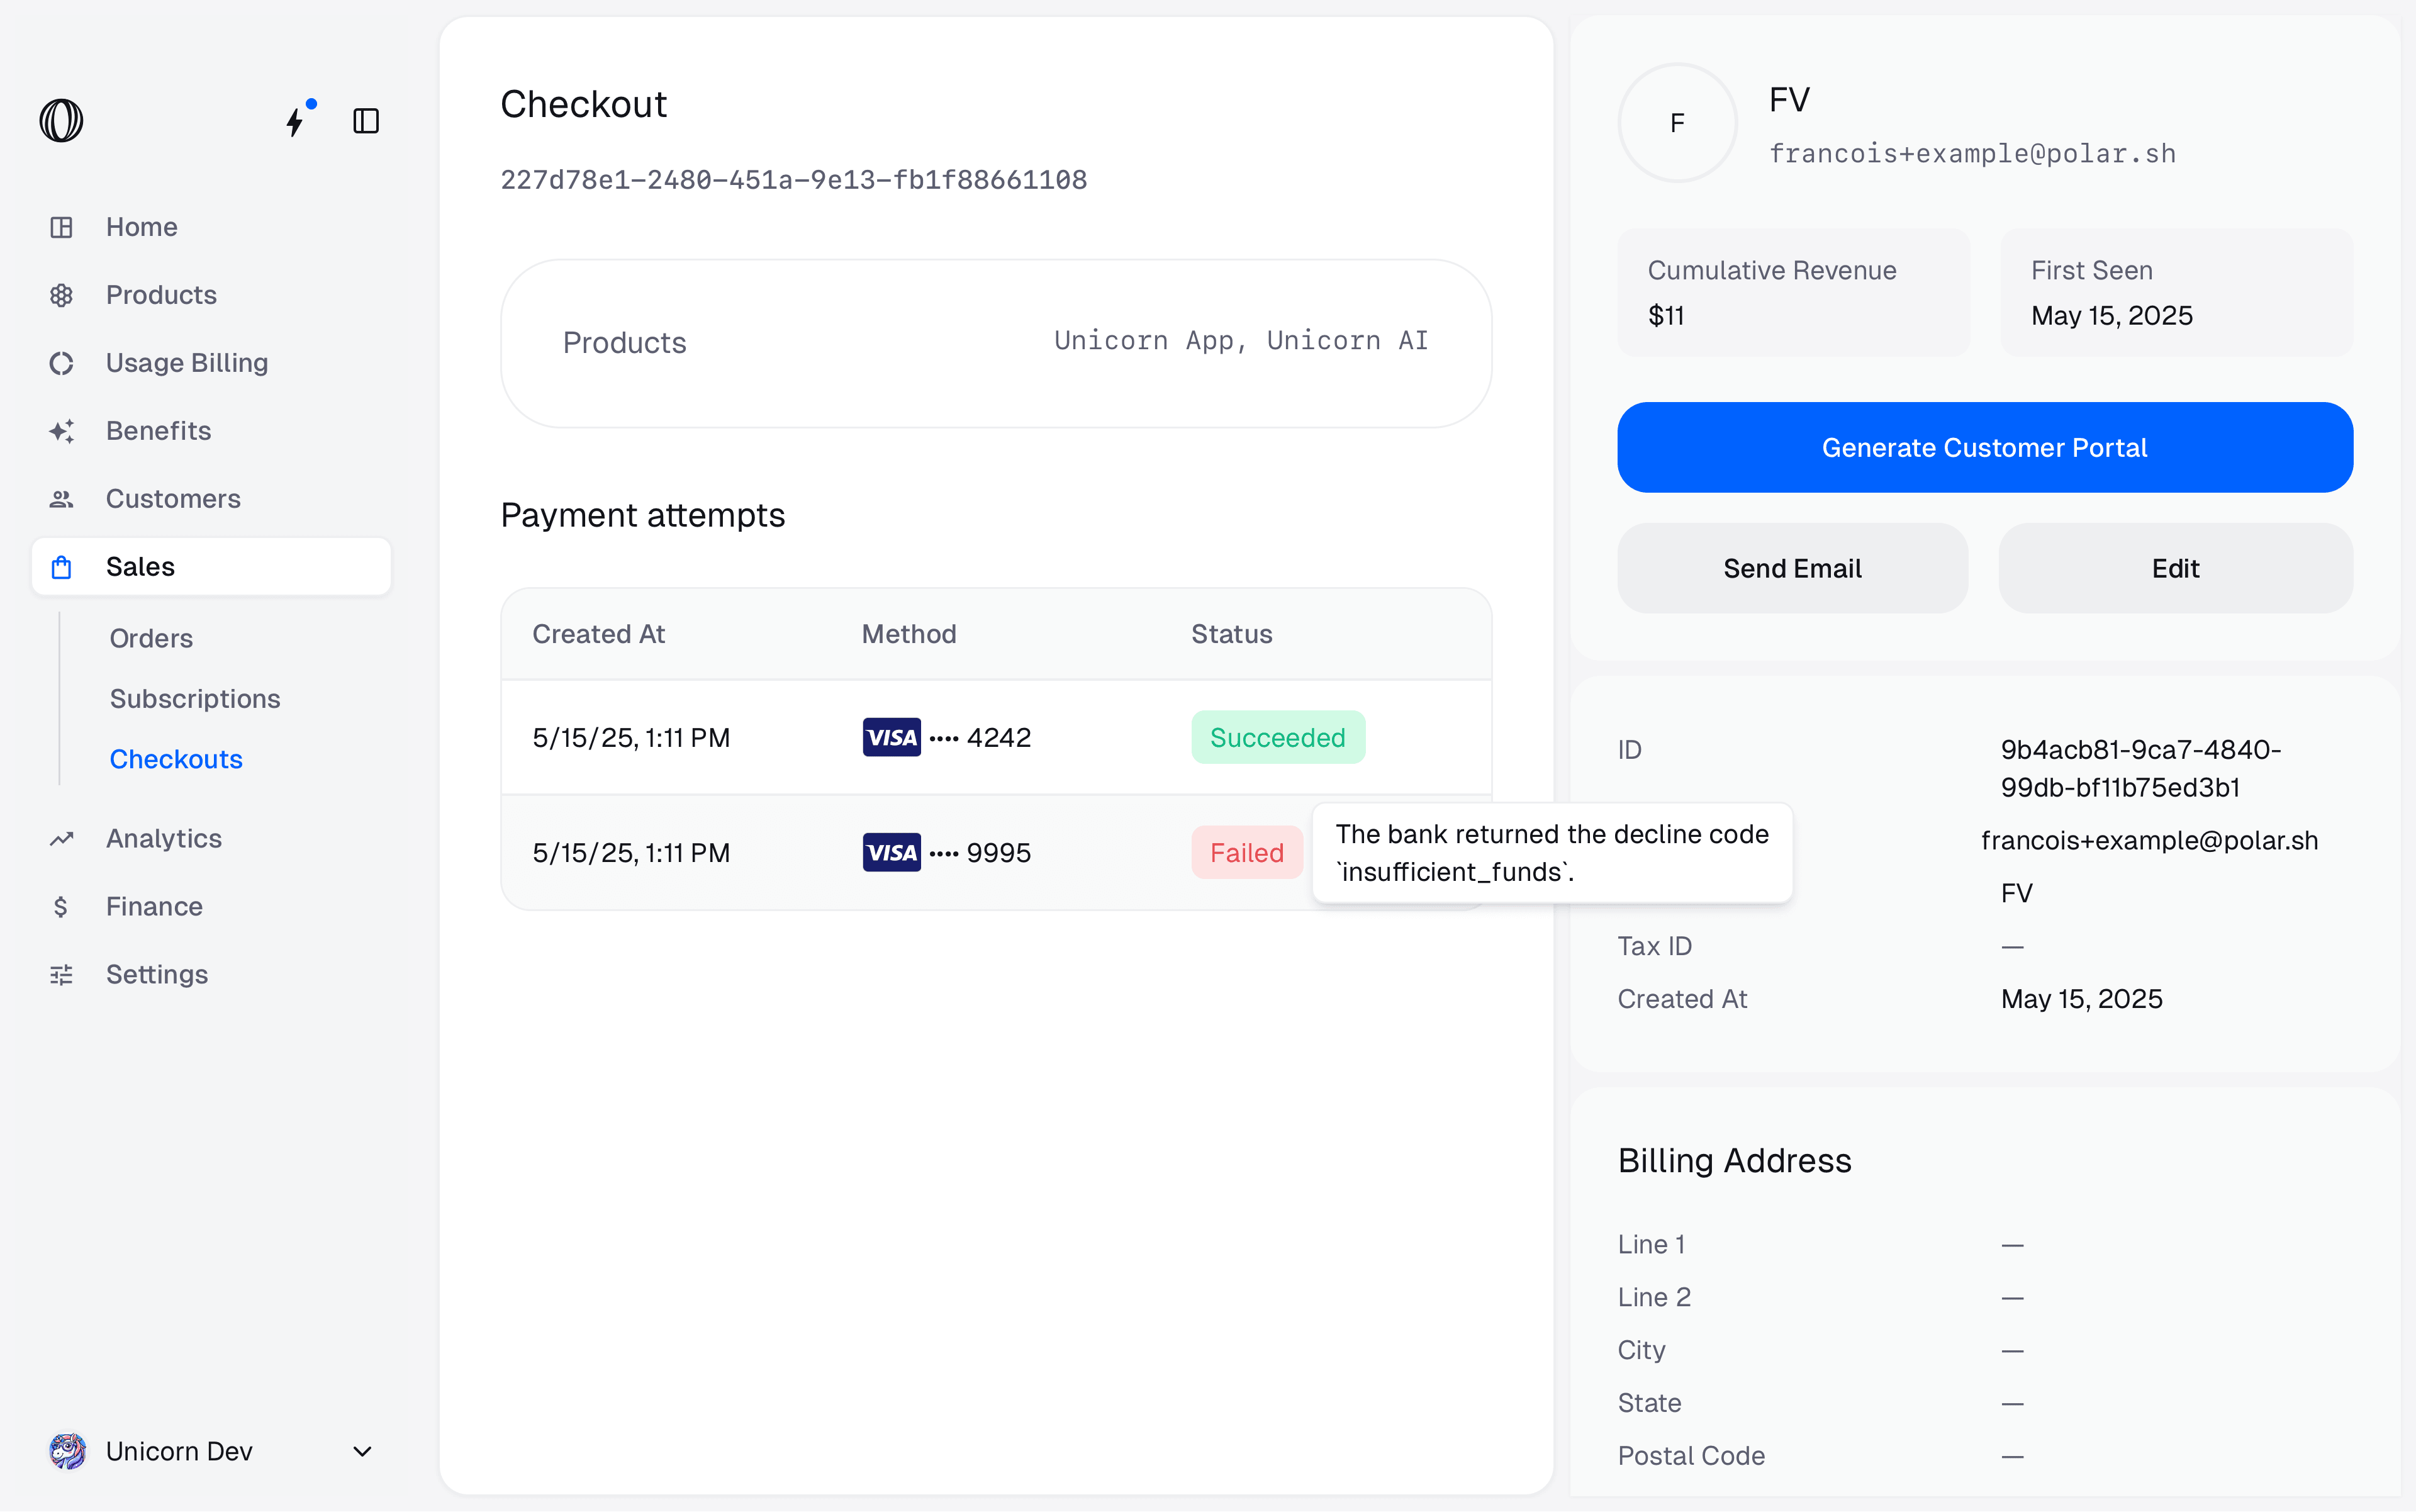
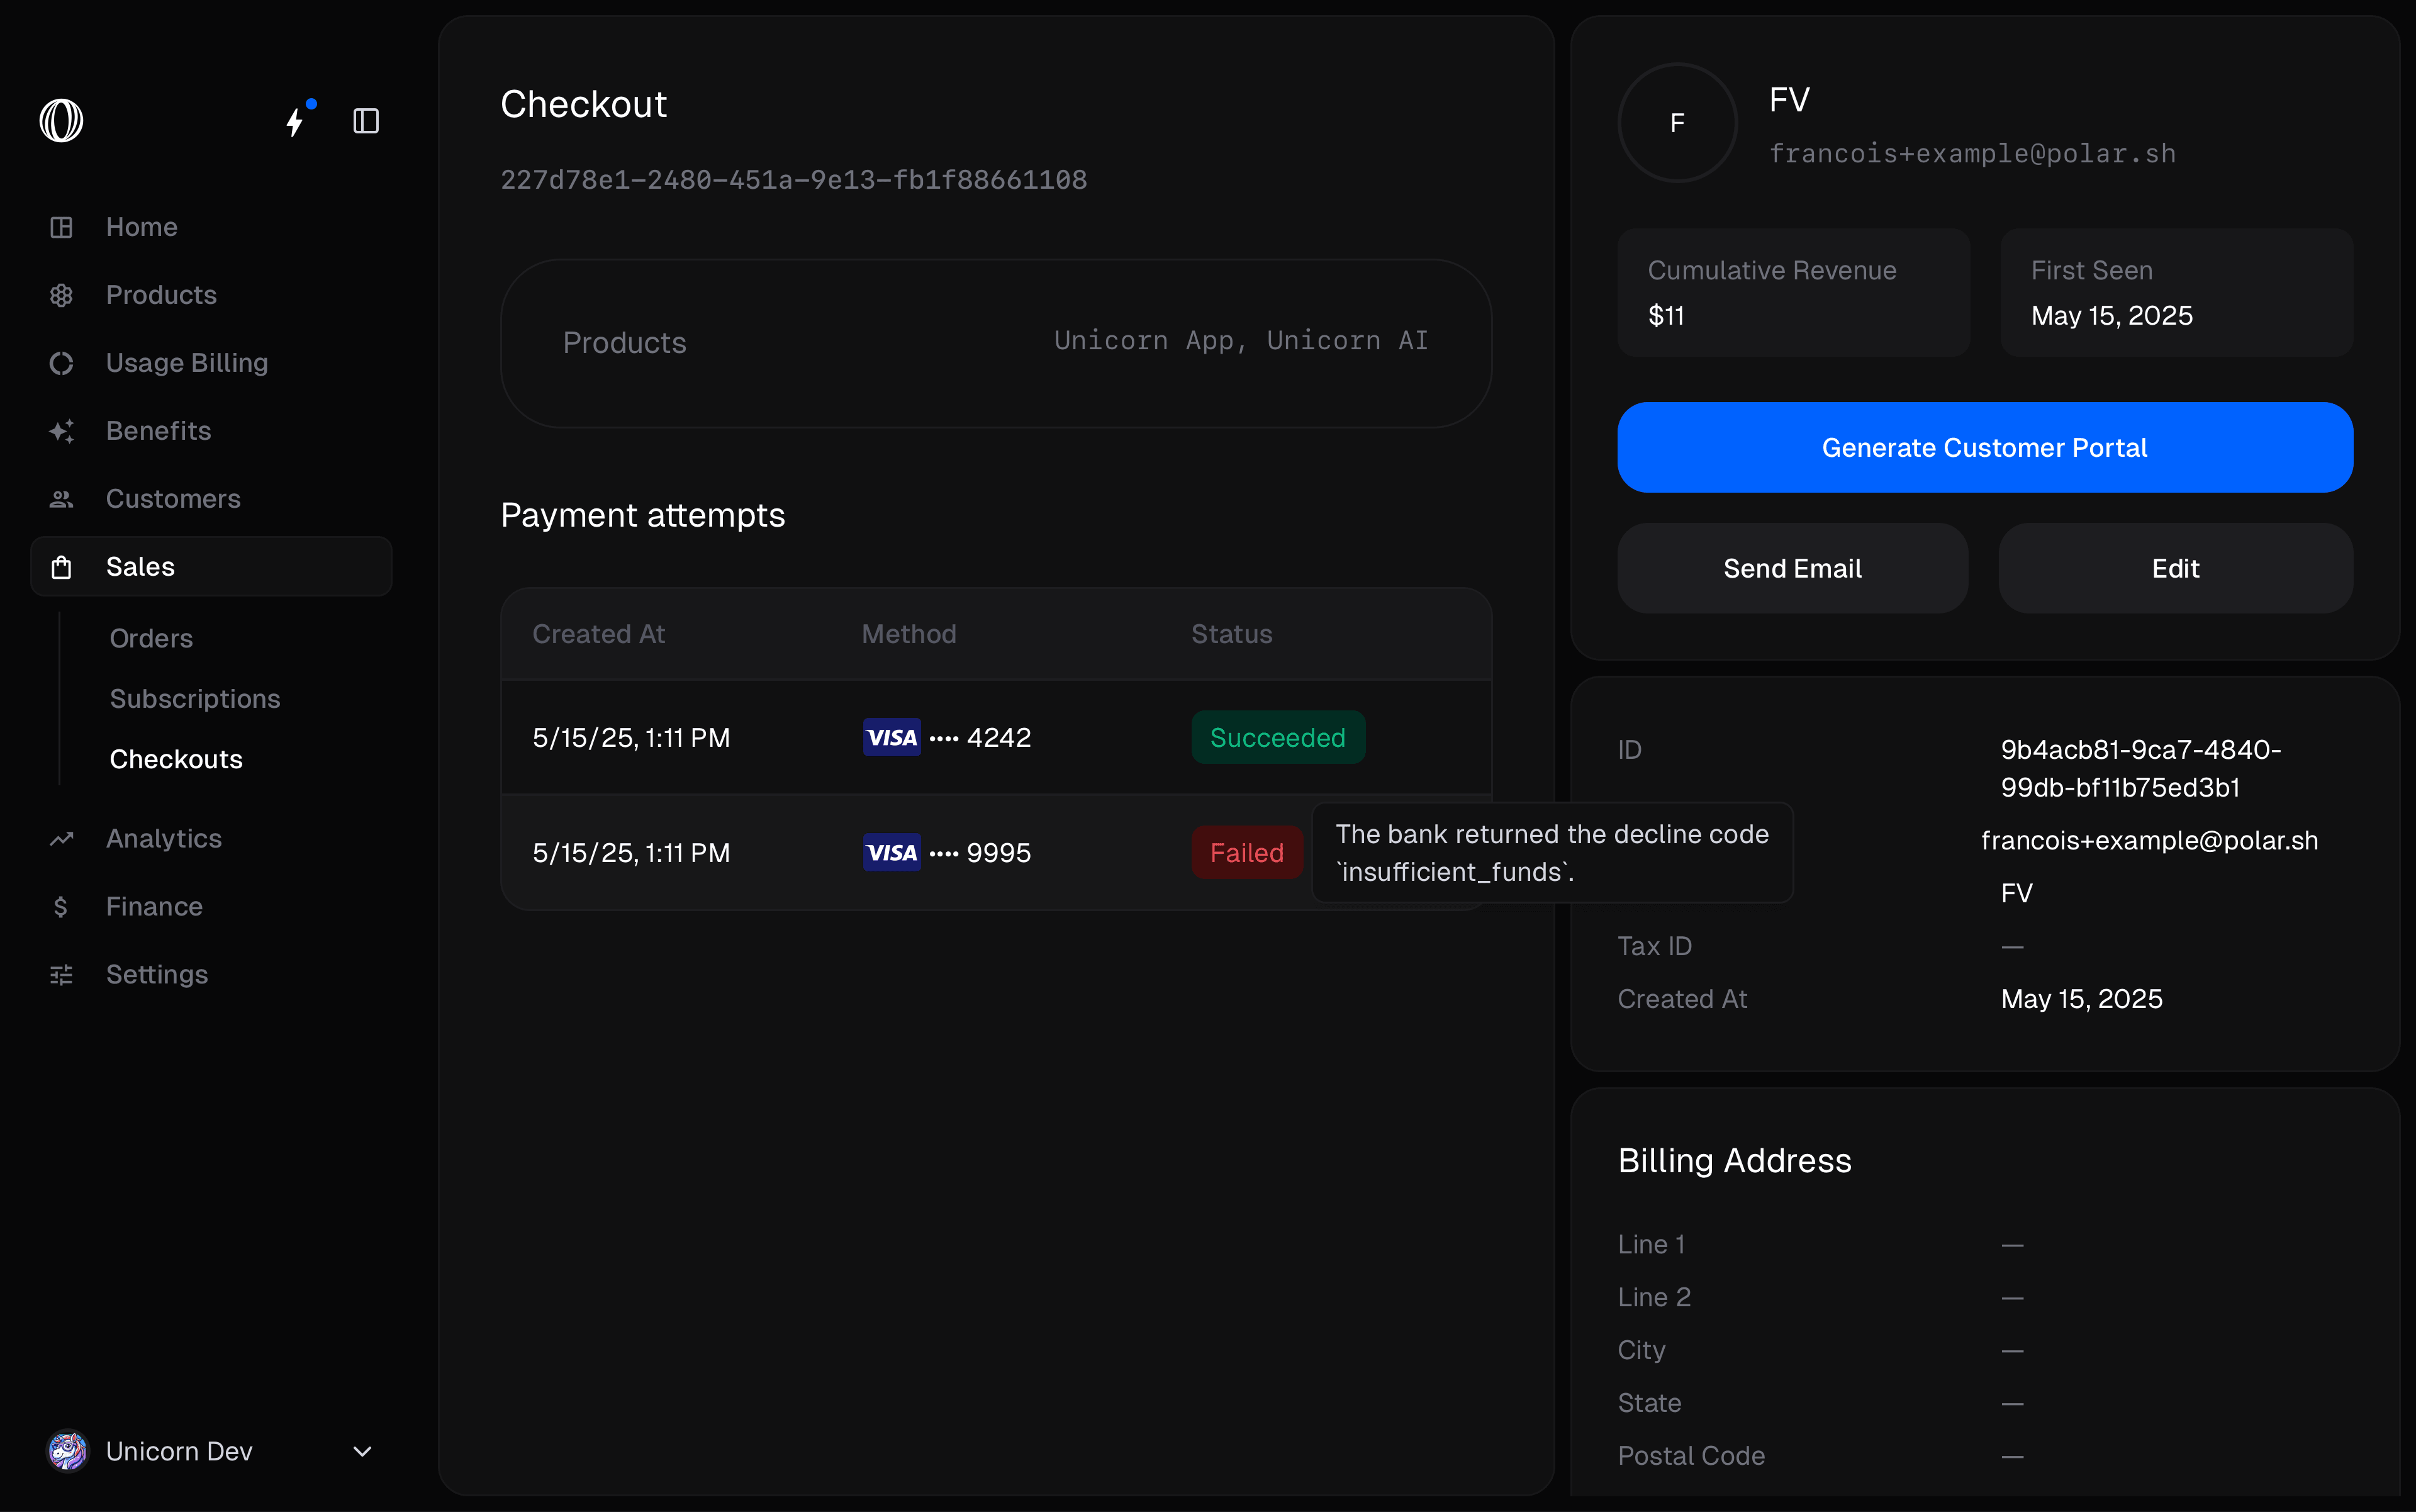 The payment attempts information is also available on each order.
Besides, we've also added new analytics around checkouts: total number of checkouts, successful checkouts, and conversion rate.
The payment attempts information is also available on each order.
Besides, we've also added new analytics around checkouts: total number of checkouts, successful checkouts, and conversion rate.
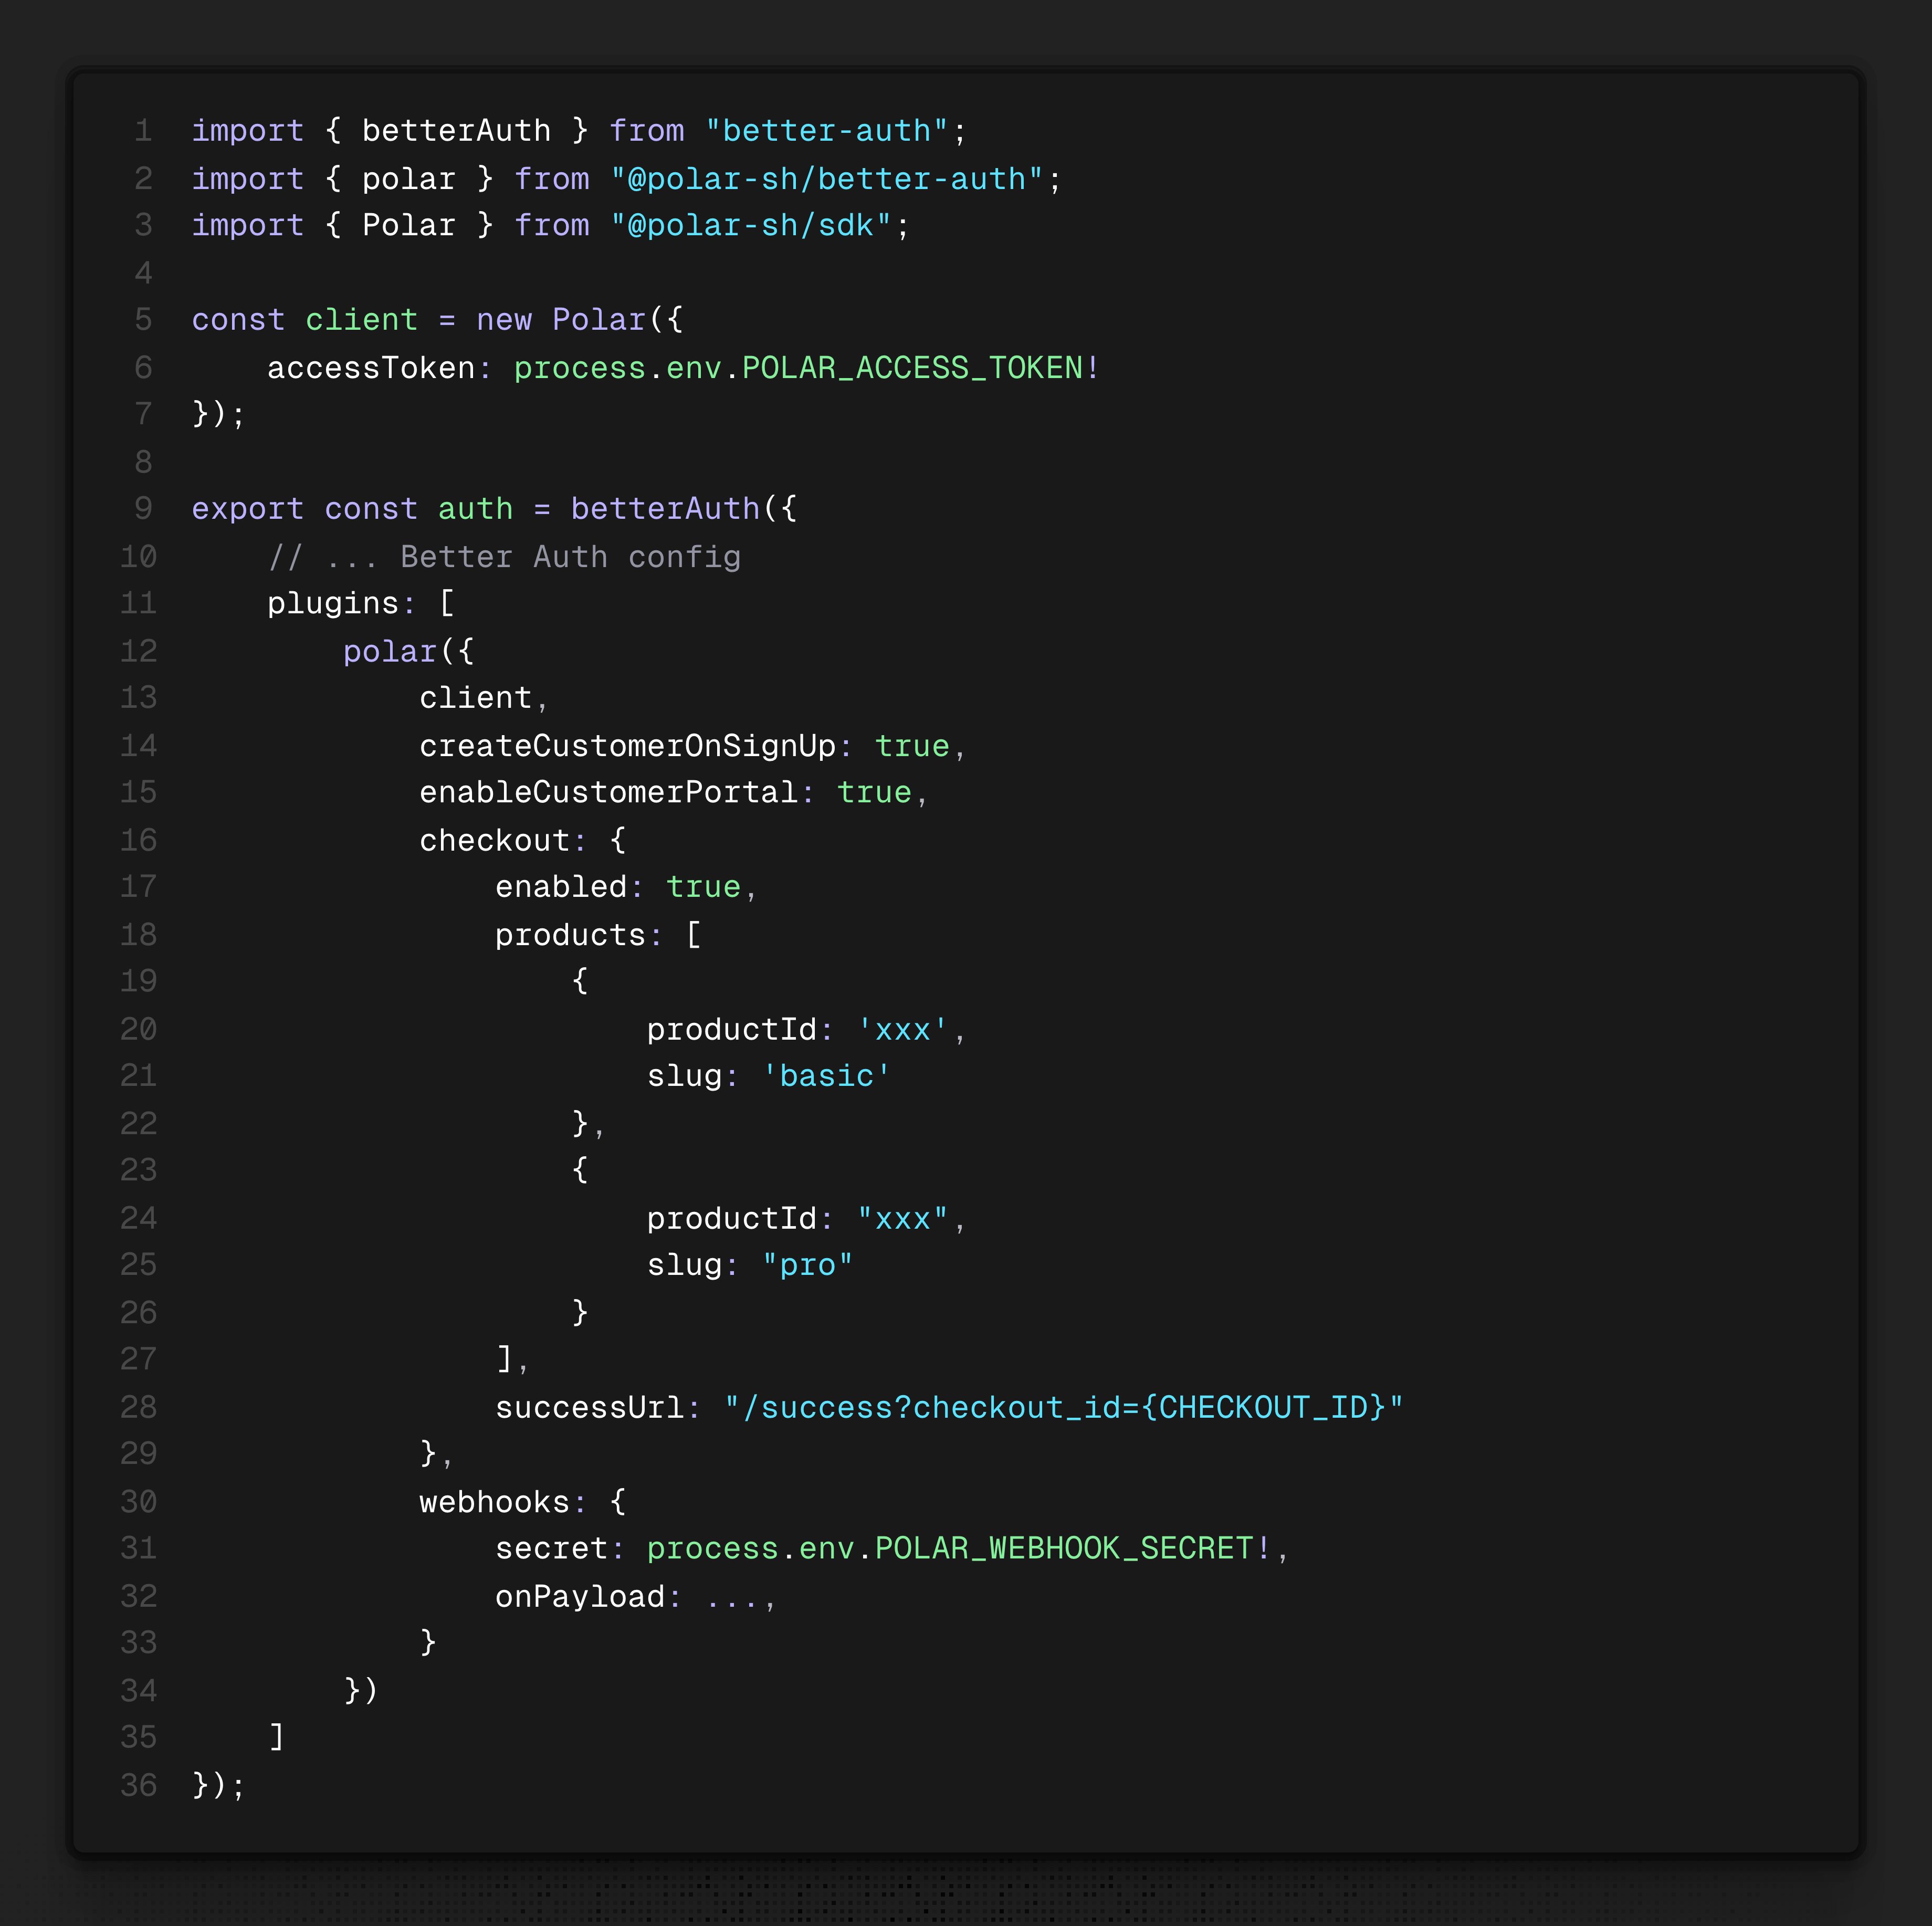 [Better Auth](https://www.better-auth.com/) is an open source authentication framework for
TypeScript that is quickly becoming a favorite amongst developers. Today, we're
thrilled to have shipped a OurPay plugin for Better Auth - in collaboration with them.
Checkout our [integration guide](/integrate/sdk/adapters/better-auth).
[Better Auth](https://www.better-auth.com/) is an open source authentication framework for
TypeScript that is quickly becoming a favorite amongst developers. Today, we're
thrilled to have shipped a OurPay plugin for Better Auth - in collaboration with them.
Checkout our [integration guide](/integrate/sdk/adapters/better-auth).
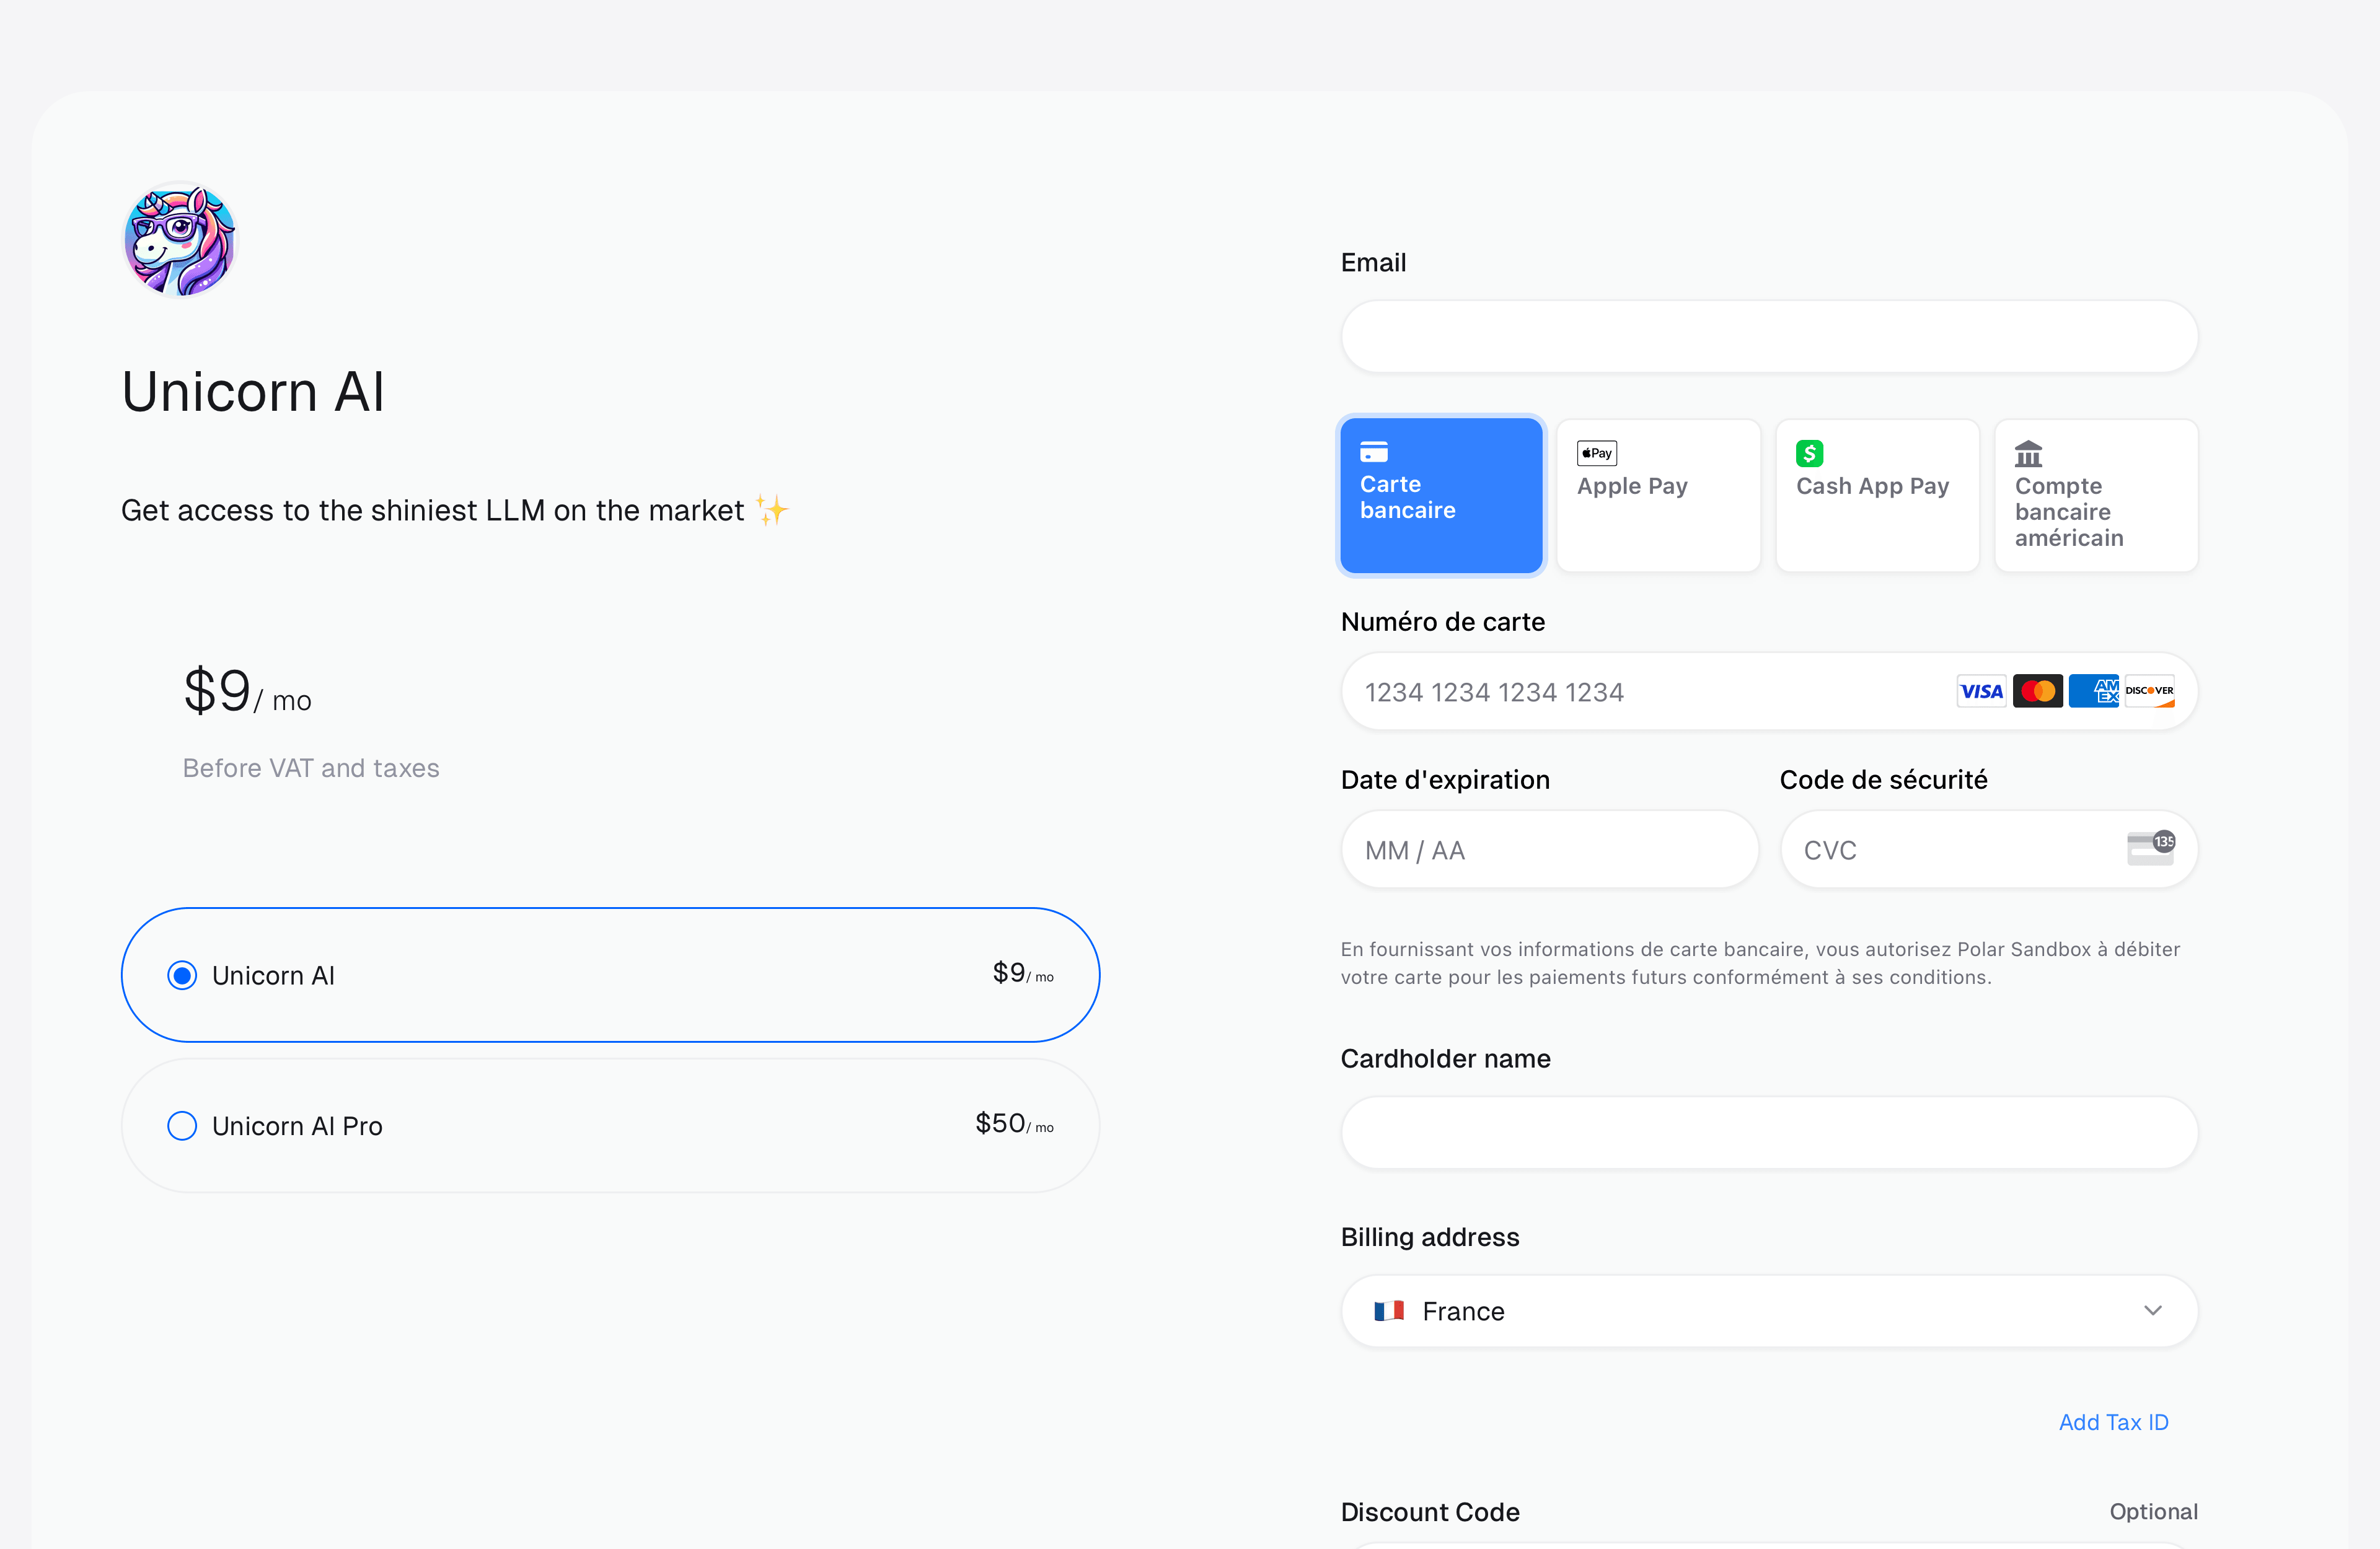
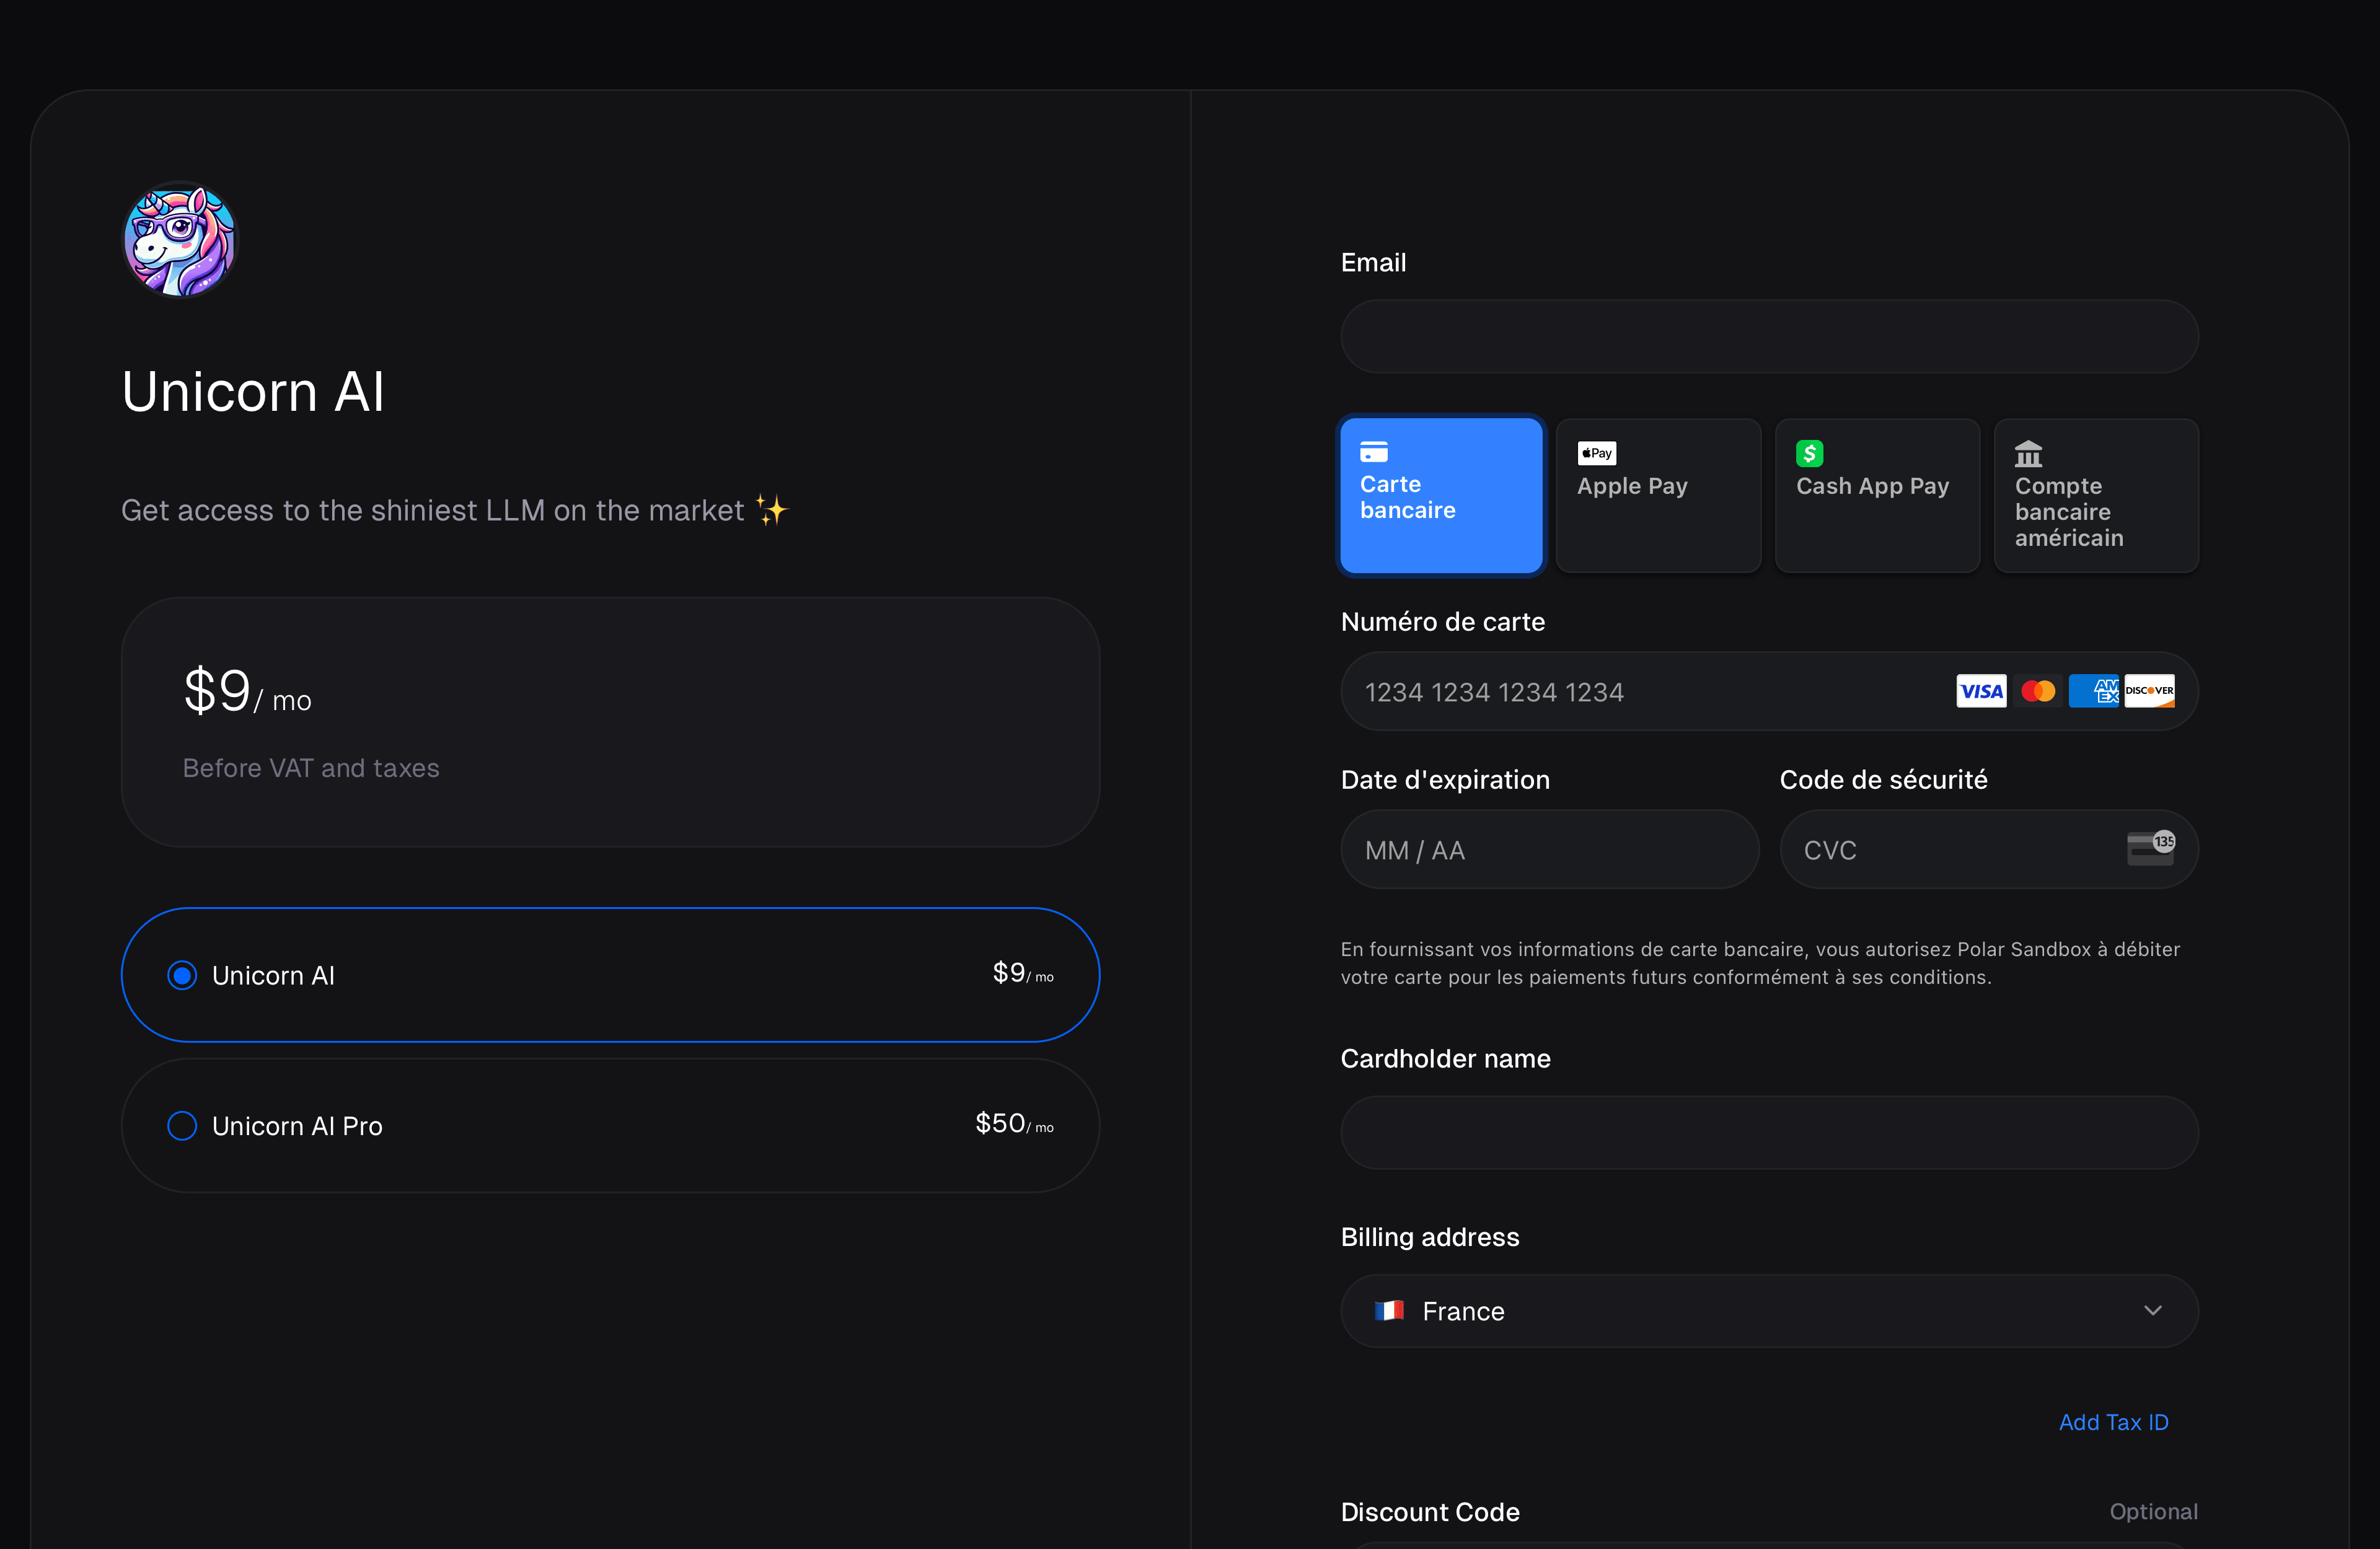 This is available right now using the [Checkout Session API](/features/checkout/session) and [Checkout Links](/features/checkout/links).
### Depreciations
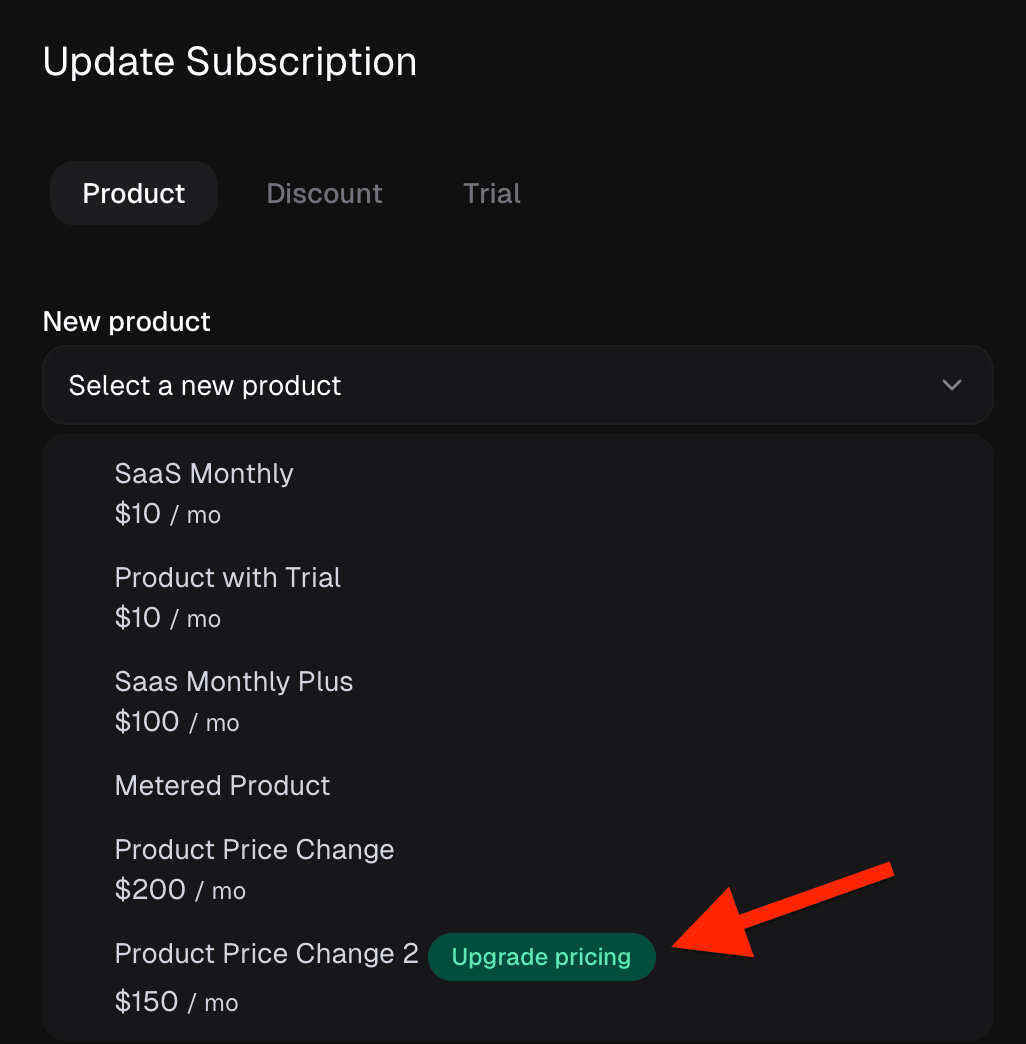
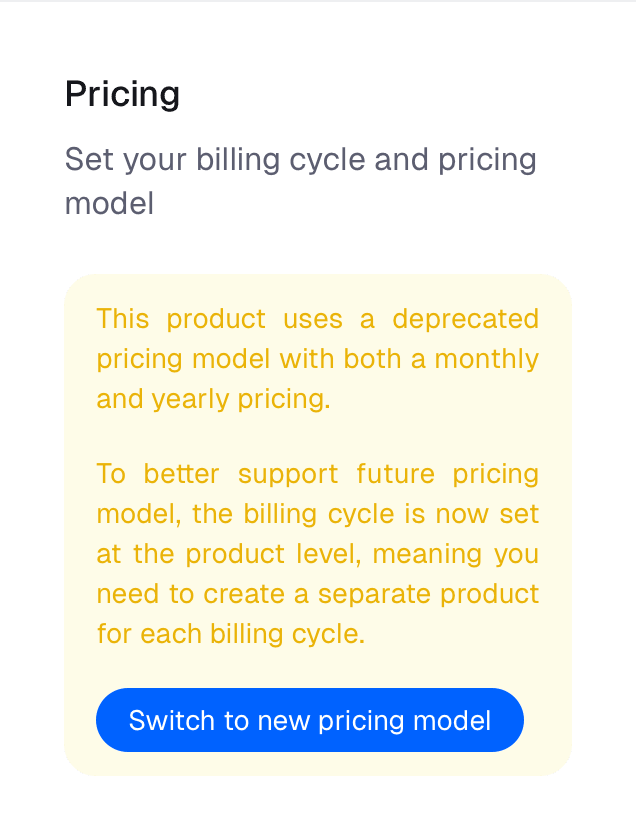
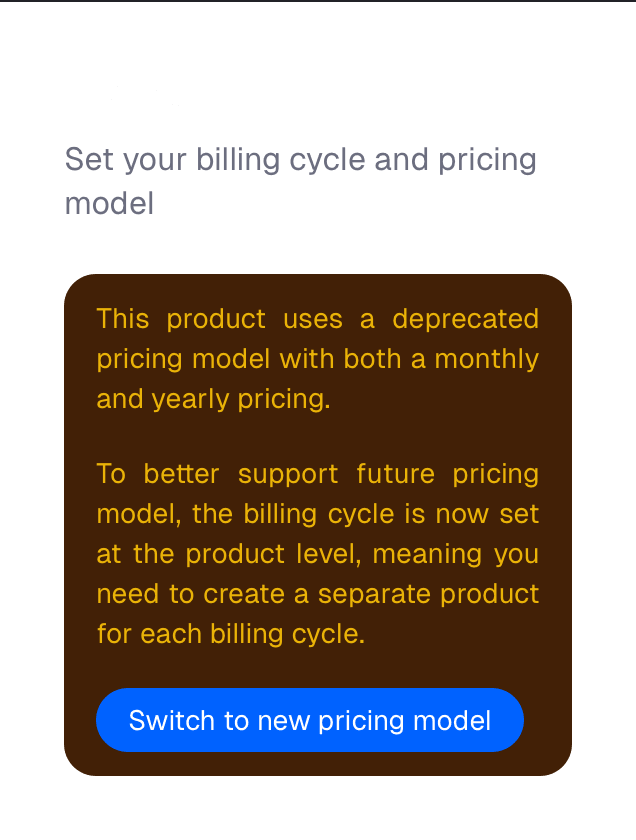
- Products can no longer have both a monthly and yearly pricing. Existing products still work, but you'll see a warning like this when trying to edit their pricing:
{" "}
This is available right now using the [Checkout Session API](/features/checkout/session) and [Checkout Links](/features/checkout/links).
### Depreciations
- Products can no longer have both a monthly and yearly pricing. Existing products still work, but you'll see a warning like this when trying to edit their pricing:
{" "}
 ### API changes
- The `product_id` and `product_price_id` fields are deprecated in the [Checkout Session API](/api-reference/checkouts/create-checkout-session). You should now use the `products` field to specify the products you want to include in the checkout.
- The `type` and `recurring_interval` fields on `ProductPrice` are deprecated. `recurring_interval` is now set directly on `Product`.
### API changes
- The `product_id` and `product_price_id` fields are deprecated in the [Checkout Session API](/api-reference/checkouts/create-checkout-session). You should now use the `products` field to specify the products you want to include in the checkout.
- The `type` and `recurring_interval` fields on `ProductPrice` are deprecated. `recurring_interval` is now set directly on `Product`.
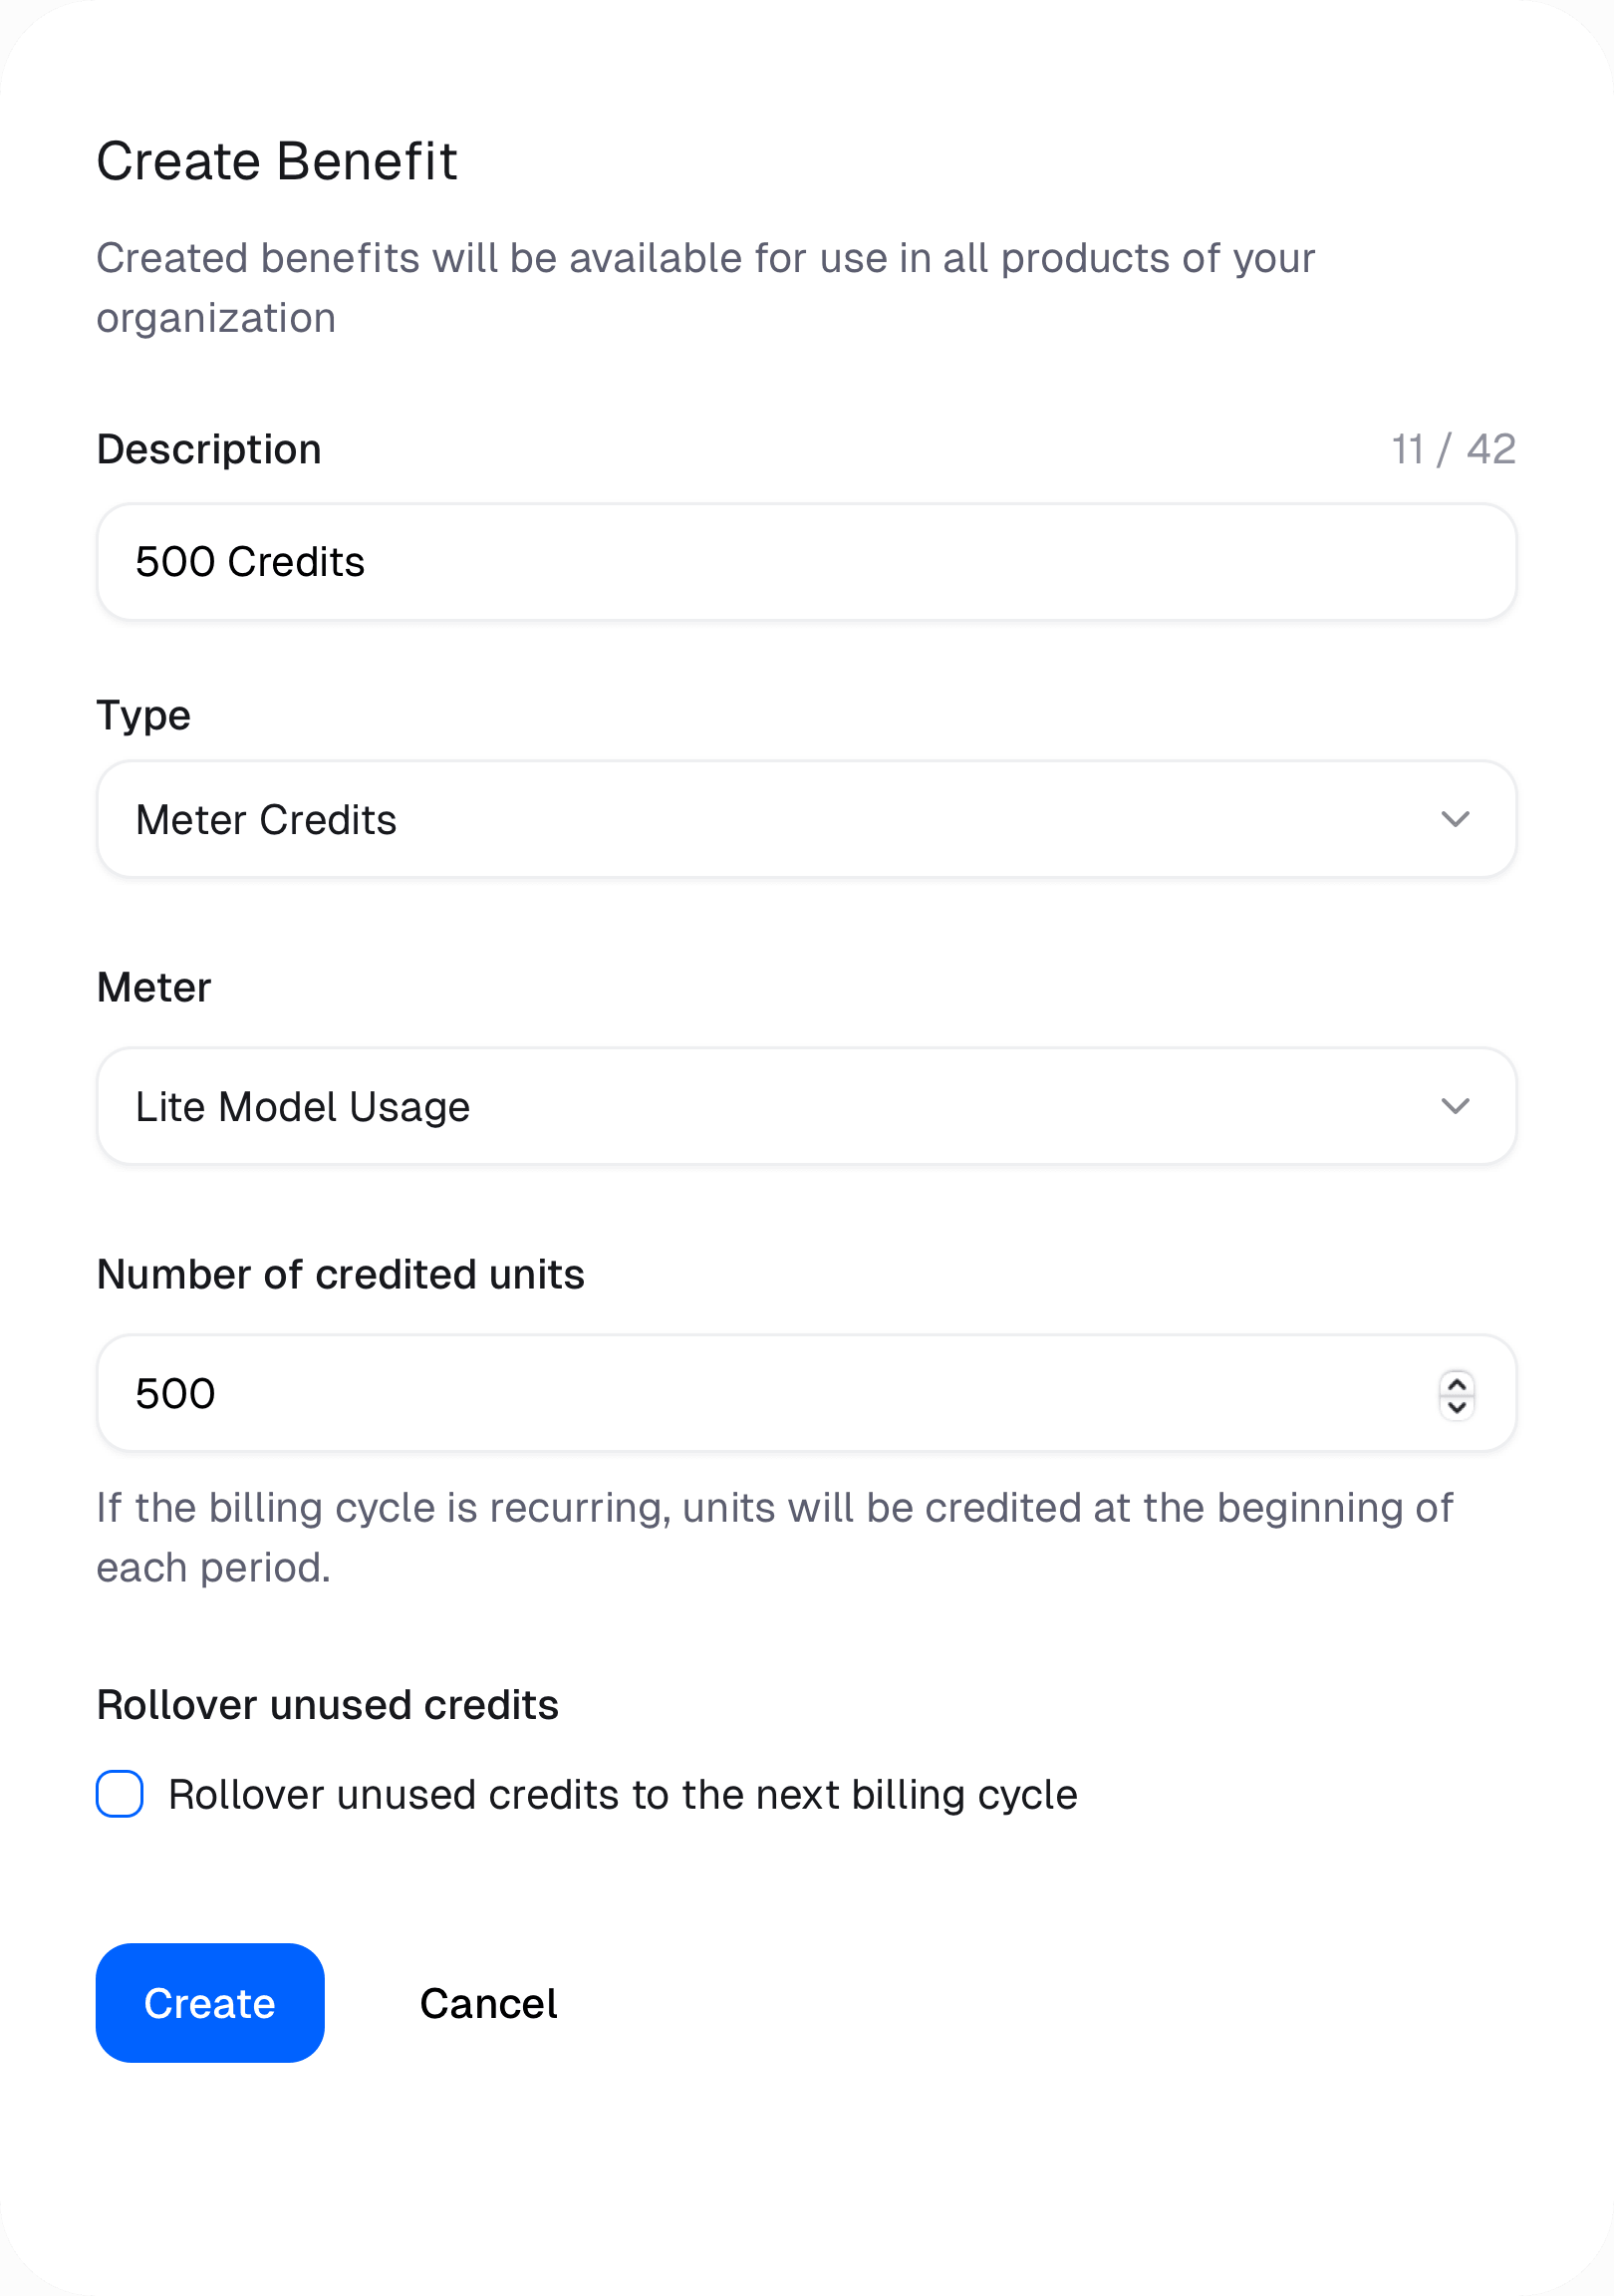
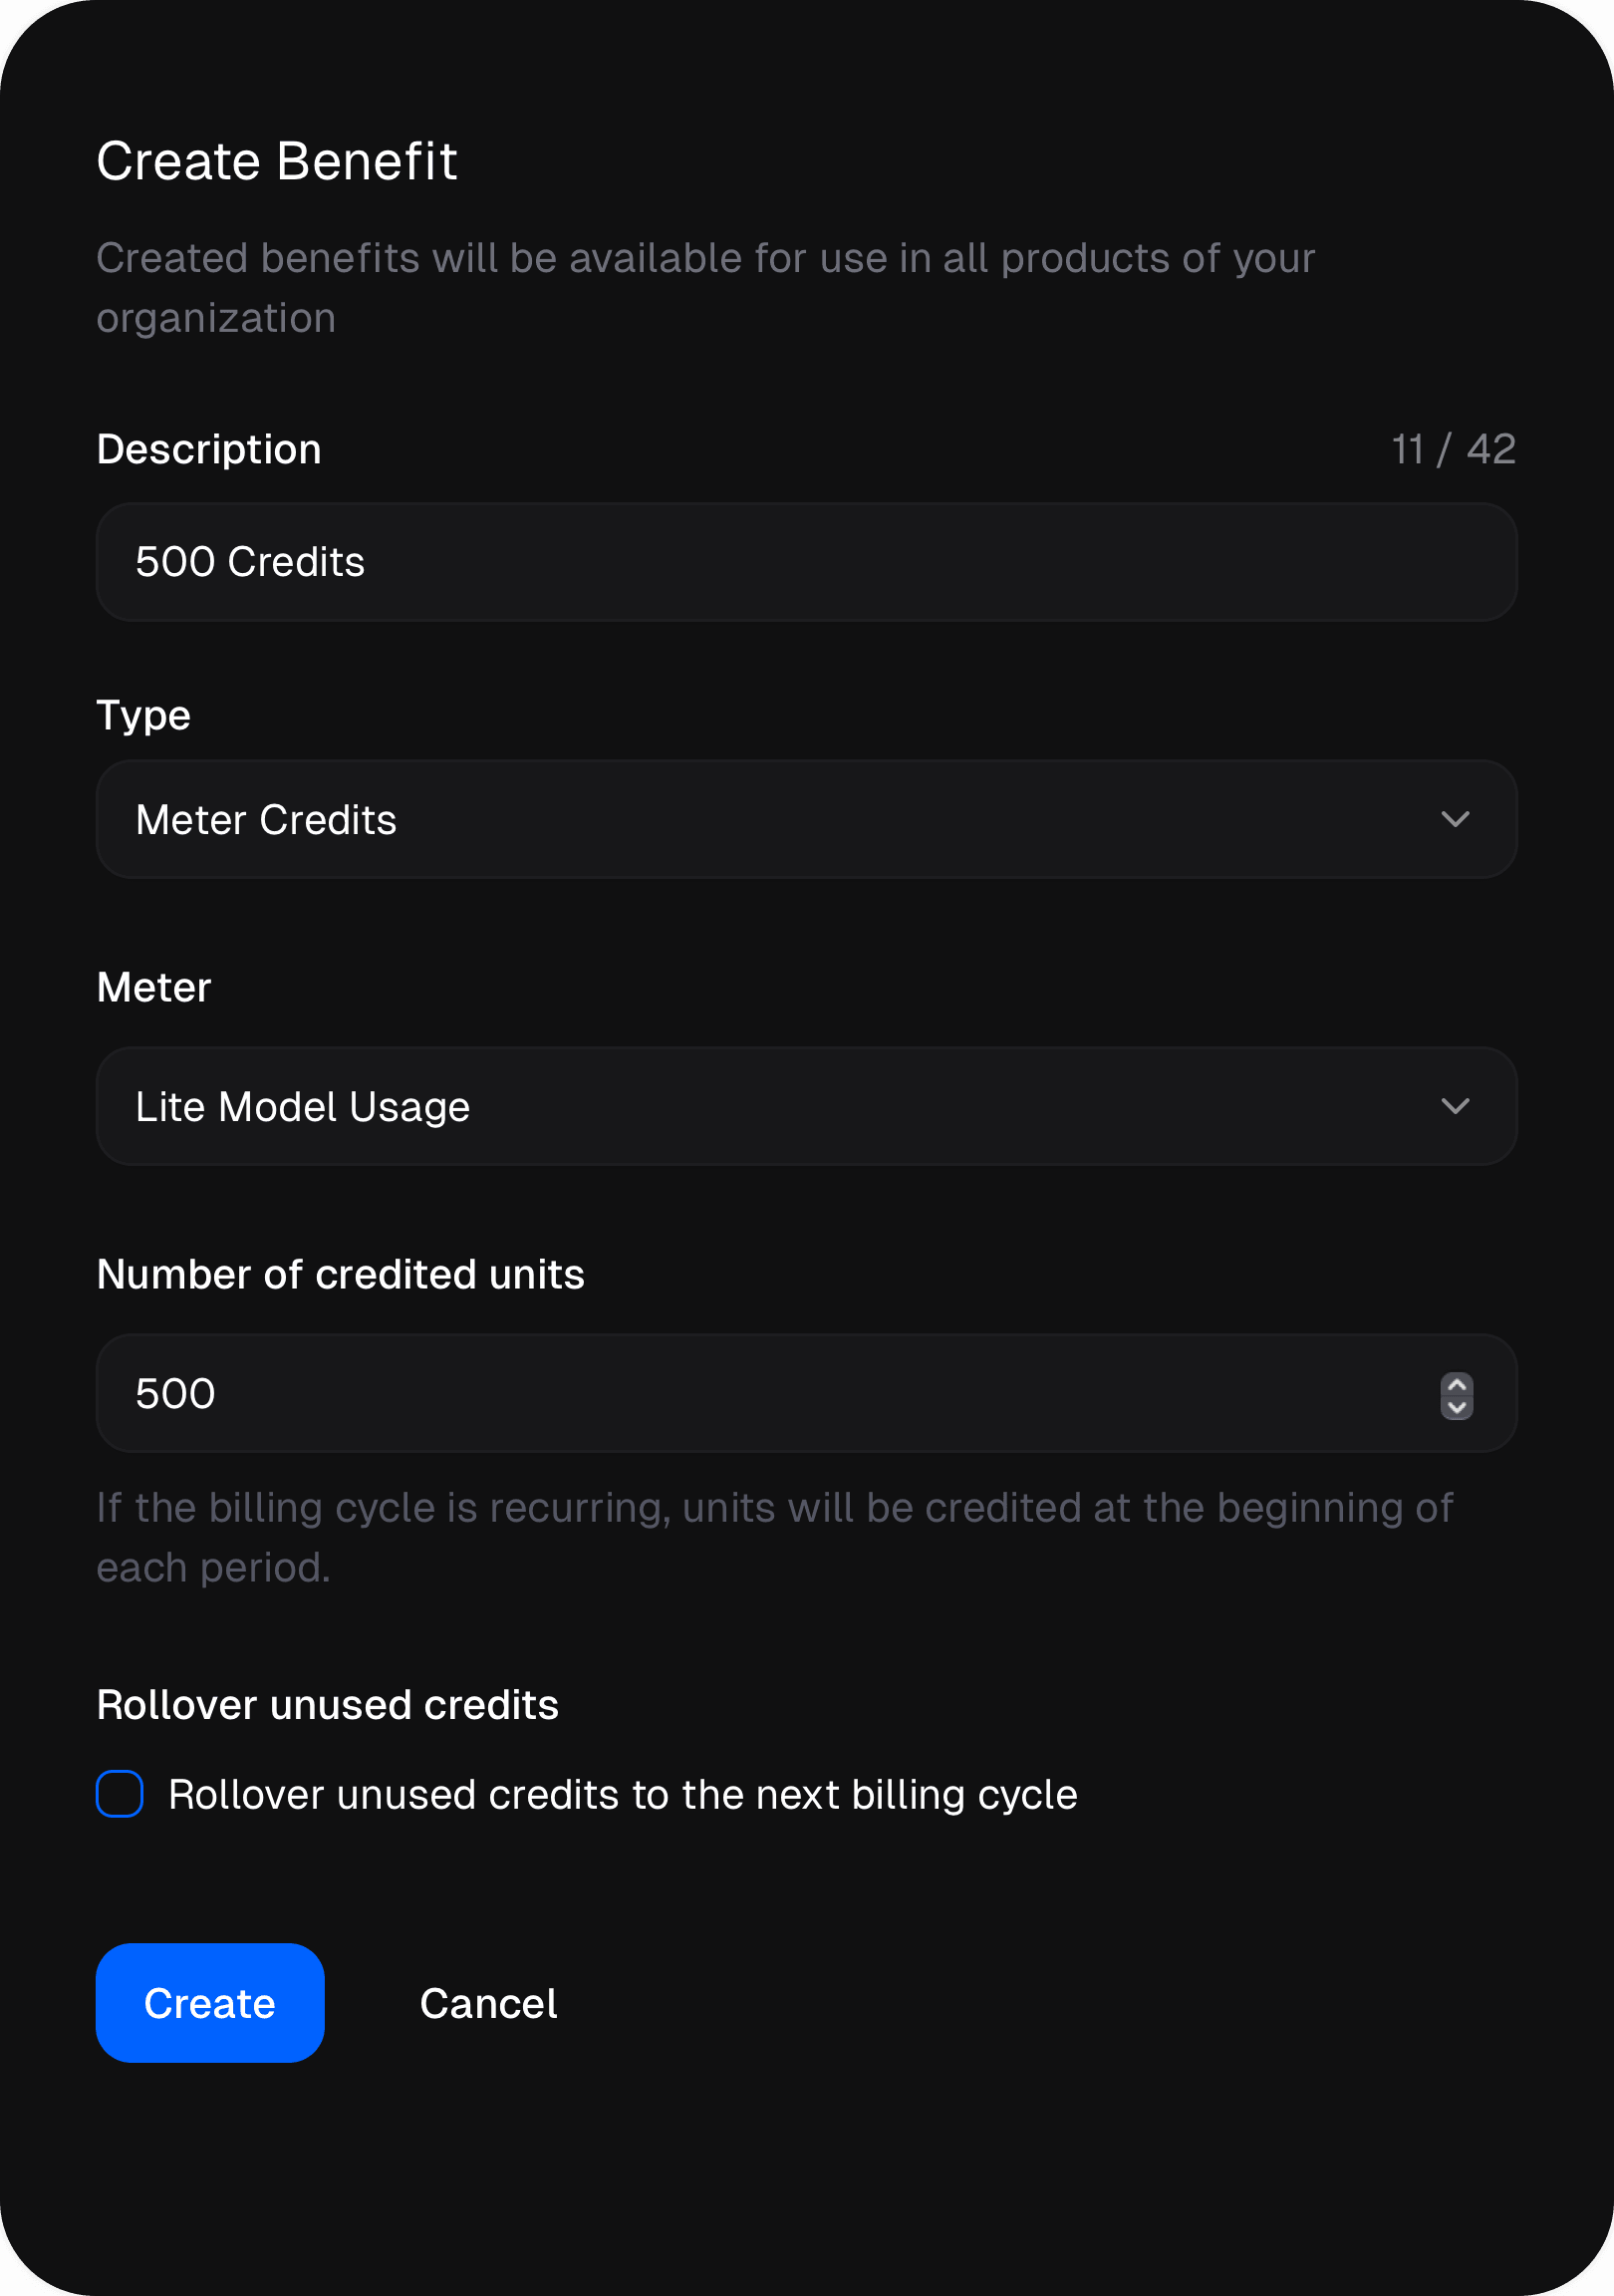 ## Crediting Usage Meter Balance
The Credits benefit will credit a customer's Usage Meter balance at different points in time depending on the type of product purchased.
### Subscription Products
The customer will be credited the amount of units specified in the benefit at the beginning of every subscription cycle period — monthly or yearly.
### One-Time Products
The customer will be credited the amount of units specified in the benefit once at the time of purchase.
## Rollover unused credits
You can choose to rollover unused credits to the next billing cycle. This means that if a customer doesn't use all of their credits in a given billing cycle, the remaining credits will be added to their balance for the next billing cycle. To enable this feature, check the "Rollover unused credits" checkbox when creating or editing the Credits benefit.
## Crediting Usage Meter Balance
The Credits benefit will credit a customer's Usage Meter balance at different points in time depending on the type of product purchased.
### Subscription Products
The customer will be credited the amount of units specified in the benefit at the beginning of every subscription cycle period — monthly or yearly.
### One-Time Products
The customer will be credited the amount of units specified in the benefit once at the time of purchase.
## Rollover unused credits
You can choose to rollover unused credits to the next billing cycle. This means that if a customer doesn't use all of their credits in a given billing cycle, the remaining credits will be added to their balance for the next billing cycle. To enable this feature, check the "Rollover unused credits" checkbox when creating or editing the Credits benefit.
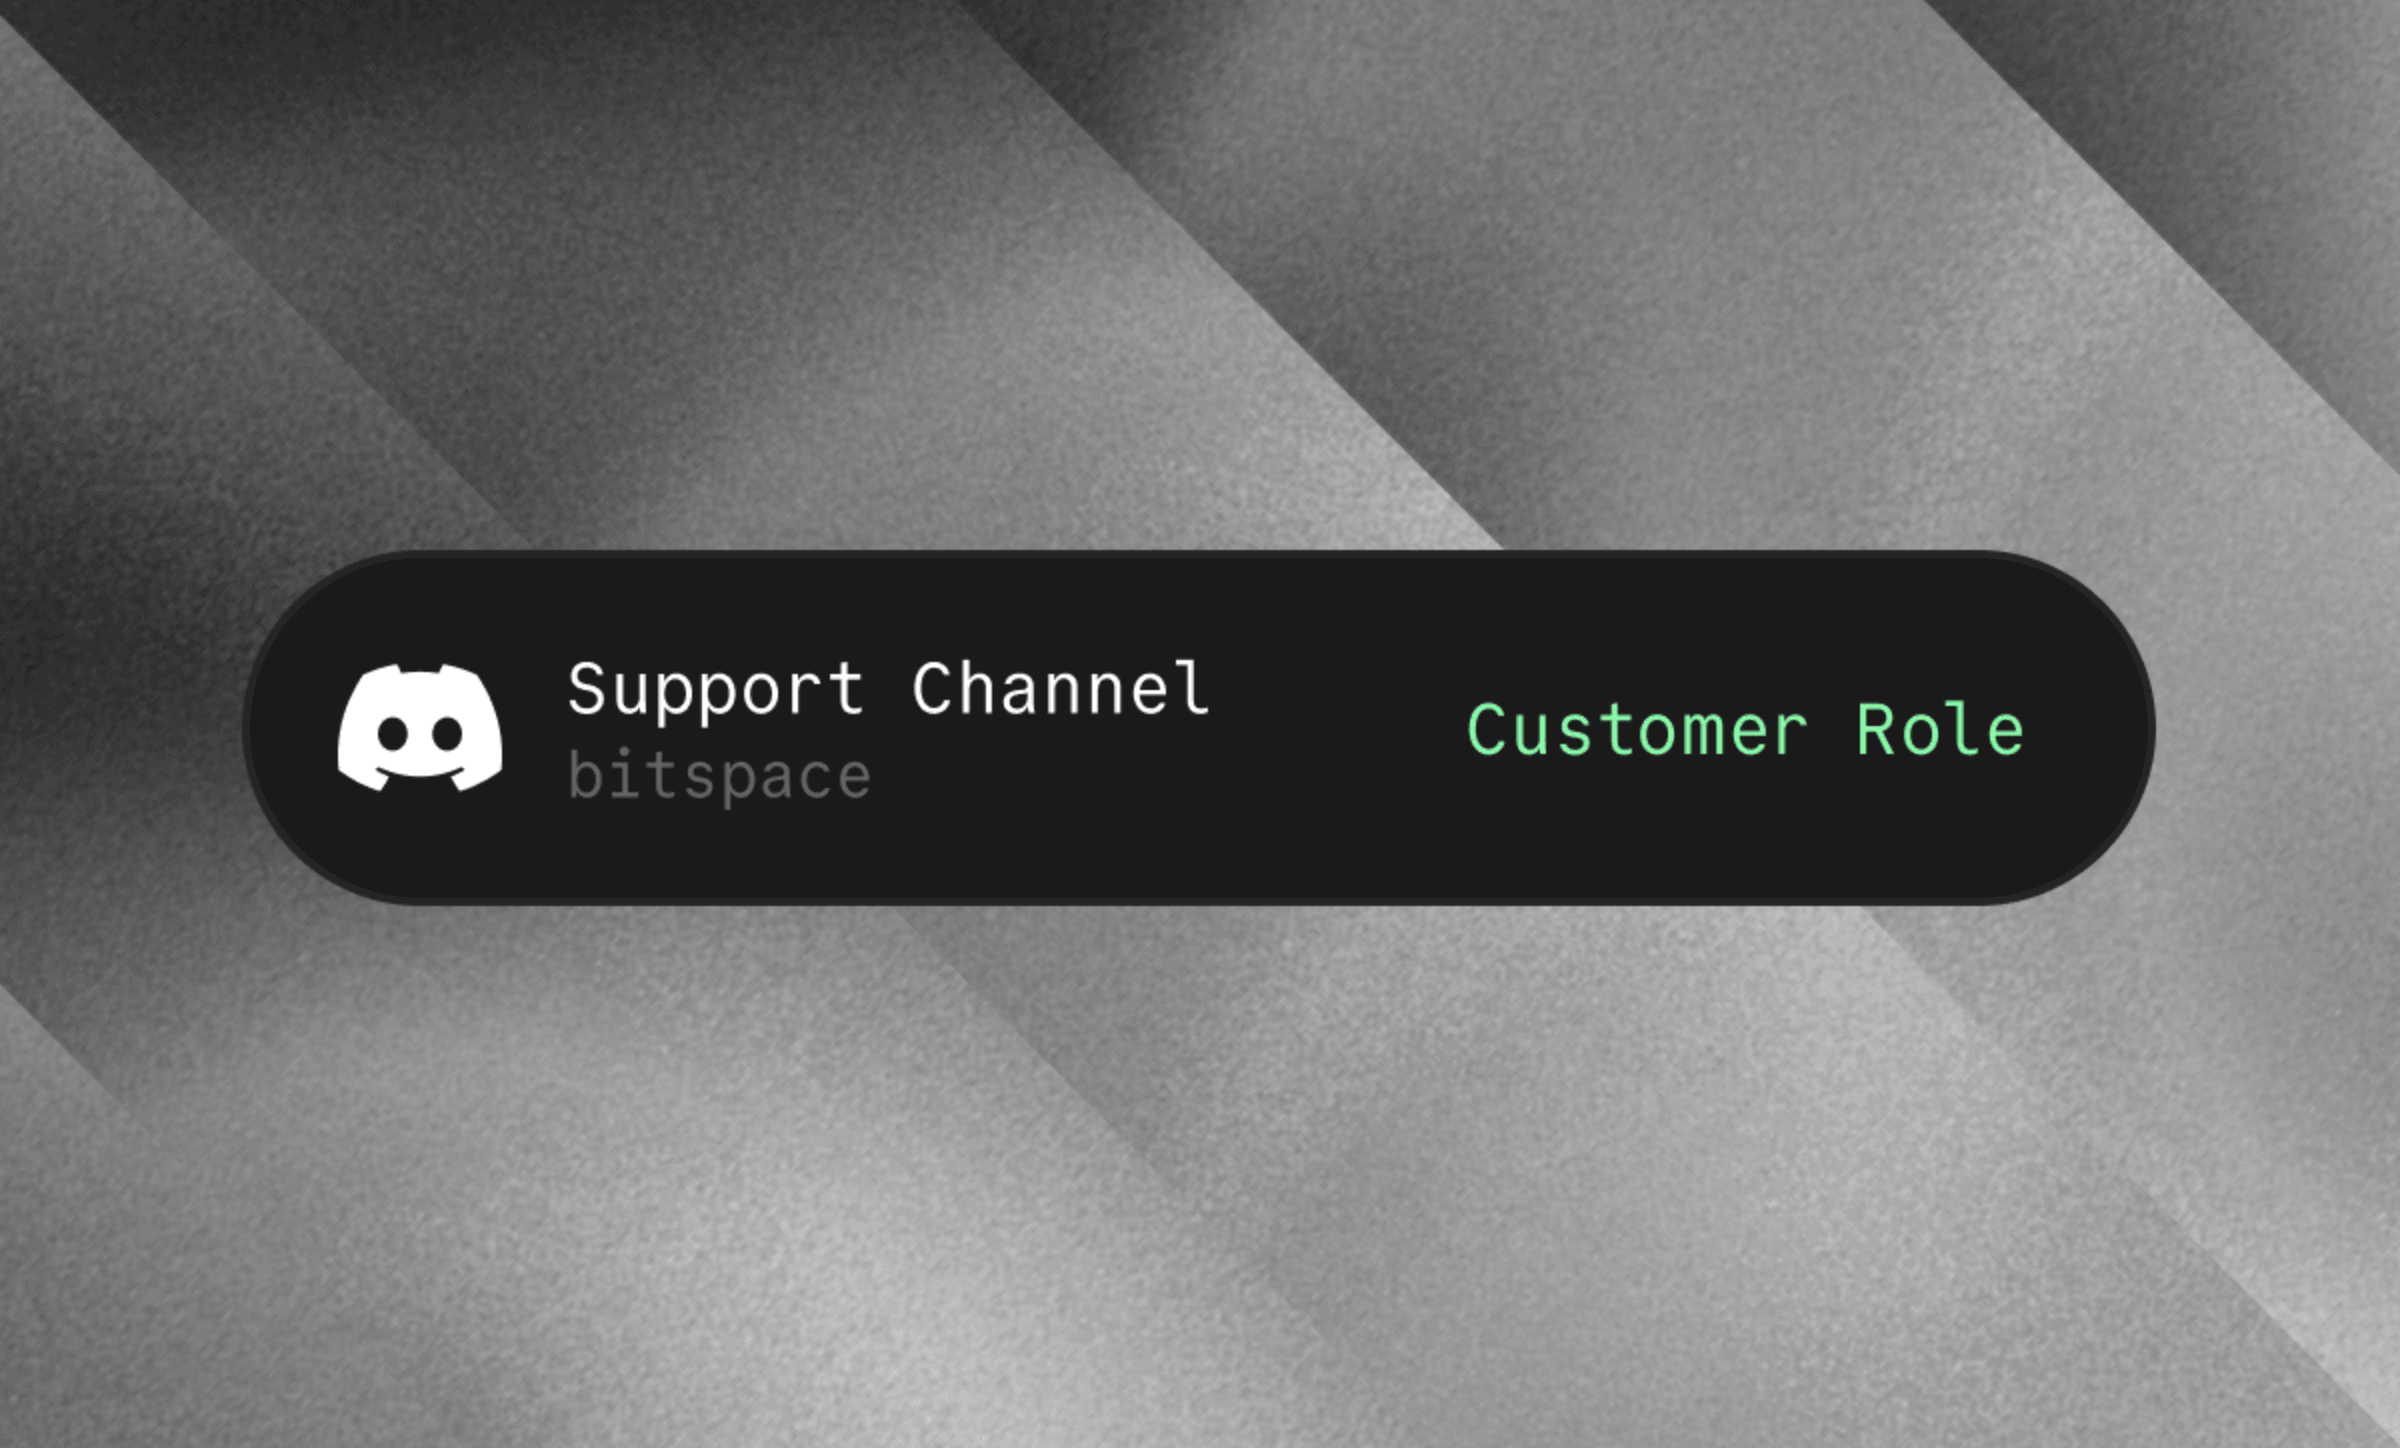 Automating Discord server invites and roles for customers or subscribers is super easy and powerful with OurPay.
* Fully automated Discord server invitations
* You can even setup multiple Discord servers, or...
* Offer different roles for different subscription tiers or products
Create Discord Benefit
-----------------------------
Automating Discord server invites and roles for customers or subscribers is super easy and powerful with OurPay.
* Fully automated Discord server invitations
* You can even setup multiple Discord servers, or...
* Offer different roles for different subscription tiers or products
Create Discord Benefit
-----------------------------
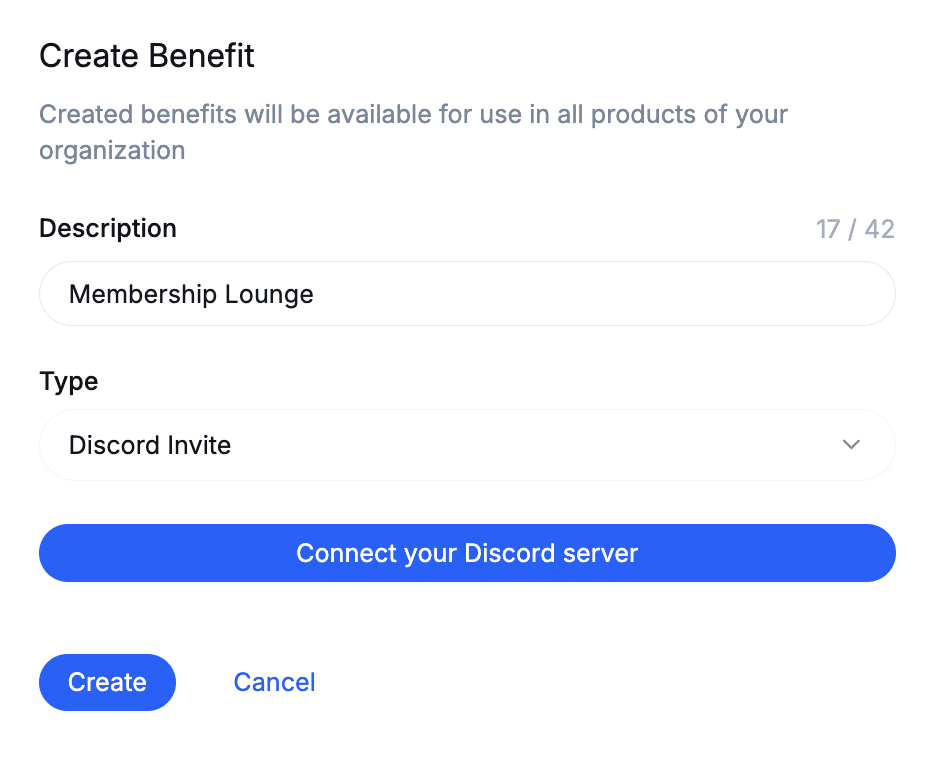
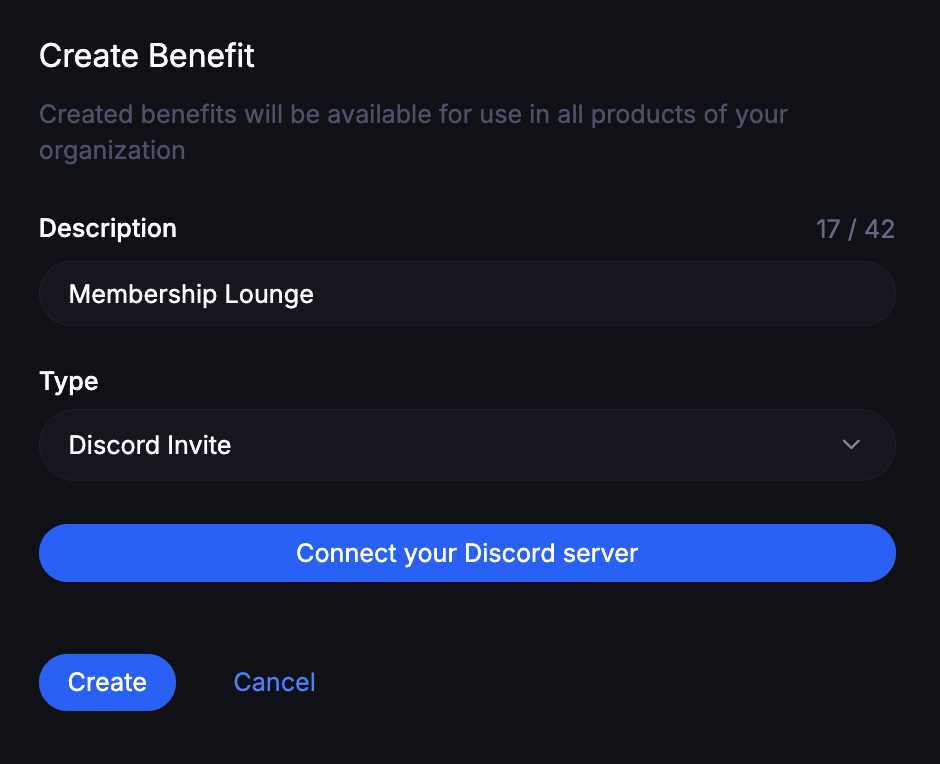 Click on `Connect your Discord server`. You'll be redirected to Discord where you can grant the OurPay App for your desired server.
Next, you'll be prompted to approve the permissions our app requires to function. It needs all of them.
### **Manage Roles**
Access to your Discord roles. You'll be able to select which ones to grant to your customers later.
### **Kick Members**
Ability to kick members who have this benefit and connected Discord with OurPay.
### **Create Invite**
Ability to invite members who purchase a product or subscribes to a tier with this benefit.
You're now redirected back to OurPay and can finish setting up the Discord benefit on our end.
### **Connected Discord server**
The Discord server you connected cannot be changed. However, you can create multiple benefits and connect more Discord servers if you want.
### **Granted role**
Which Discord role do you want to grant as part of this benefit?
Adding Benefit to Product
--------------------------------
Head over to the product you want to associate this new Discord benefit with. You should be able to toggle the benefit in the bottom of the Edit Product form.
# Feature Flag Benefit
Source: https://docs.ourpay.dev/features/benefits/feature-flags
The Feature Flag benefit is a lightweight way to grant feature access to customers without any external service integration. If a customer has the benefit grant, they have access — it's that simple.
## Use Cases
* Gate premium features behind a subscription tier
* Offer early access or beta features to select customers
* Differentiate access levels across product tiers
* Control API rate limit tiers or usage quotas in your application
## Create Feature Flag Benefit
1. Go to [`Benefits`](https://ourpay.dev/to/dashboard/products/benefits)
2. Click `+ New Benefit` to create a new benefit
3. Choose `Feature Flag` as the `Type`
4. Give it a short description (e.g. "Premium Features" or "Beta Access")
### Metadata
You can optionally attach key-value metadata to a feature flag benefit. This is useful for passing additional context to your application, for example:
* `role` → `editor`
* `max_upload_size` → `10`
* `priority` → `elevated`
Metadata can be configured when creating or editing the benefit in the dashboard using the **Add Metadata** button.
## Integration
The recommended way to check if a customer has a feature flag benefit is through the [Customer State](/integrate/customer-state) API or the [`customer.state_changed`](/api-reference/customerstate_changed) webhook.
The customer state object includes all granted benefits. Simply check if the customer has a benefit grant for your feature flag benefit to determine access.
### Lifecycle
* **Subscriptions**: The feature flag is granted at the start of each subscription cycle and automatically revoked when the subscription is cancelled.
* **One-time purchases**: The feature flag is granted at the time of purchase with lifetime access.
# Automate Customer File Downloads
Source: https://docs.ourpay.dev/features/benefits/file-downloads
Click on `Connect your Discord server`. You'll be redirected to Discord where you can grant the OurPay App for your desired server.
Next, you'll be prompted to approve the permissions our app requires to function. It needs all of them.
### **Manage Roles**
Access to your Discord roles. You'll be able to select which ones to grant to your customers later.
### **Kick Members**
Ability to kick members who have this benefit and connected Discord with OurPay.
### **Create Invite**
Ability to invite members who purchase a product or subscribes to a tier with this benefit.
You're now redirected back to OurPay and can finish setting up the Discord benefit on our end.
### **Connected Discord server**
The Discord server you connected cannot be changed. However, you can create multiple benefits and connect more Discord servers if you want.
### **Granted role**
Which Discord role do you want to grant as part of this benefit?
Adding Benefit to Product
--------------------------------
Head over to the product you want to associate this new Discord benefit with. You should be able to toggle the benefit in the bottom of the Edit Product form.
# Feature Flag Benefit
Source: https://docs.ourpay.dev/features/benefits/feature-flags
The Feature Flag benefit is a lightweight way to grant feature access to customers without any external service integration. If a customer has the benefit grant, they have access — it's that simple.
## Use Cases
* Gate premium features behind a subscription tier
* Offer early access or beta features to select customers
* Differentiate access levels across product tiers
* Control API rate limit tiers or usage quotas in your application
## Create Feature Flag Benefit
1. Go to [`Benefits`](https://ourpay.dev/to/dashboard/products/benefits)
2. Click `+ New Benefit` to create a new benefit
3. Choose `Feature Flag` as the `Type`
4. Give it a short description (e.g. "Premium Features" or "Beta Access")
### Metadata
You can optionally attach key-value metadata to a feature flag benefit. This is useful for passing additional context to your application, for example:
* `role` → `editor`
* `max_upload_size` → `10`
* `priority` → `elevated`
Metadata can be configured when creating or editing the benefit in the dashboard using the **Add Metadata** button.
## Integration
The recommended way to check if a customer has a feature flag benefit is through the [Customer State](/integrate/customer-state) API or the [`customer.state_changed`](/api-reference/customerstate_changed) webhook.
The customer state object includes all granted benefits. Simply check if the customer has a benefit grant for your feature flag benefit to determine access.
### Lifecycle
* **Subscriptions**: The feature flag is granted at the start of each subscription cycle and automatically revoked when the subscription is cancelled.
* **One-time purchases**: The feature flag is granted at the time of purchase with lifetime access.
# Automate Customer File Downloads
Source: https://docs.ourpay.dev/features/benefits/file-downloads
 Sell Digital Products
----------------------------
You can easily offer customers and subscribers access to downloadable files with OurPay.
* Up to 10GB per file
* Upload any type of file - from ebooks to full-fledged applications
* SHA-256 checksum validation throughout for you and your customers (if desired)
* Customers get a signed & personal downloadable URL
Create Downloadable Benefit
----------------------------------
1. Go to [`Benefits`](https://ourpay.dev/to/dashboard/products/benefits)
2. Click `+ Add Benefit` to create a new benefit
3. Choose `File Downloads` as the `Type`
You can now upload the files you want to offer as downloadables for customers.
1. Drag & drop files to the dropzone (`Feed me some bytes`)
2. Or click on that area to open a file browser
### Change filename
Click on the filename to change it inline.
### Change order of files
You can drag and drop the files in the order you want.
### Review SHA-256 checksum
Click on the contextual menu dots and then `Copy SHA-256 Checksum`
### Delete a file
Click on the contextual menu dots and then `Delete` in the menu.
**Active subscribers & customers will lose access too!**
Deleting a file permanently deletes it from OurPay and our S3 buckets except for the metadata. Disable the file instead if you don't want it permanently deleted.
### Disable & Enable Files
You can disable files at any point to prevent new customers getting access to it.
**Existing customers retain their access**
Customers who purchased before the file was disabled will still have access to legacy files. Only new customers will be impacted.
**Enabling or adding files grants access retroactively**
In case you add more files or re-enable existing ones, all current customers and subscribers with the benefit will be granted access.
# Automate Private GitHub Repo(s) Access
Source: https://docs.ourpay.dev/features/benefits/github-access
Sell Digital Products
----------------------------
You can easily offer customers and subscribers access to downloadable files with OurPay.
* Up to 10GB per file
* Upload any type of file - from ebooks to full-fledged applications
* SHA-256 checksum validation throughout for you and your customers (if desired)
* Customers get a signed & personal downloadable URL
Create Downloadable Benefit
----------------------------------
1. Go to [`Benefits`](https://ourpay.dev/to/dashboard/products/benefits)
2. Click `+ Add Benefit` to create a new benefit
3. Choose `File Downloads` as the `Type`
You can now upload the files you want to offer as downloadables for customers.
1. Drag & drop files to the dropzone (`Feed me some bytes`)
2. Or click on that area to open a file browser
### Change filename
Click on the filename to change it inline.
### Change order of files
You can drag and drop the files in the order you want.
### Review SHA-256 checksum
Click on the contextual menu dots and then `Copy SHA-256 Checksum`
### Delete a file
Click on the contextual menu dots and then `Delete` in the menu.
**Active subscribers & customers will lose access too!**
Deleting a file permanently deletes it from OurPay and our S3 buckets except for the metadata. Disable the file instead if you don't want it permanently deleted.
### Disable & Enable Files
You can disable files at any point to prevent new customers getting access to it.
**Existing customers retain their access**
Customers who purchased before the file was disabled will still have access to legacy files. Only new customers will be impacted.
**Enabling or adding files grants access retroactively**
In case you add more files or re-enable existing ones, all current customers and subscribers with the benefit will be granted access.
# Automate Private GitHub Repo(s) Access
Source: https://docs.ourpay.dev/features/benefits/github-access
 Sell GitHub Repository Access
------------------------------------
With OurPay you can seamlessly offer your customers and subscribers automated access to private GitHub repositories.
* Fully automated collaborator invites
* Unlimited repositories (via multiple benefits) from your organization(s)
* Users get access upon subscribing & removed on cancellation
* Or get lifetime access upon paying a one-time price (product)
### **Use cases**
* Sponsorware
* Access to private GitHub discussions & issues for sponsors
* Early access to new feature development before upstream push
* Premium educational materials & code
* Self-hosting products
* Courses, starter kits, open core software & more...
Create GitHub Repository Benefit
---------------------------------------
1. Go to [`Benefits`](https://ourpay.dev/to/dashboard/products/benefits)
2. Click `+ New Benefit` to create a new benefit
3. Choose `GitHub Repository Access` as the `Type`
You first need to `Connect your GitHub Account` and install a dedicated OurPay App for this benefit across the repositories you want to use it with.
* Click `Connect your GitHub Account`
Sell GitHub Repository Access
------------------------------------
With OurPay you can seamlessly offer your customers and subscribers automated access to private GitHub repositories.
* Fully automated collaborator invites
* Unlimited repositories (via multiple benefits) from your organization(s)
* Users get access upon subscribing & removed on cancellation
* Or get lifetime access upon paying a one-time price (product)
### **Use cases**
* Sponsorware
* Access to private GitHub discussions & issues for sponsors
* Early access to new feature development before upstream push
* Premium educational materials & code
* Self-hosting products
* Courses, starter kits, open core software & more...
Create GitHub Repository Benefit
---------------------------------------
1. Go to [`Benefits`](https://ourpay.dev/to/dashboard/products/benefits)
2. Click `+ New Benefit` to create a new benefit
3. Choose `GitHub Repository Access` as the `Type`
You first need to `Connect your GitHub Account` and install a dedicated OurPay App for this benefit across the repositories you want to use it with.
* Click `Connect your GitHub Account`
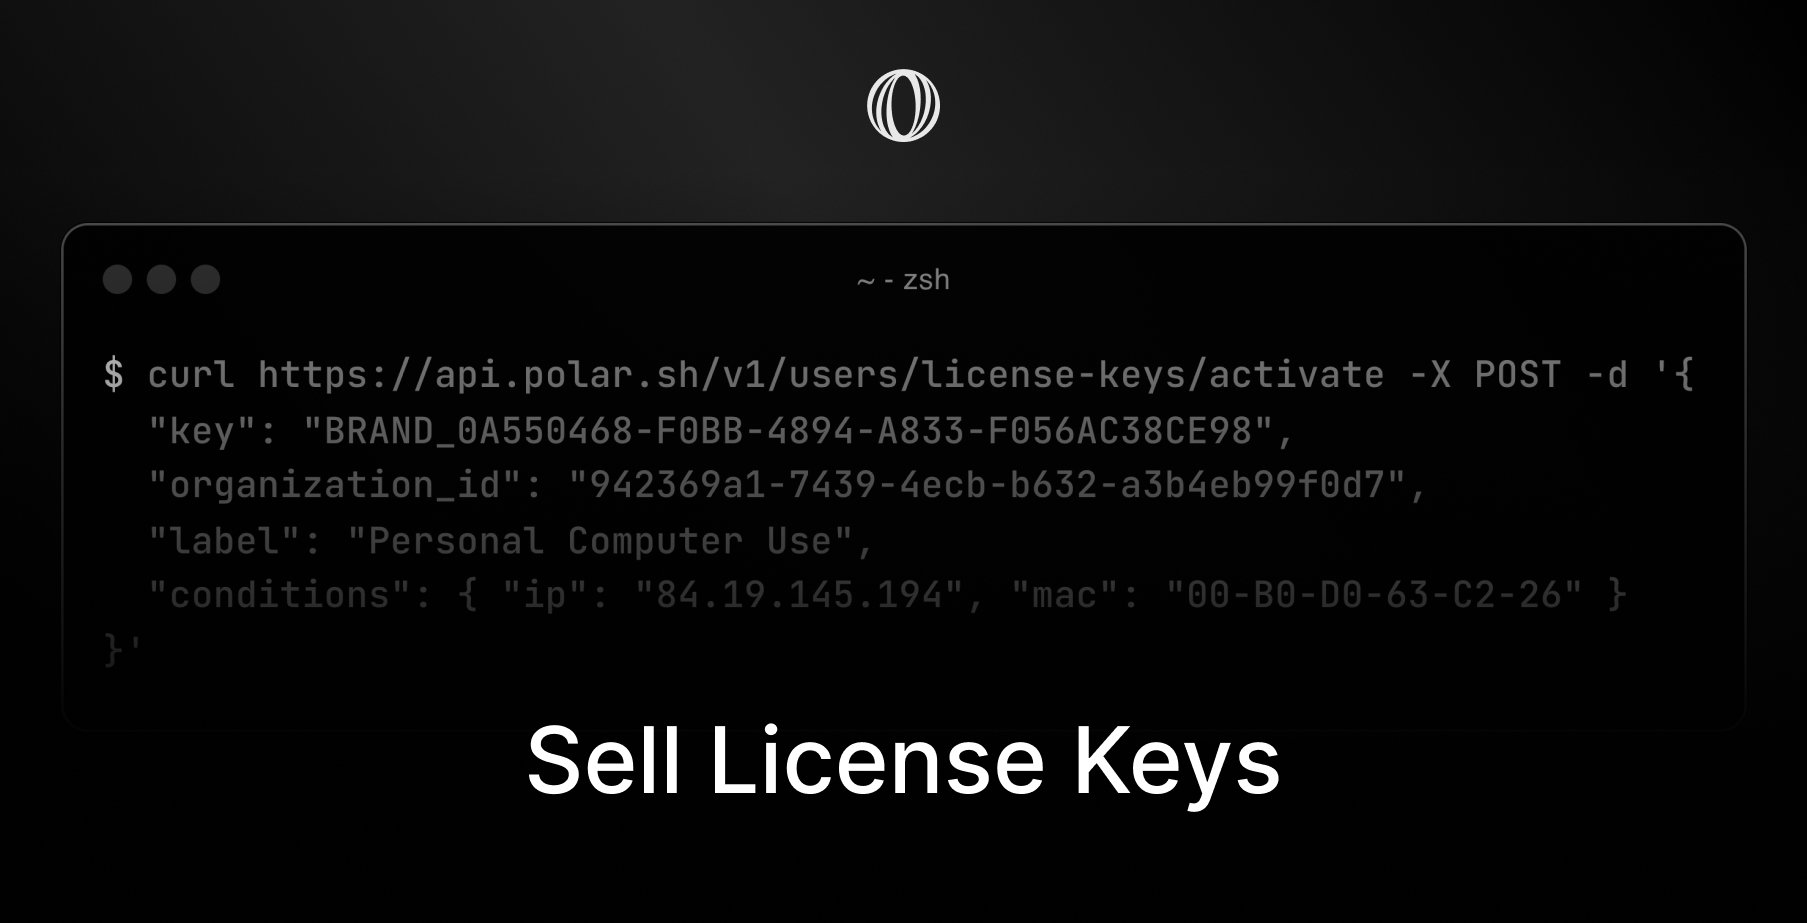 You can easily sell software license keys with OurPay without having to deal with sales tax or hosting an API to validate them in real-time. License keys with OurPay come with a lot of powerful features built-in.
* Brandable prefixes, e.g `OURPAY_*****`
* Automatic expiration after `N` days, months or years
* Limited number of user activations, e.g devices
* Custom validation conditions
* Usage quotas per license key
* Automatic revokation upon cancelled subscriptions
Create License Key Benefit
---------------------------------
1. Go to [`Benefits`](https://ourpay.dev/to/dashboard/products/benefits)
2. Click `+ New Benefit` to create a new benefit
3. Choose `License Keys` as the `Type`
### Custom Branding
Make your license keys standout with brandable prefixes, e.g `MYAPP_
You can easily sell software license keys with OurPay without having to deal with sales tax or hosting an API to validate them in real-time. License keys with OurPay come with a lot of powerful features built-in.
* Brandable prefixes, e.g `OURPAY_*****`
* Automatic expiration after `N` days, months or years
* Limited number of user activations, e.g devices
* Custom validation conditions
* Usage quotas per license key
* Automatic revokation upon cancelled subscriptions
Create License Key Benefit
---------------------------------
1. Go to [`Benefits`](https://ourpay.dev/to/dashboard/products/benefits)
2. Click `+ New Benefit` to create a new benefit
3. Choose `License Keys` as the `Type`
### Custom Branding
Make your license keys standout with brandable prefixes, e.g `MYAPP_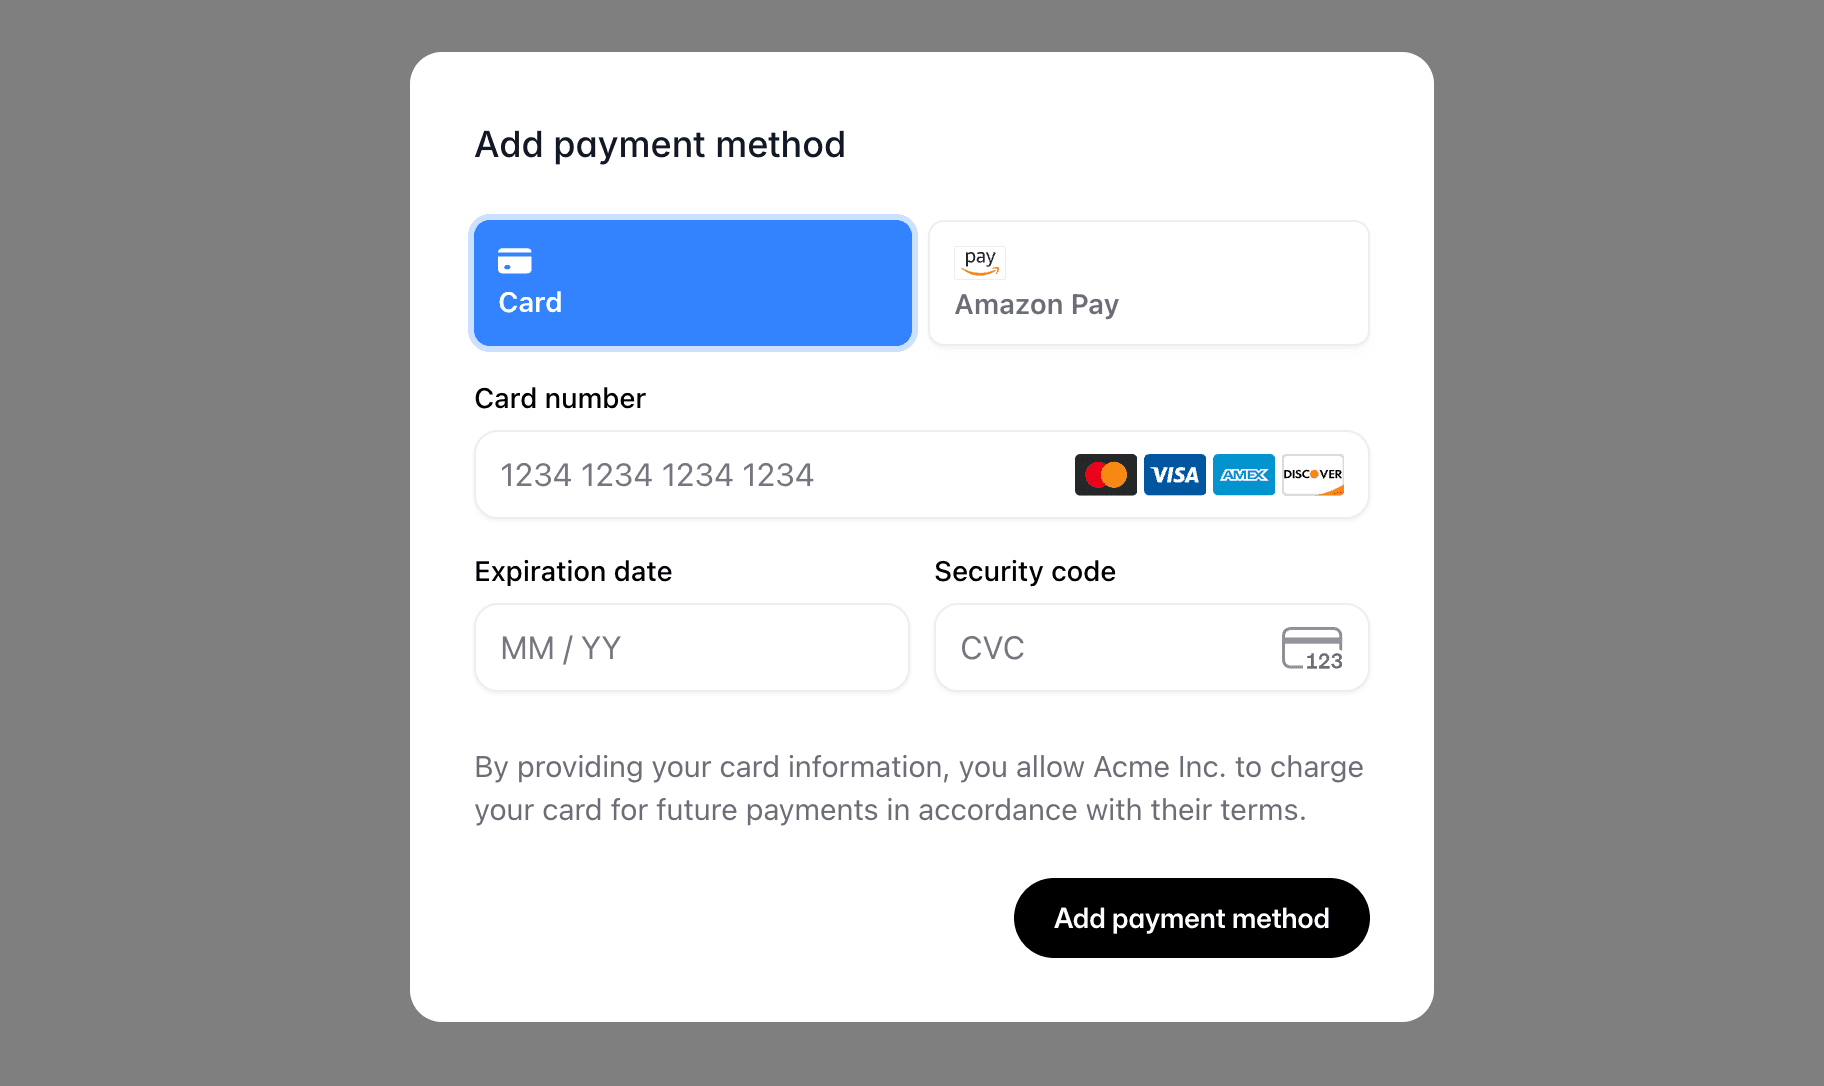 Let your customers securely add a payment method without leaving your site.
## Getting a session token
Every embed is authenticated with a short-lived **customer session token**. Create it **on your server** to keep the OurPay access token secret, then hand the token to the client.
```ts
import { OurPay } from "@ourpay-dev/sdk";
const ourpay = new OurPay({ accessToken: process.env.OURPAY_ACCESS_TOKEN });
const session = await ourpay.customerSessions.create({
customerId: "the-customer-id",
});
```
The token expires after one hour and is scoped to that single customer.
## Implementation
Start by installing the SDK.
Let your customers securely add a payment method without leaving your site.
## Getting a session token
Every embed is authenticated with a short-lived **customer session token**. Create it **on your server** to keep the OurPay access token secret, then hand the token to the client.
```ts
import { OurPay } from "@ourpay-dev/sdk";
const ourpay = new OurPay({ accessToken: process.env.OURPAY_ACCESS_TOKEN });
const session = await ourpay.customerSessions.create({
customerId: "the-customer-id",
});
```
The token expires after one hour and is scoped to that single customer.
## Implementation
Start by installing the SDK.
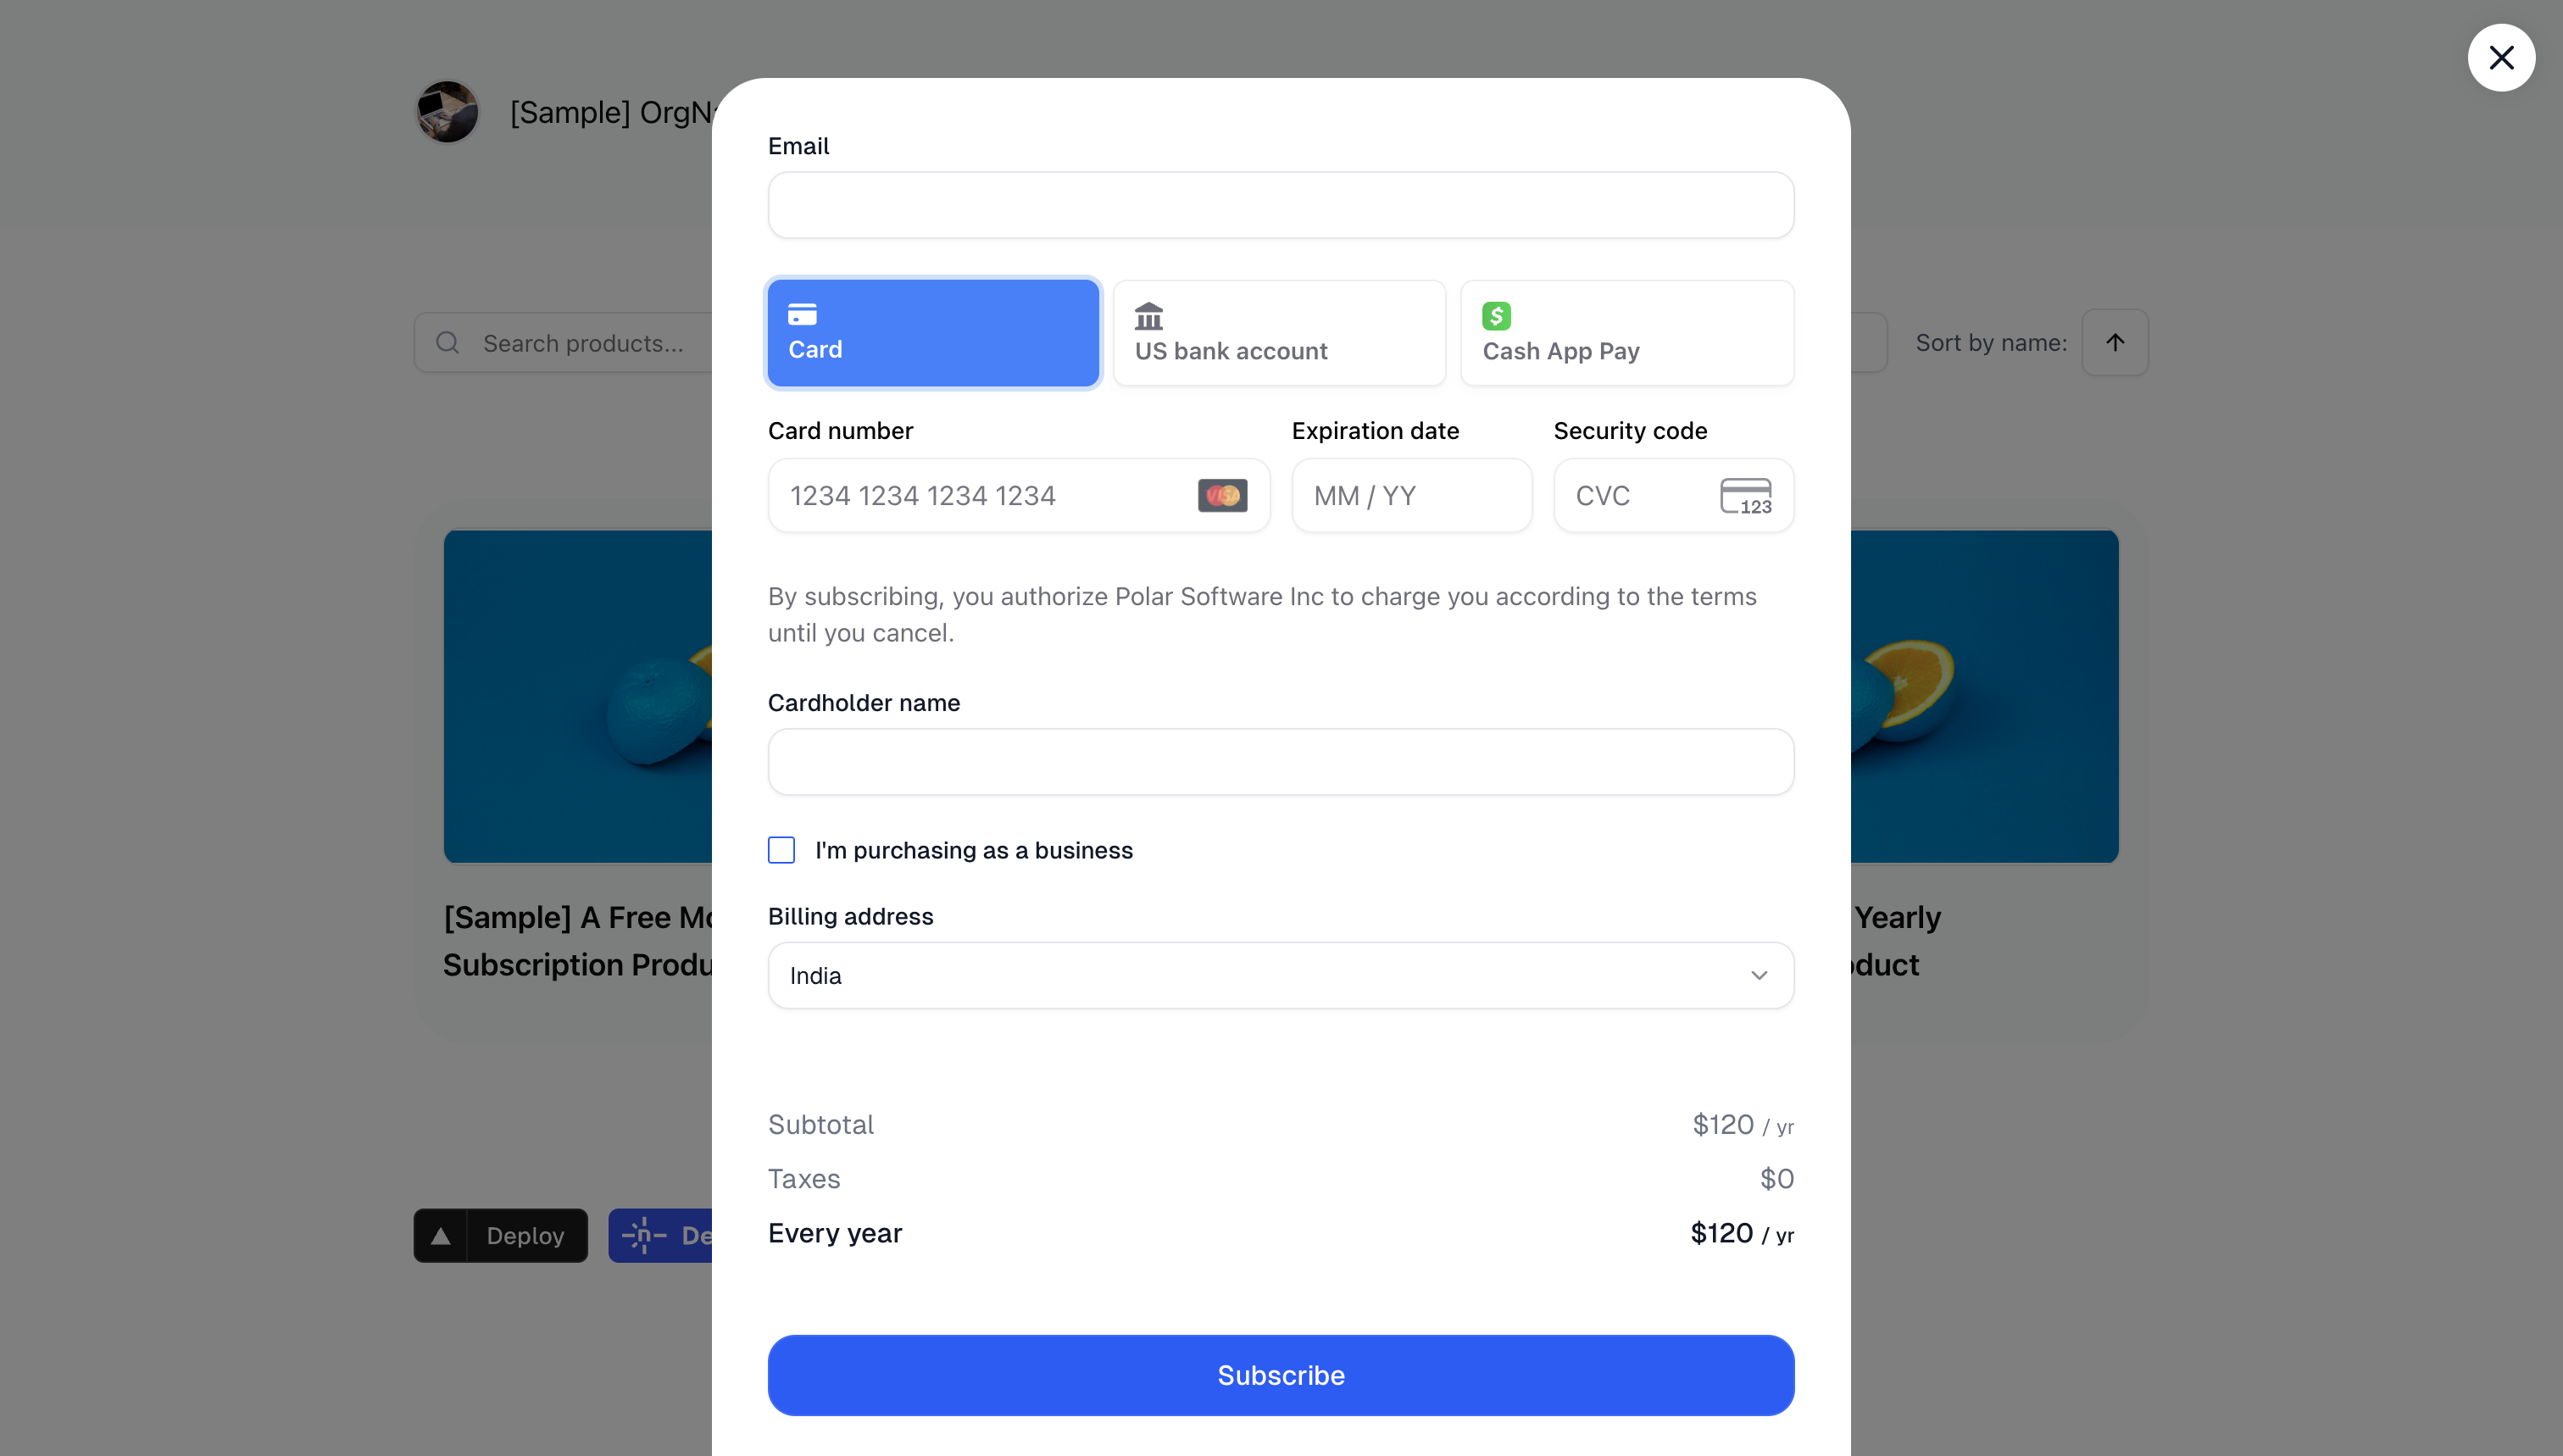 You can either copy and paste our code snippet to get up and running in a second or use our JavaScript library for more advanced integrations. Our embedded checkout allows you to provide a seamless purchasing experience without redirecting users away from your site.
## Code Snippet
The code snippet can be used on any website or CMS that allows you to insert HTML.
First, create a [Checkout Link](/features/checkout/links) as described in the previous section. The code snippet can directly be copied from there by clicking on `Copy Embed Code`.
The snippet looks like this:
```typescript
You can either copy and paste our code snippet to get up and running in a second or use our JavaScript library for more advanced integrations. Our embedded checkout allows you to provide a seamless purchasing experience without redirecting users away from your site.
## Code Snippet
The code snippet can be used on any website or CMS that allows you to insert HTML.
First, create a [Checkout Link](/features/checkout/links) as described in the previous section. The code snippet can directly be copied from there by clicking on `Copy Embed Code`.
The snippet looks like this:
```typescript
 ## What is Fernand?
[Fernand](https://getfernand.com/) is a modern customer support tool designed for SaaS — it’s fast, calm, and built to reduce the anxiety of answering support requests.
## How it works
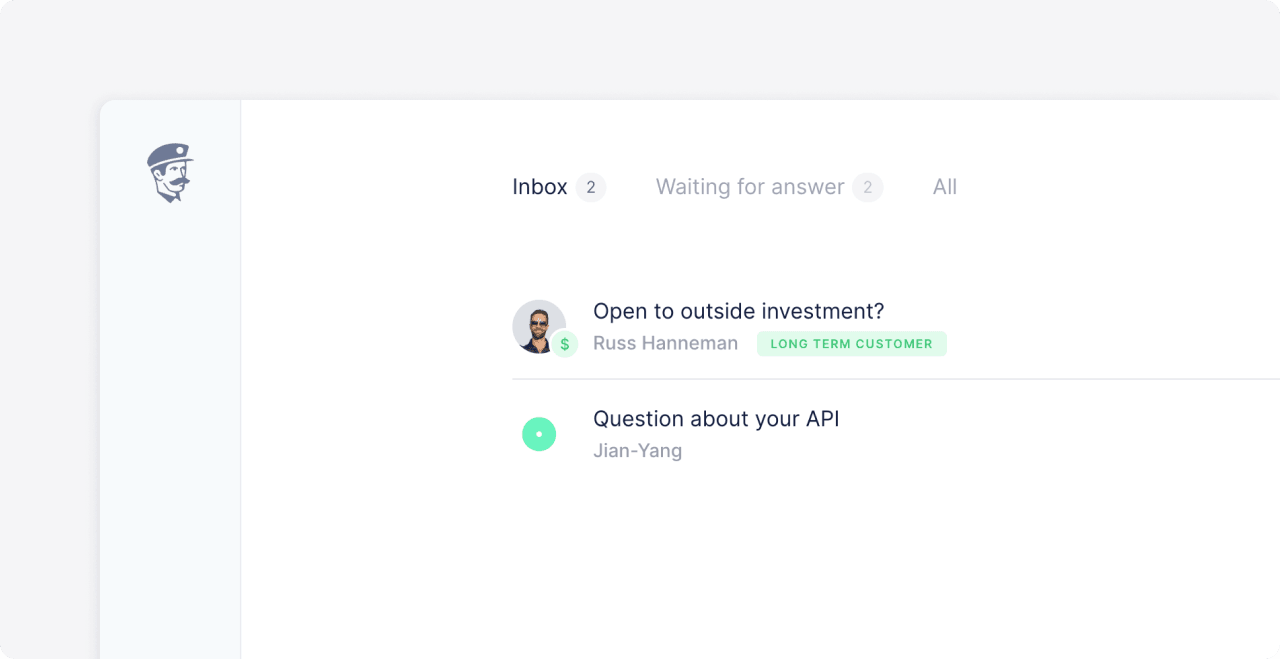
After connecting your [OurPay](https://ourpay.dev/) account to Fernand, you’ll be able to see customer payment information and product access details directly within each customer conversation.
This enables you to:
- Instantly verify if someone is an active customer
- Prioritize conversations from high-tier plans
- View product purchases and payment history in context
---
## How to connect Fernand with OurPay
## What is Fernand?
[Fernand](https://getfernand.com/) is a modern customer support tool designed for SaaS — it’s fast, calm, and built to reduce the anxiety of answering support requests.
## How it works
After connecting your [OurPay](https://ourpay.dev/) account to Fernand, you’ll be able to see customer payment information and product access details directly within each customer conversation.
This enables you to:
- Instantly verify if someone is an active customer
- Prioritize conversations from high-tier plans
- View product purchases and payment history in context
---
## How to connect Fernand with OurPay
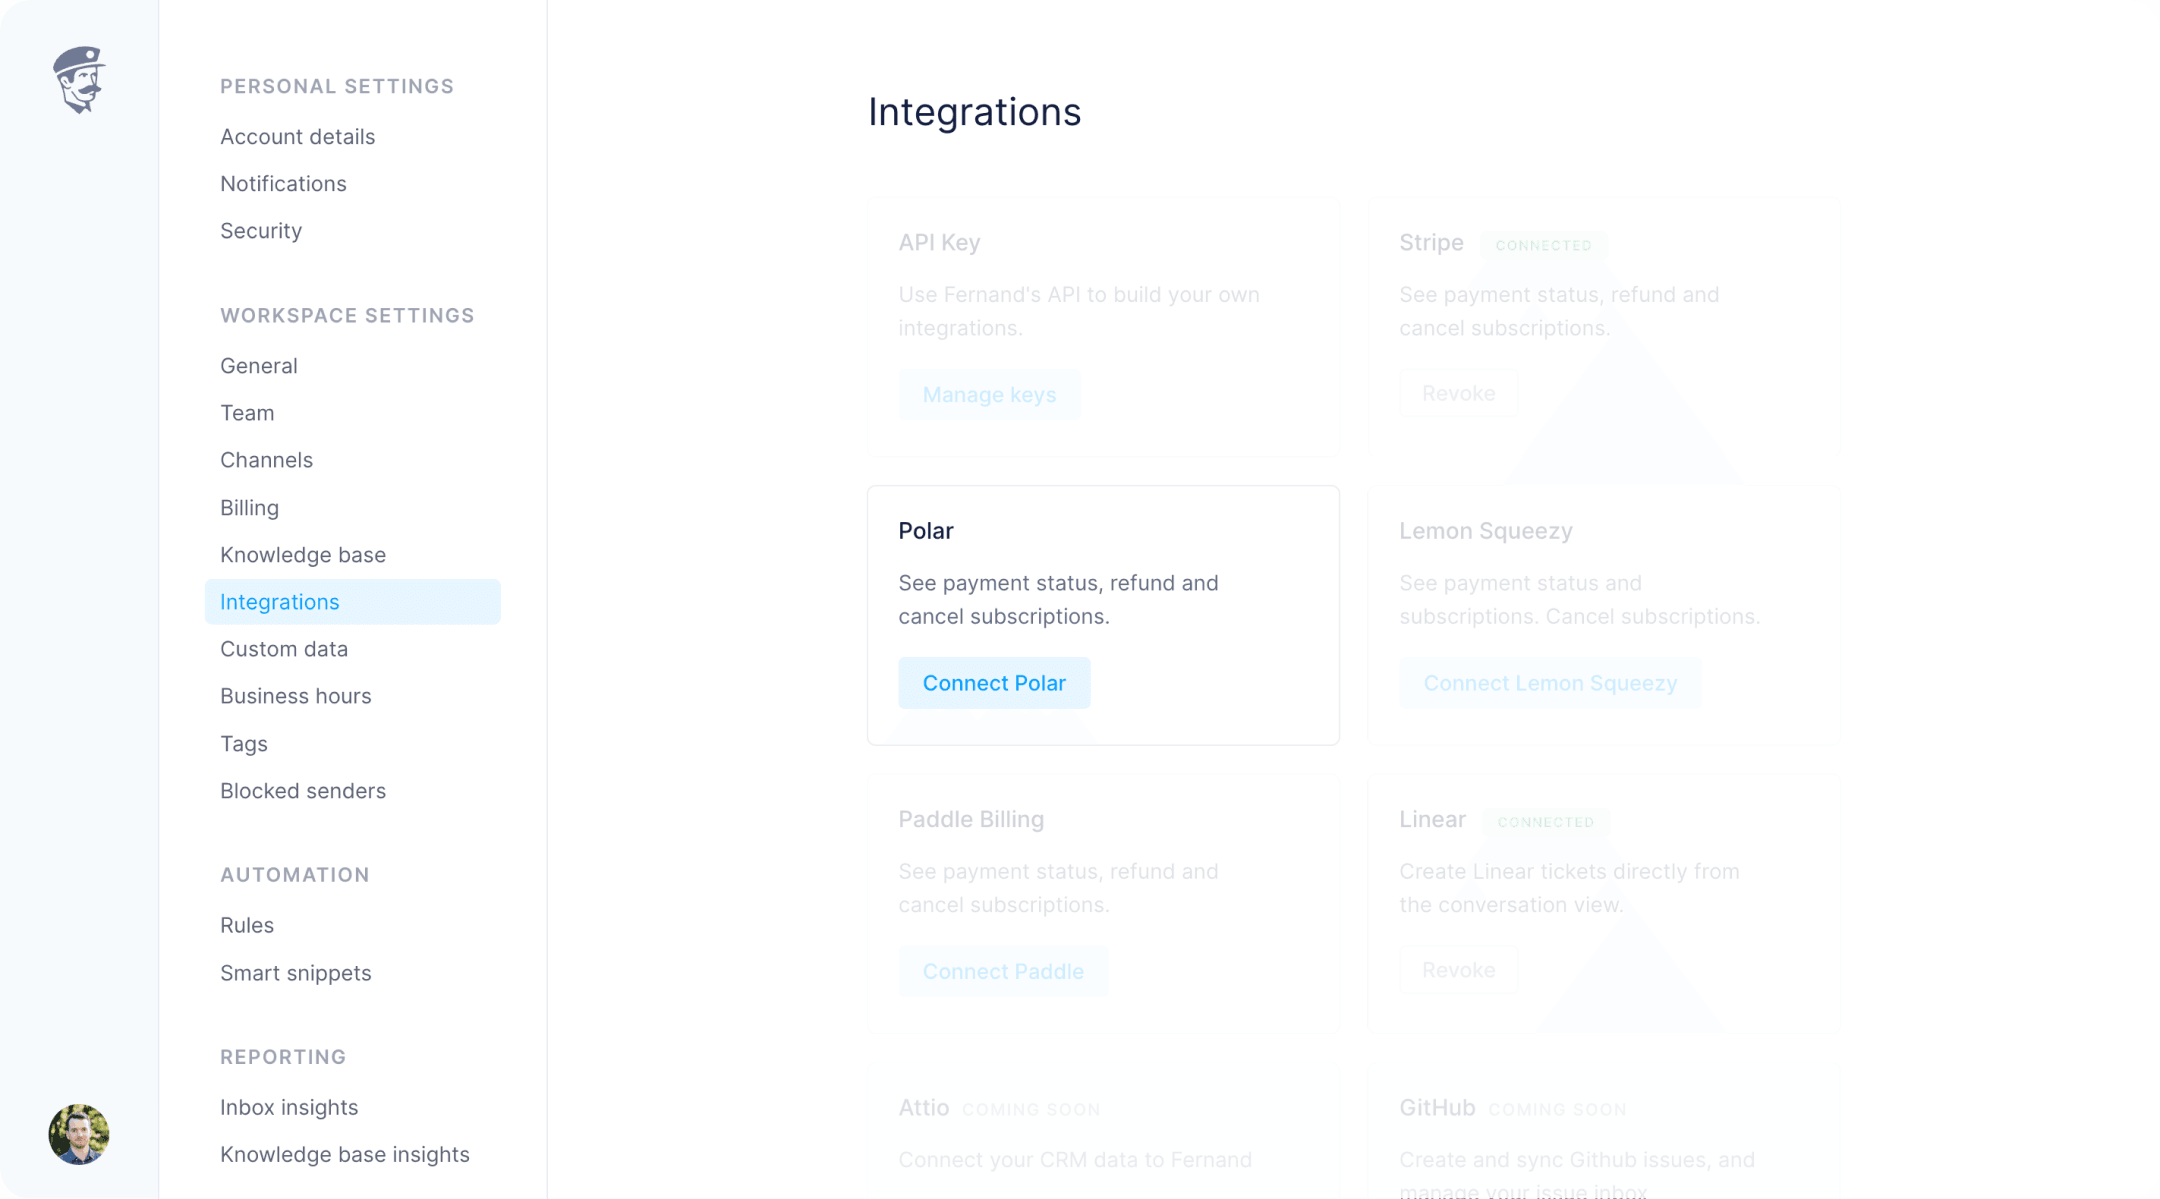 1. Open [Integrations](https://app.getfernand.com/settings/organization/integrations) in your Fernand organization settings.
2. Click on **Connect OurPay**.
3. You'll be redirected to OurPay to authorize the connection.
4. Once approved, Fernand will begin syncing customer data automatically.
That’s it! You’ll now see OurPay customer info directly in Fernand's conversation list and sidebar.
---
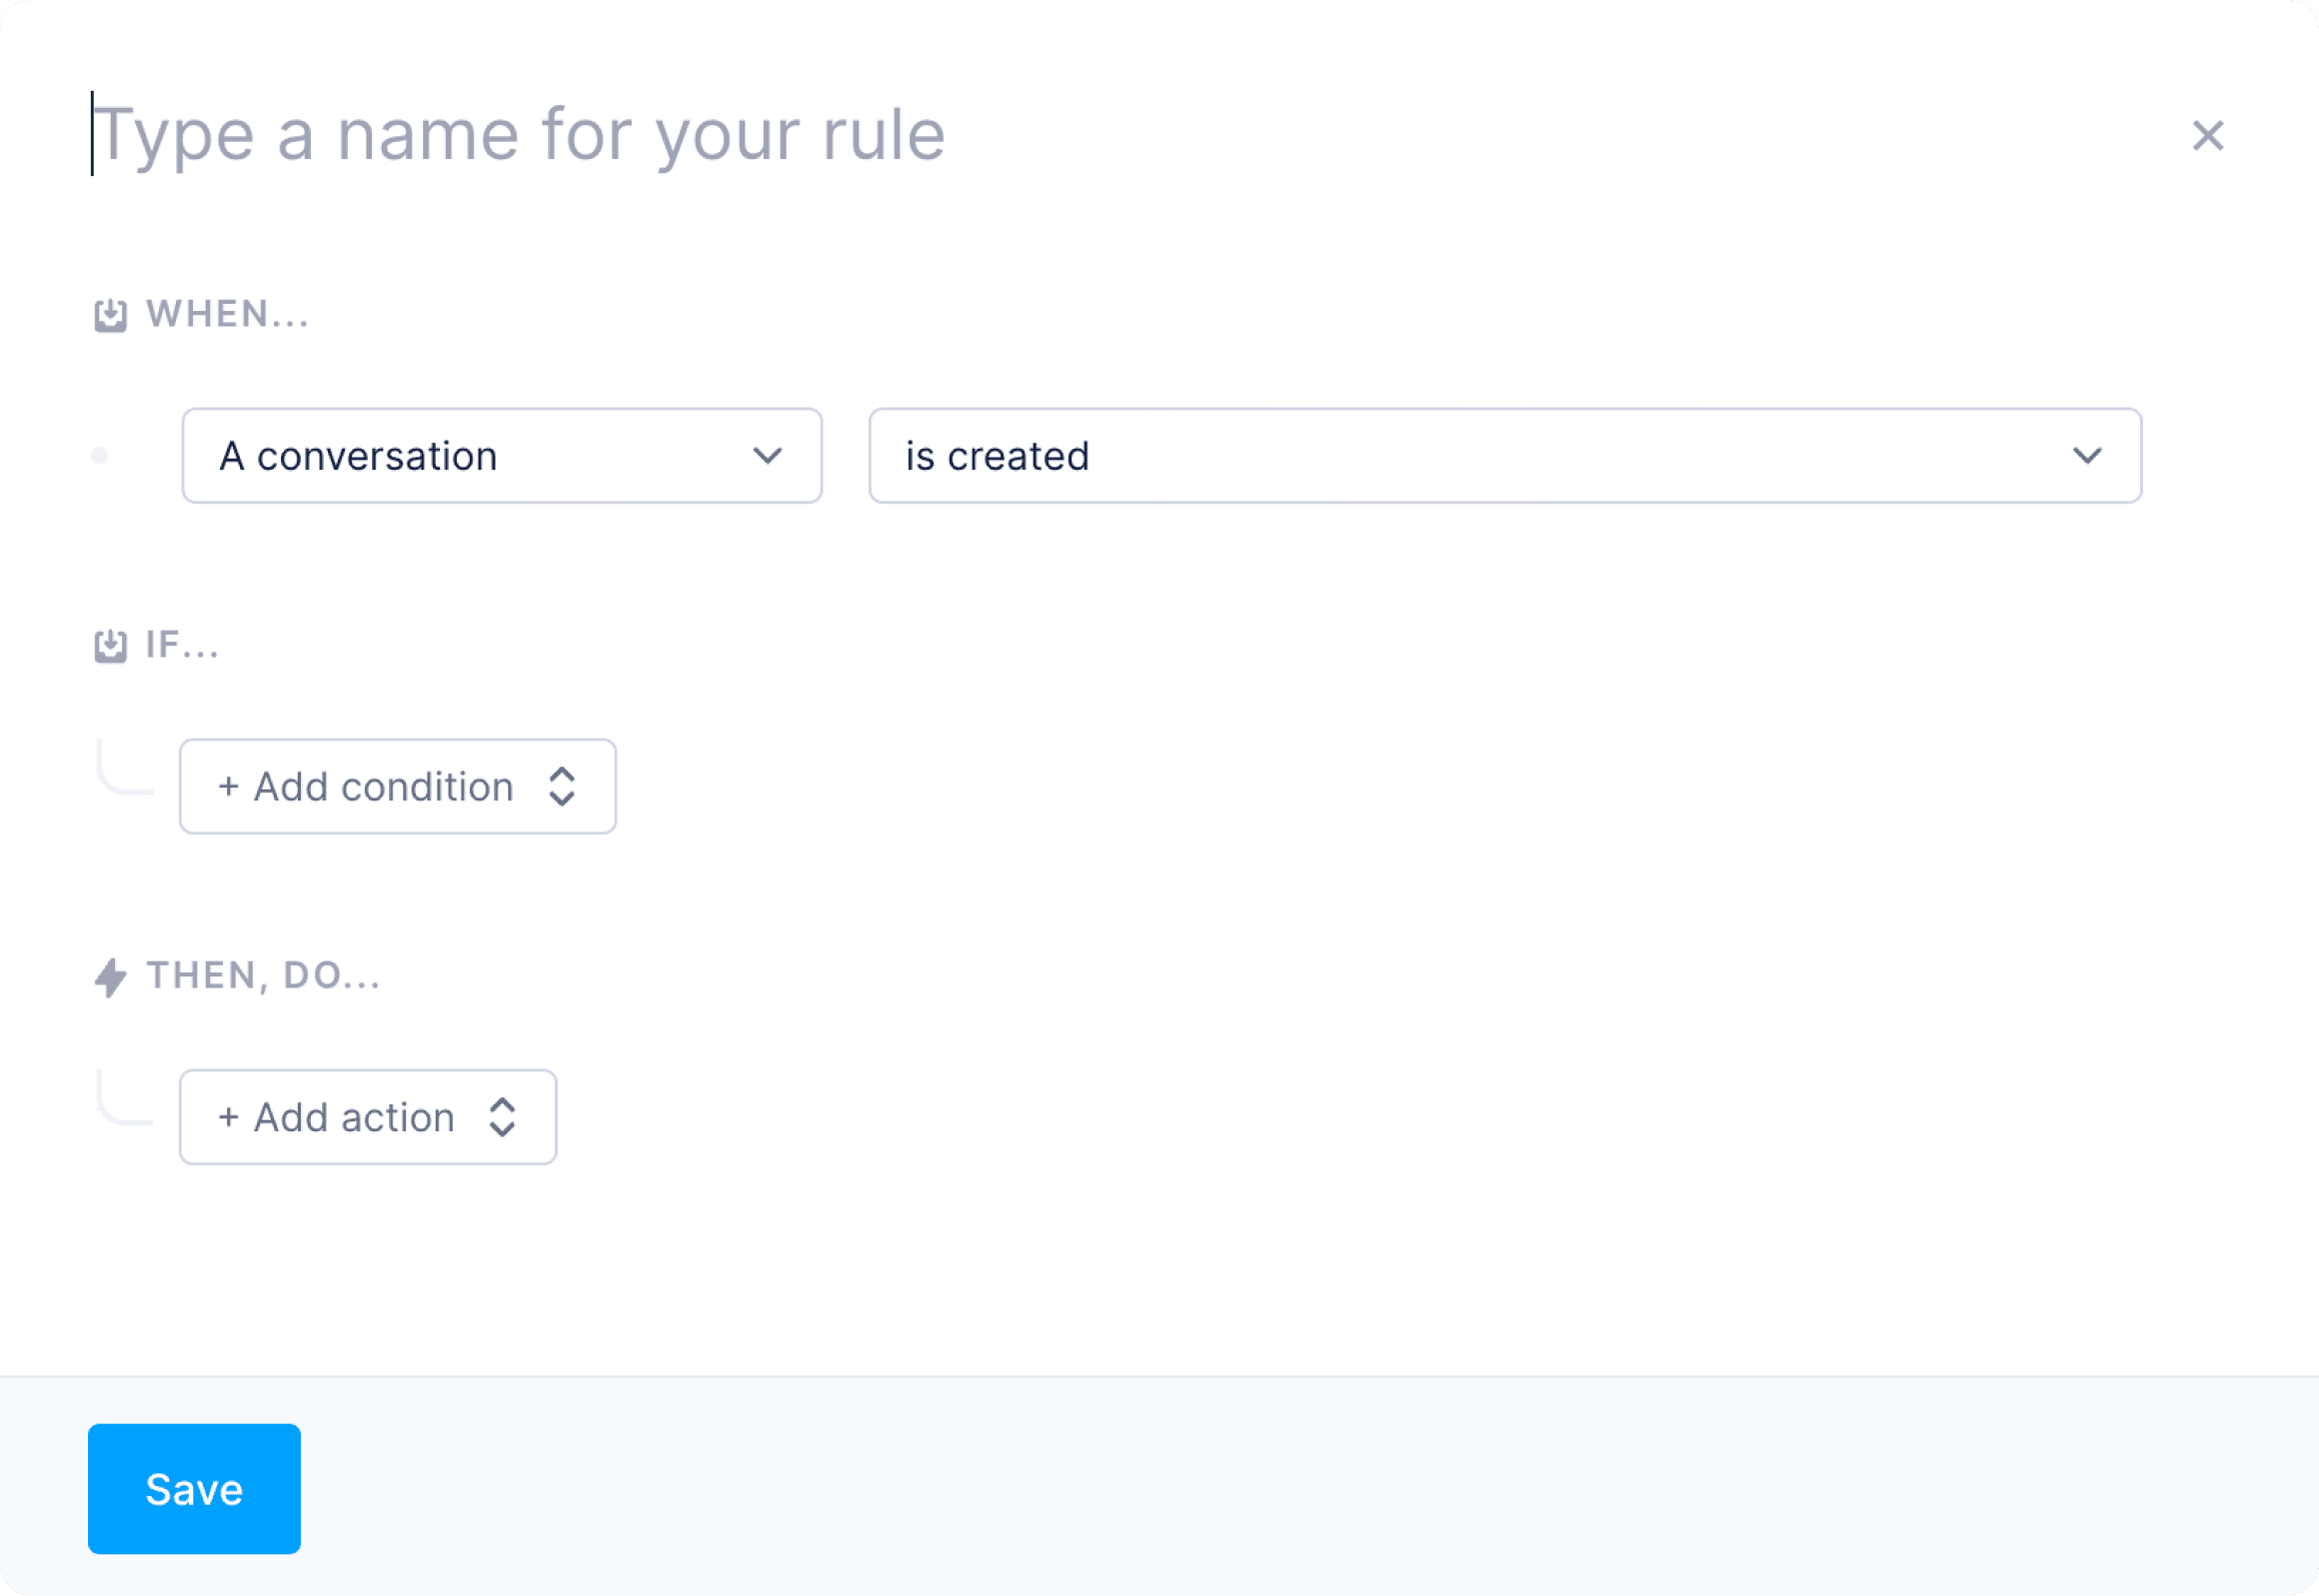
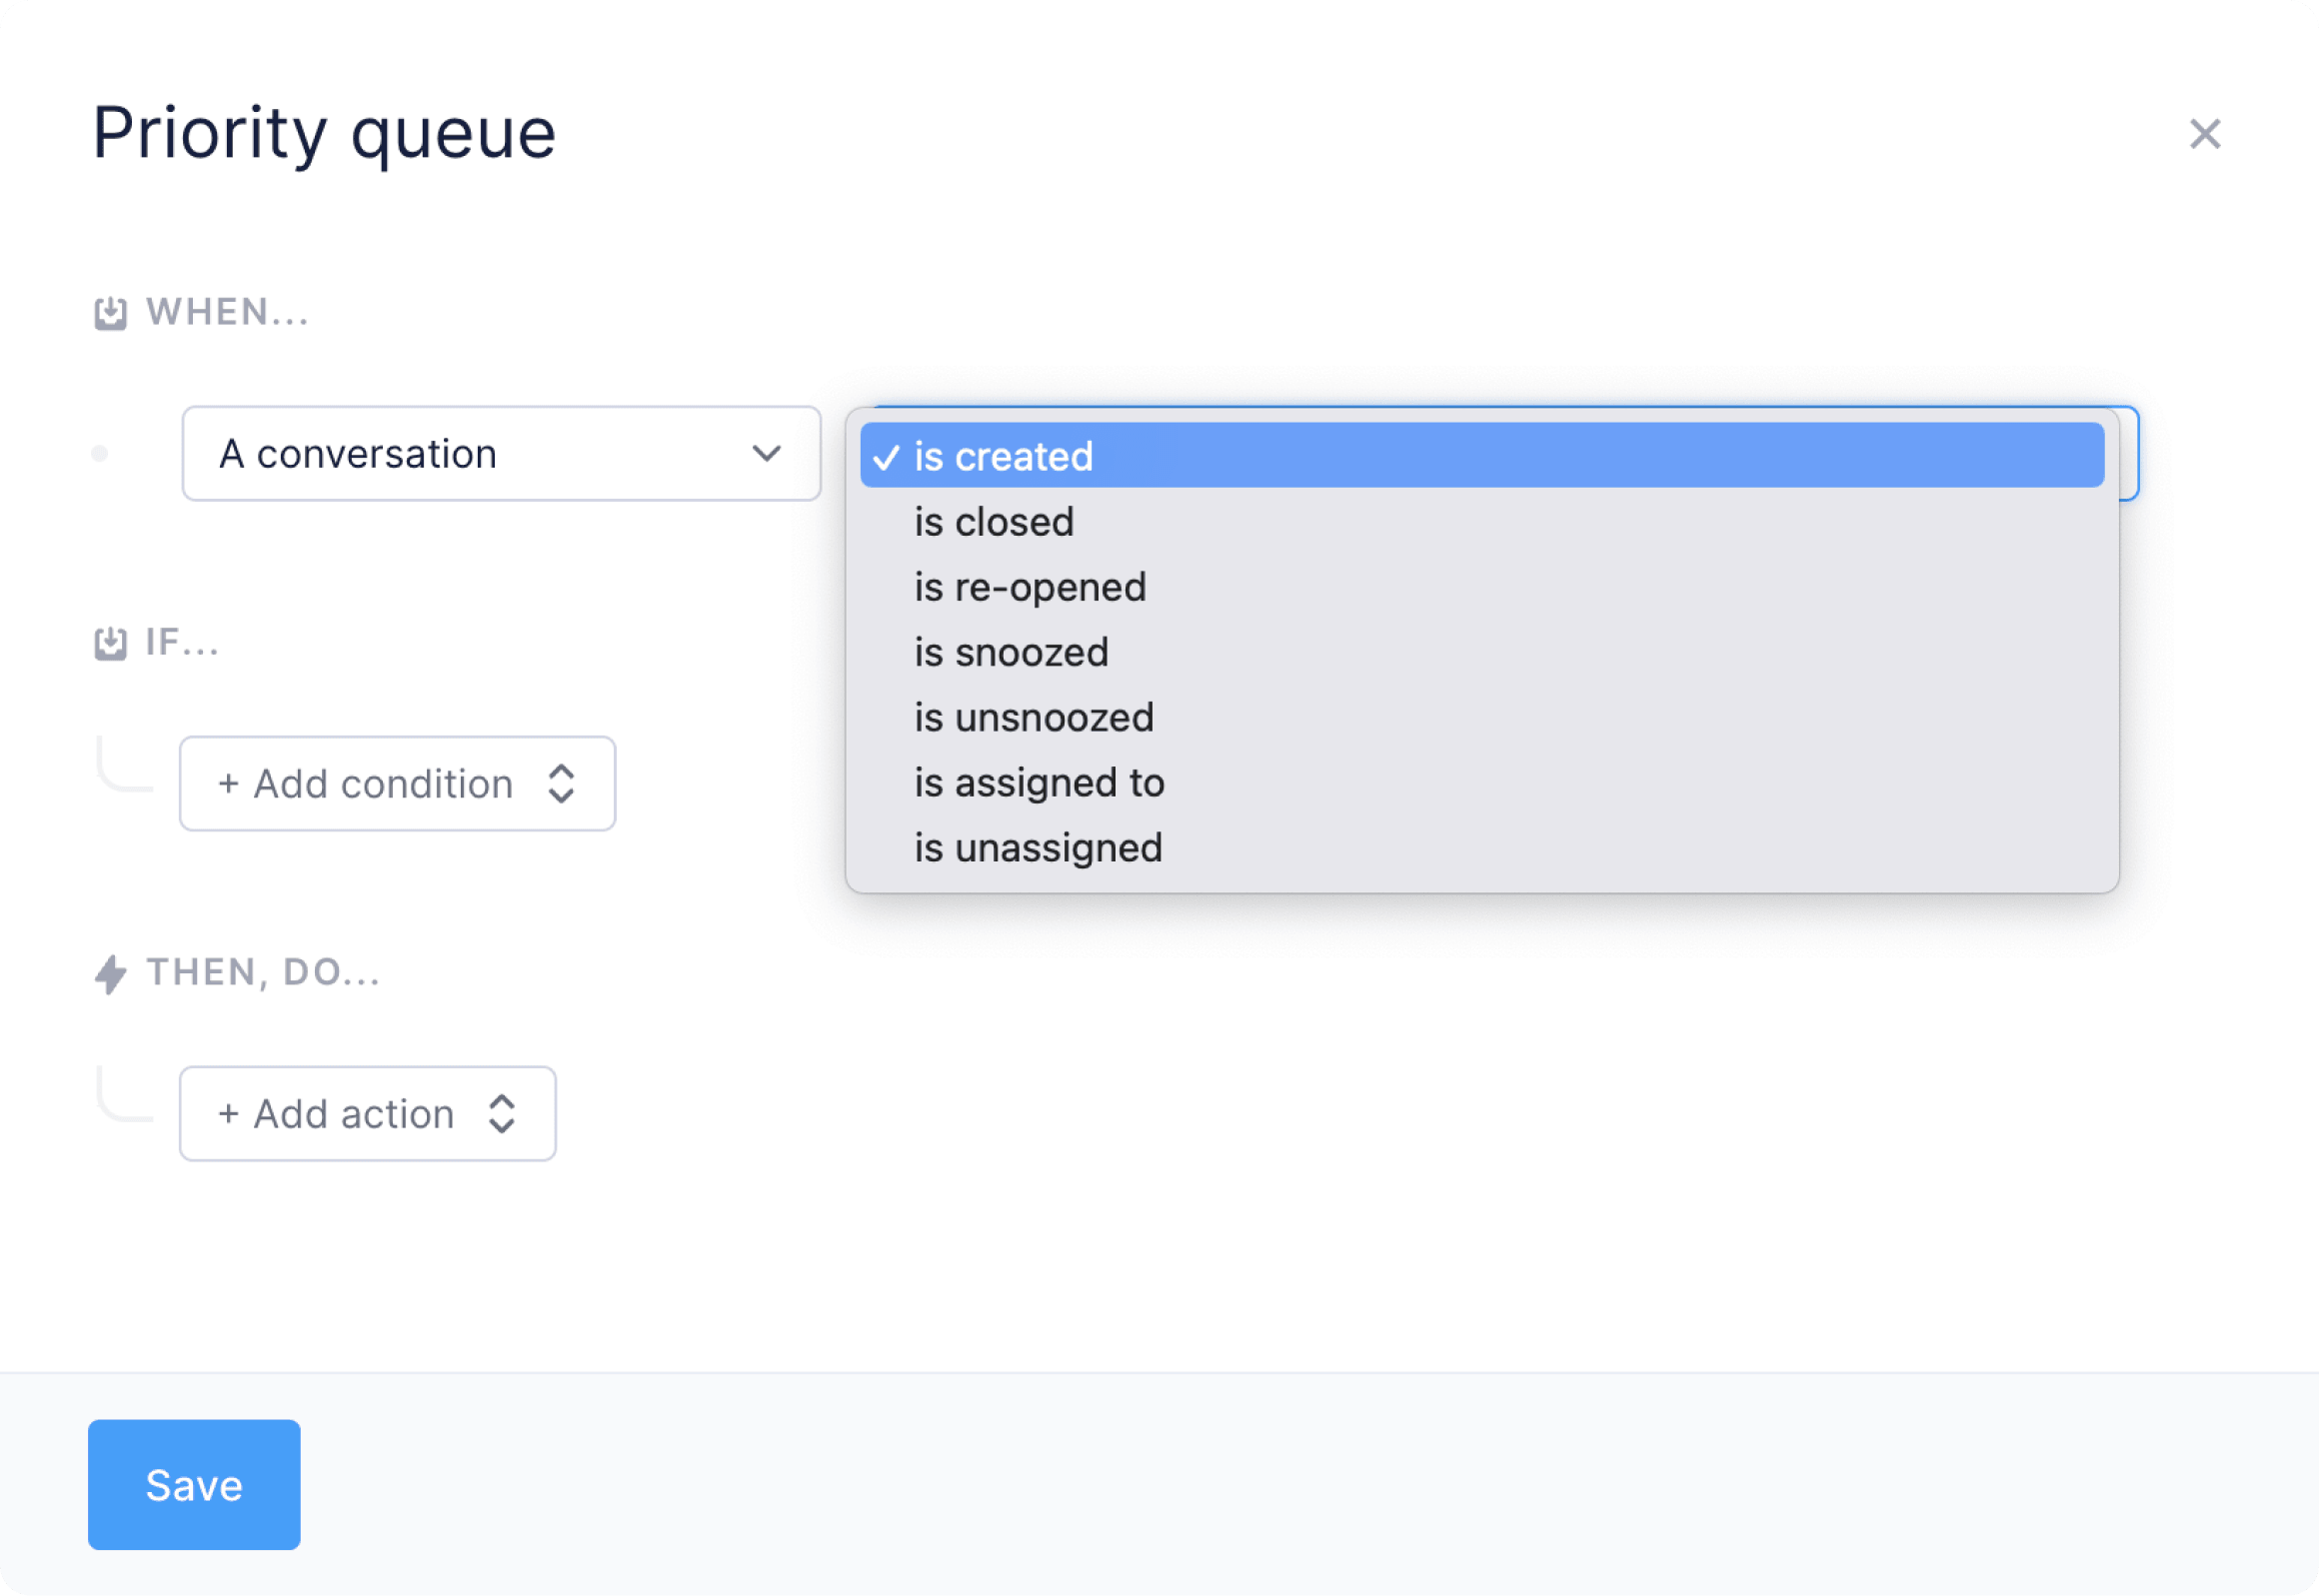
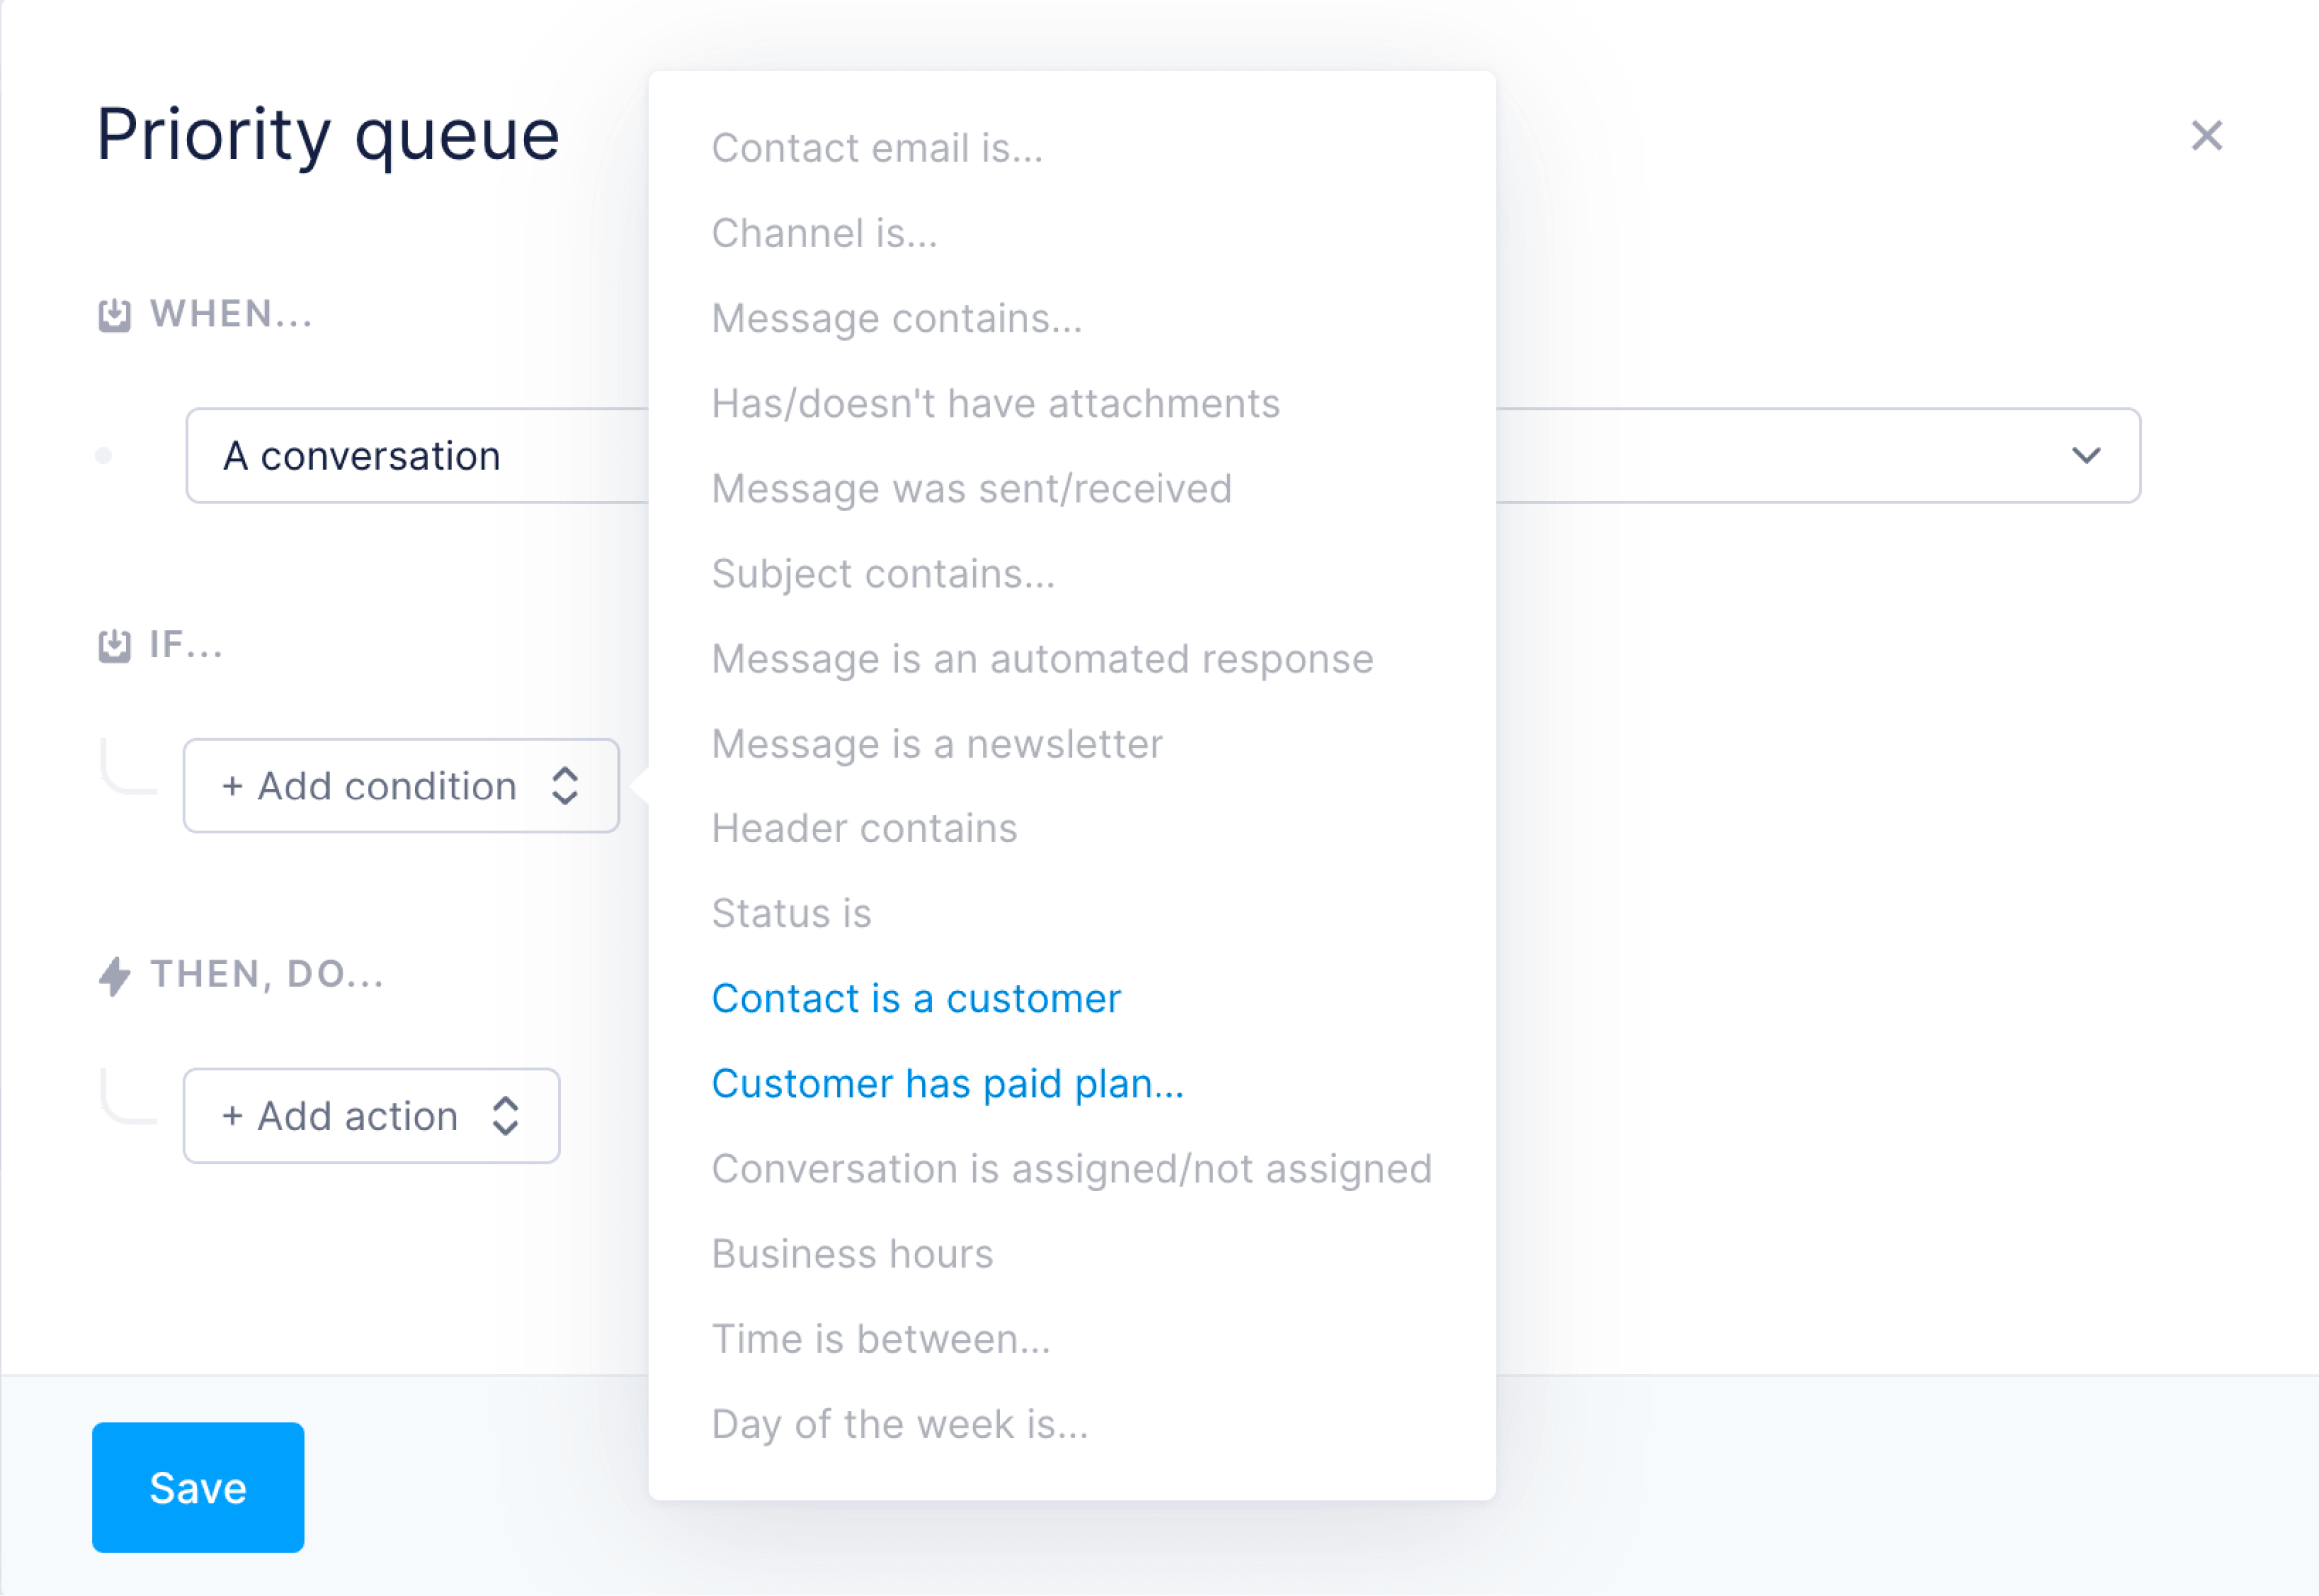
## How to automate your inbox with OurPay data
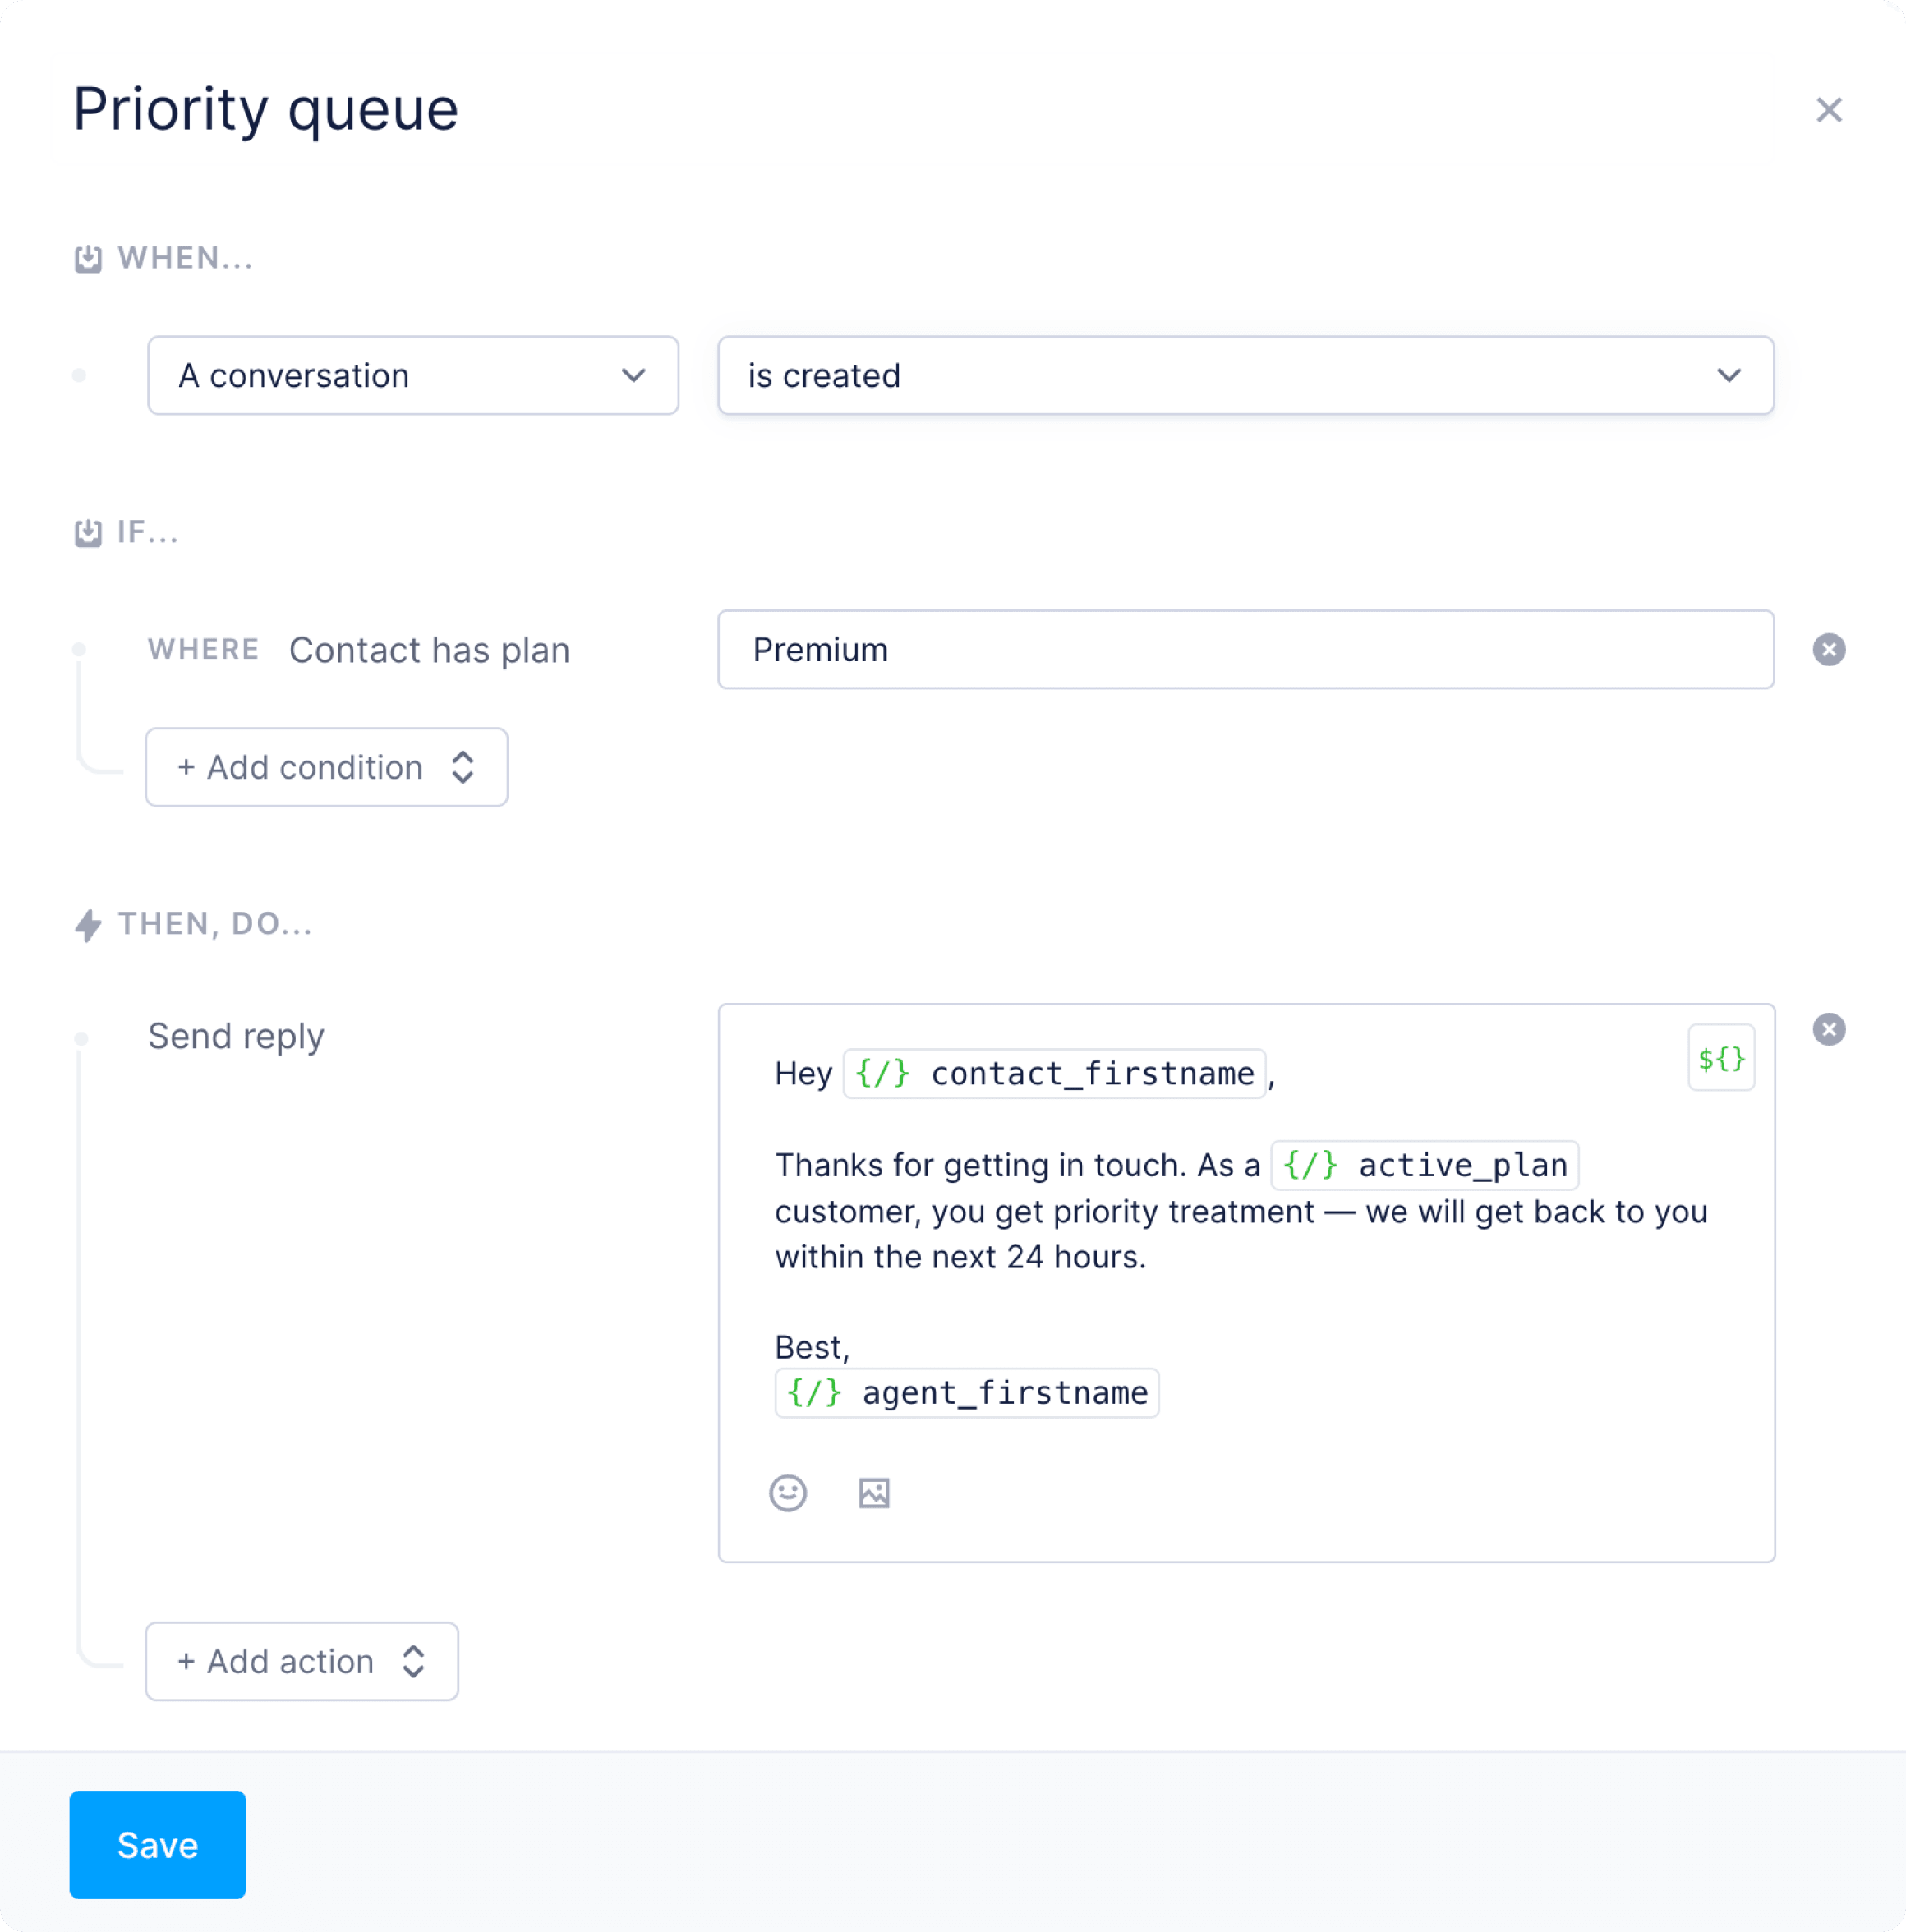
Once OurPay is connected, you can create automation rules in Fernand based on OurPay data.
Let’s walk through a basic example: auto-replying to all customers on your `Pro` plan.
1. Open [Integrations](https://app.getfernand.com/settings/organization/integrations) in your Fernand organization settings.
2. Click on **Connect OurPay**.
3. You'll be redirected to OurPay to authorize the connection.
4. Once approved, Fernand will begin syncing customer data automatically.
That’s it! You’ll now see OurPay customer info directly in Fernand's conversation list and sidebar.
---
## How to automate your inbox with OurPay data
Once OurPay is connected, you can create automation rules in Fernand based on OurPay data.
Let’s walk through a basic example: auto-replying to all customers on your `Pro` plan.
 ### Create a new rule
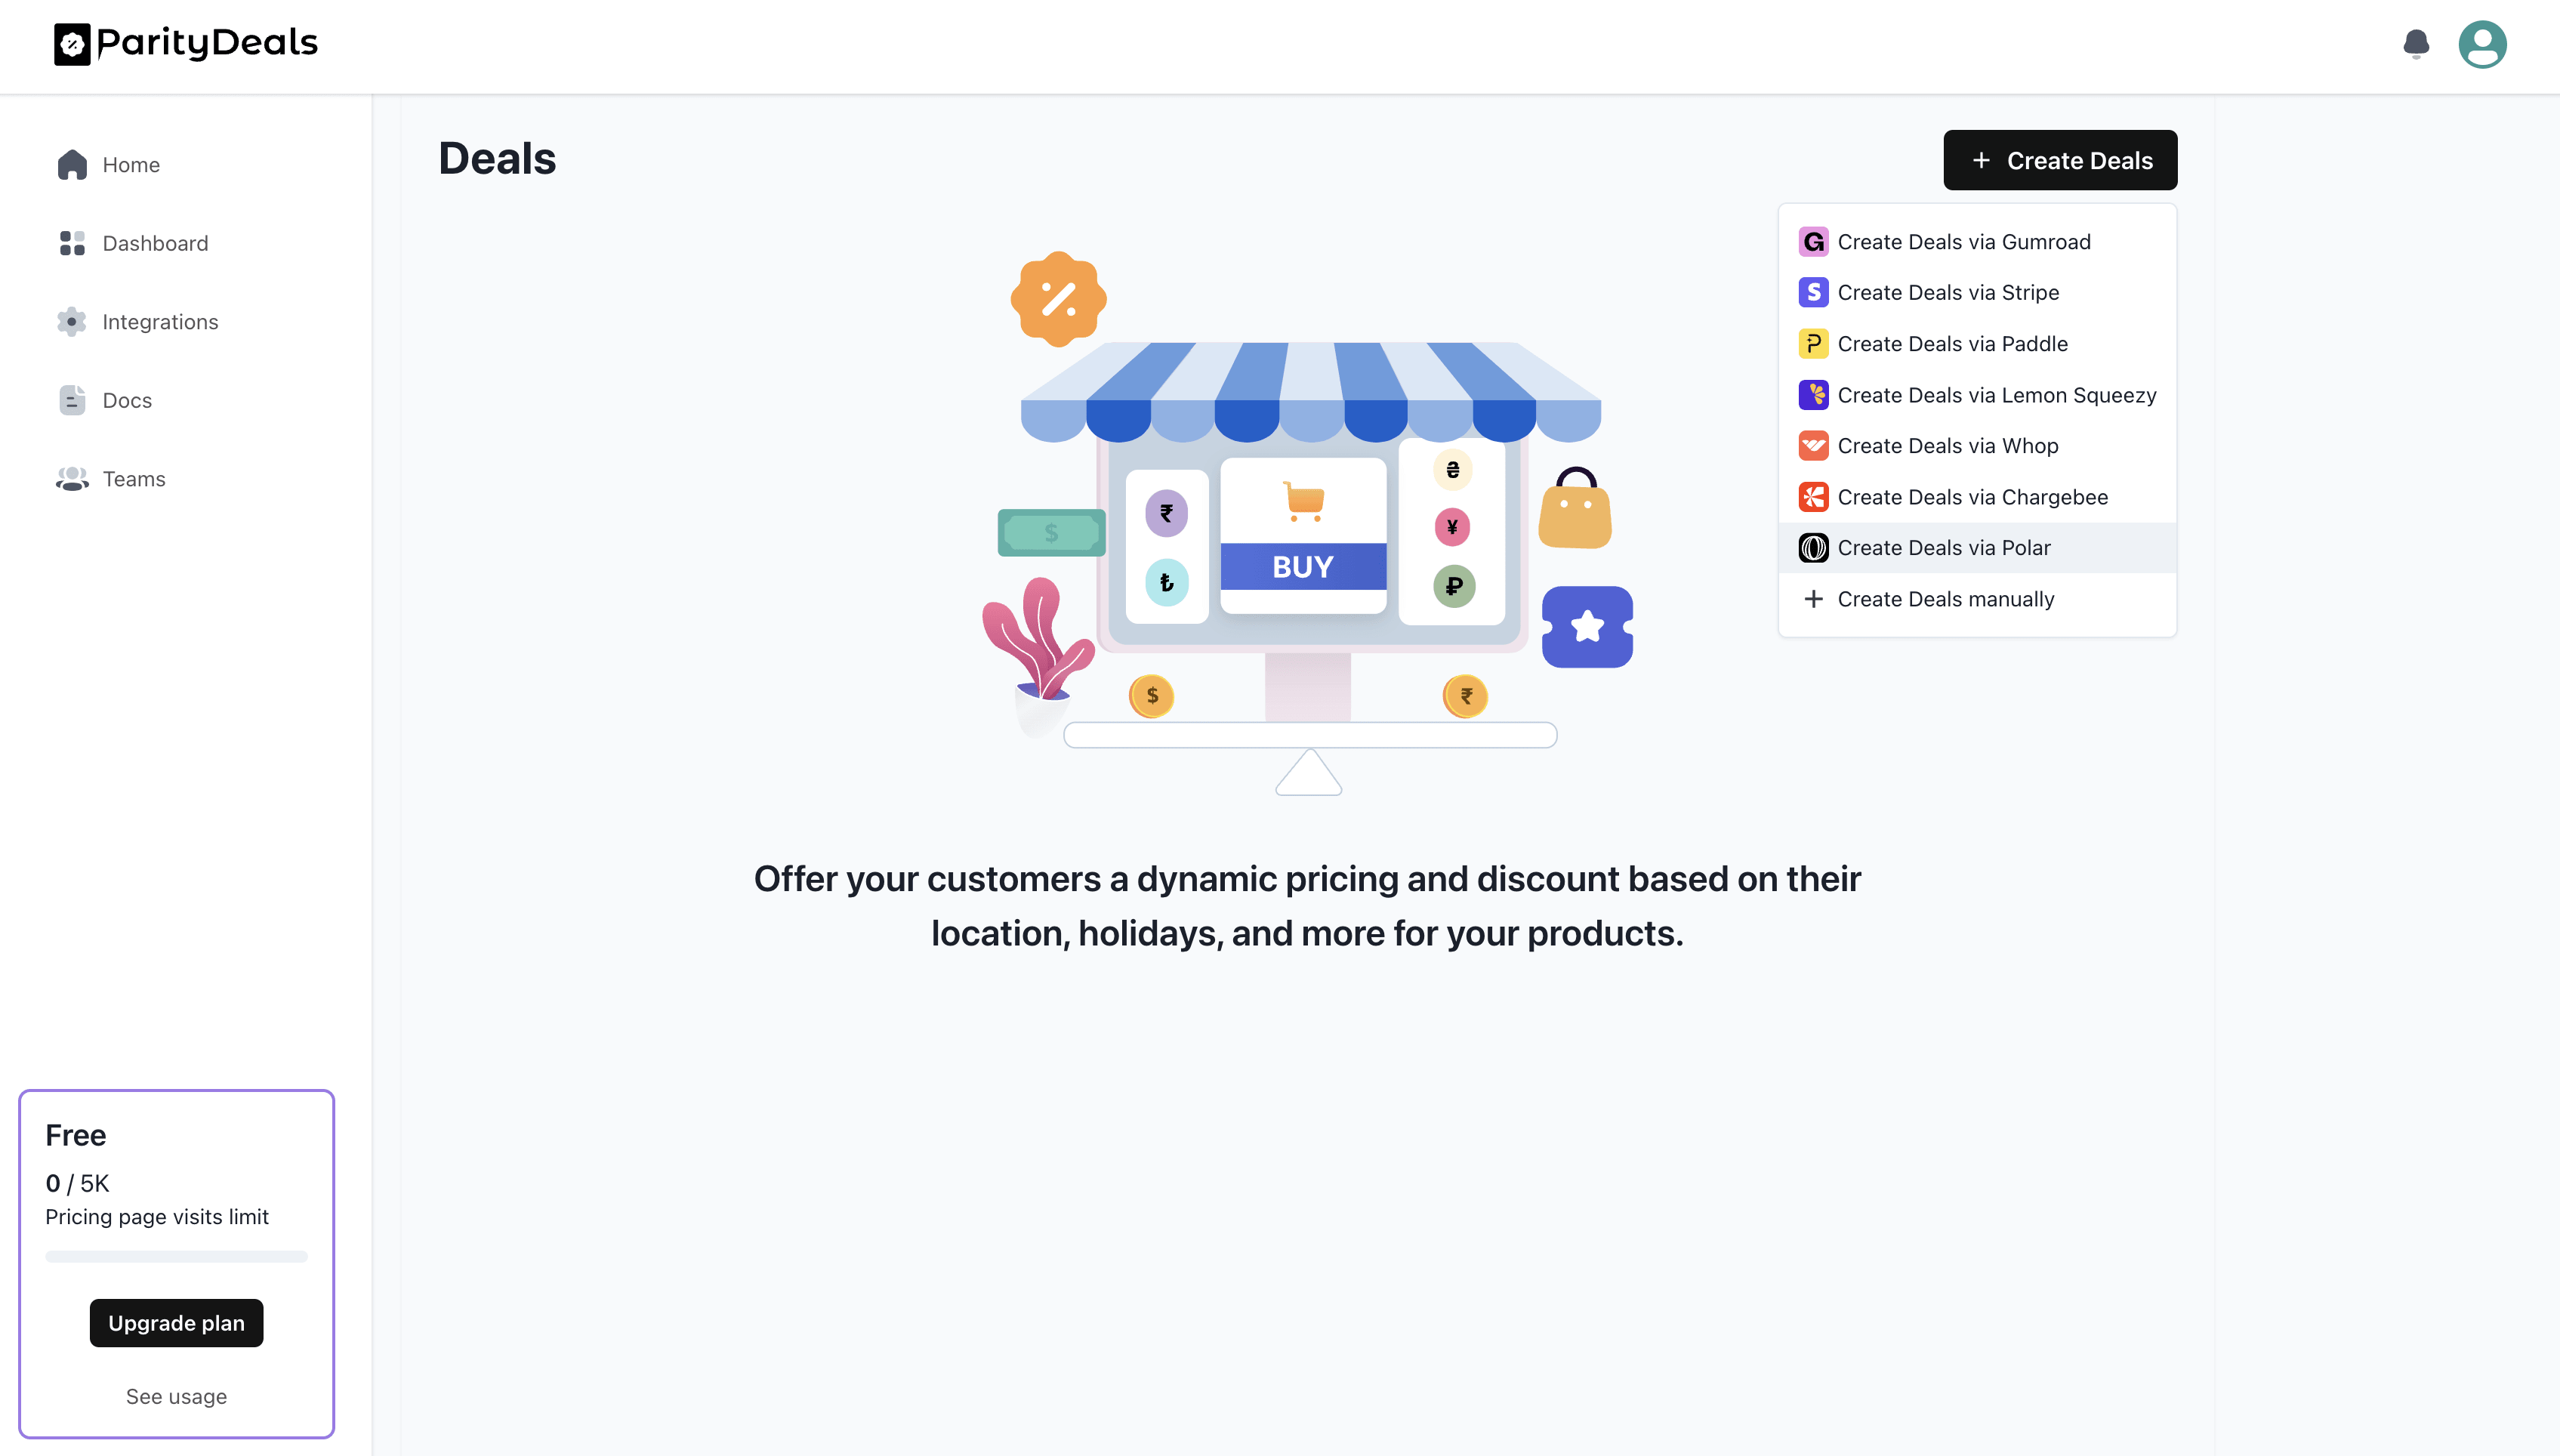 ### Grant ParityDeals Access (OAuth 2.0)
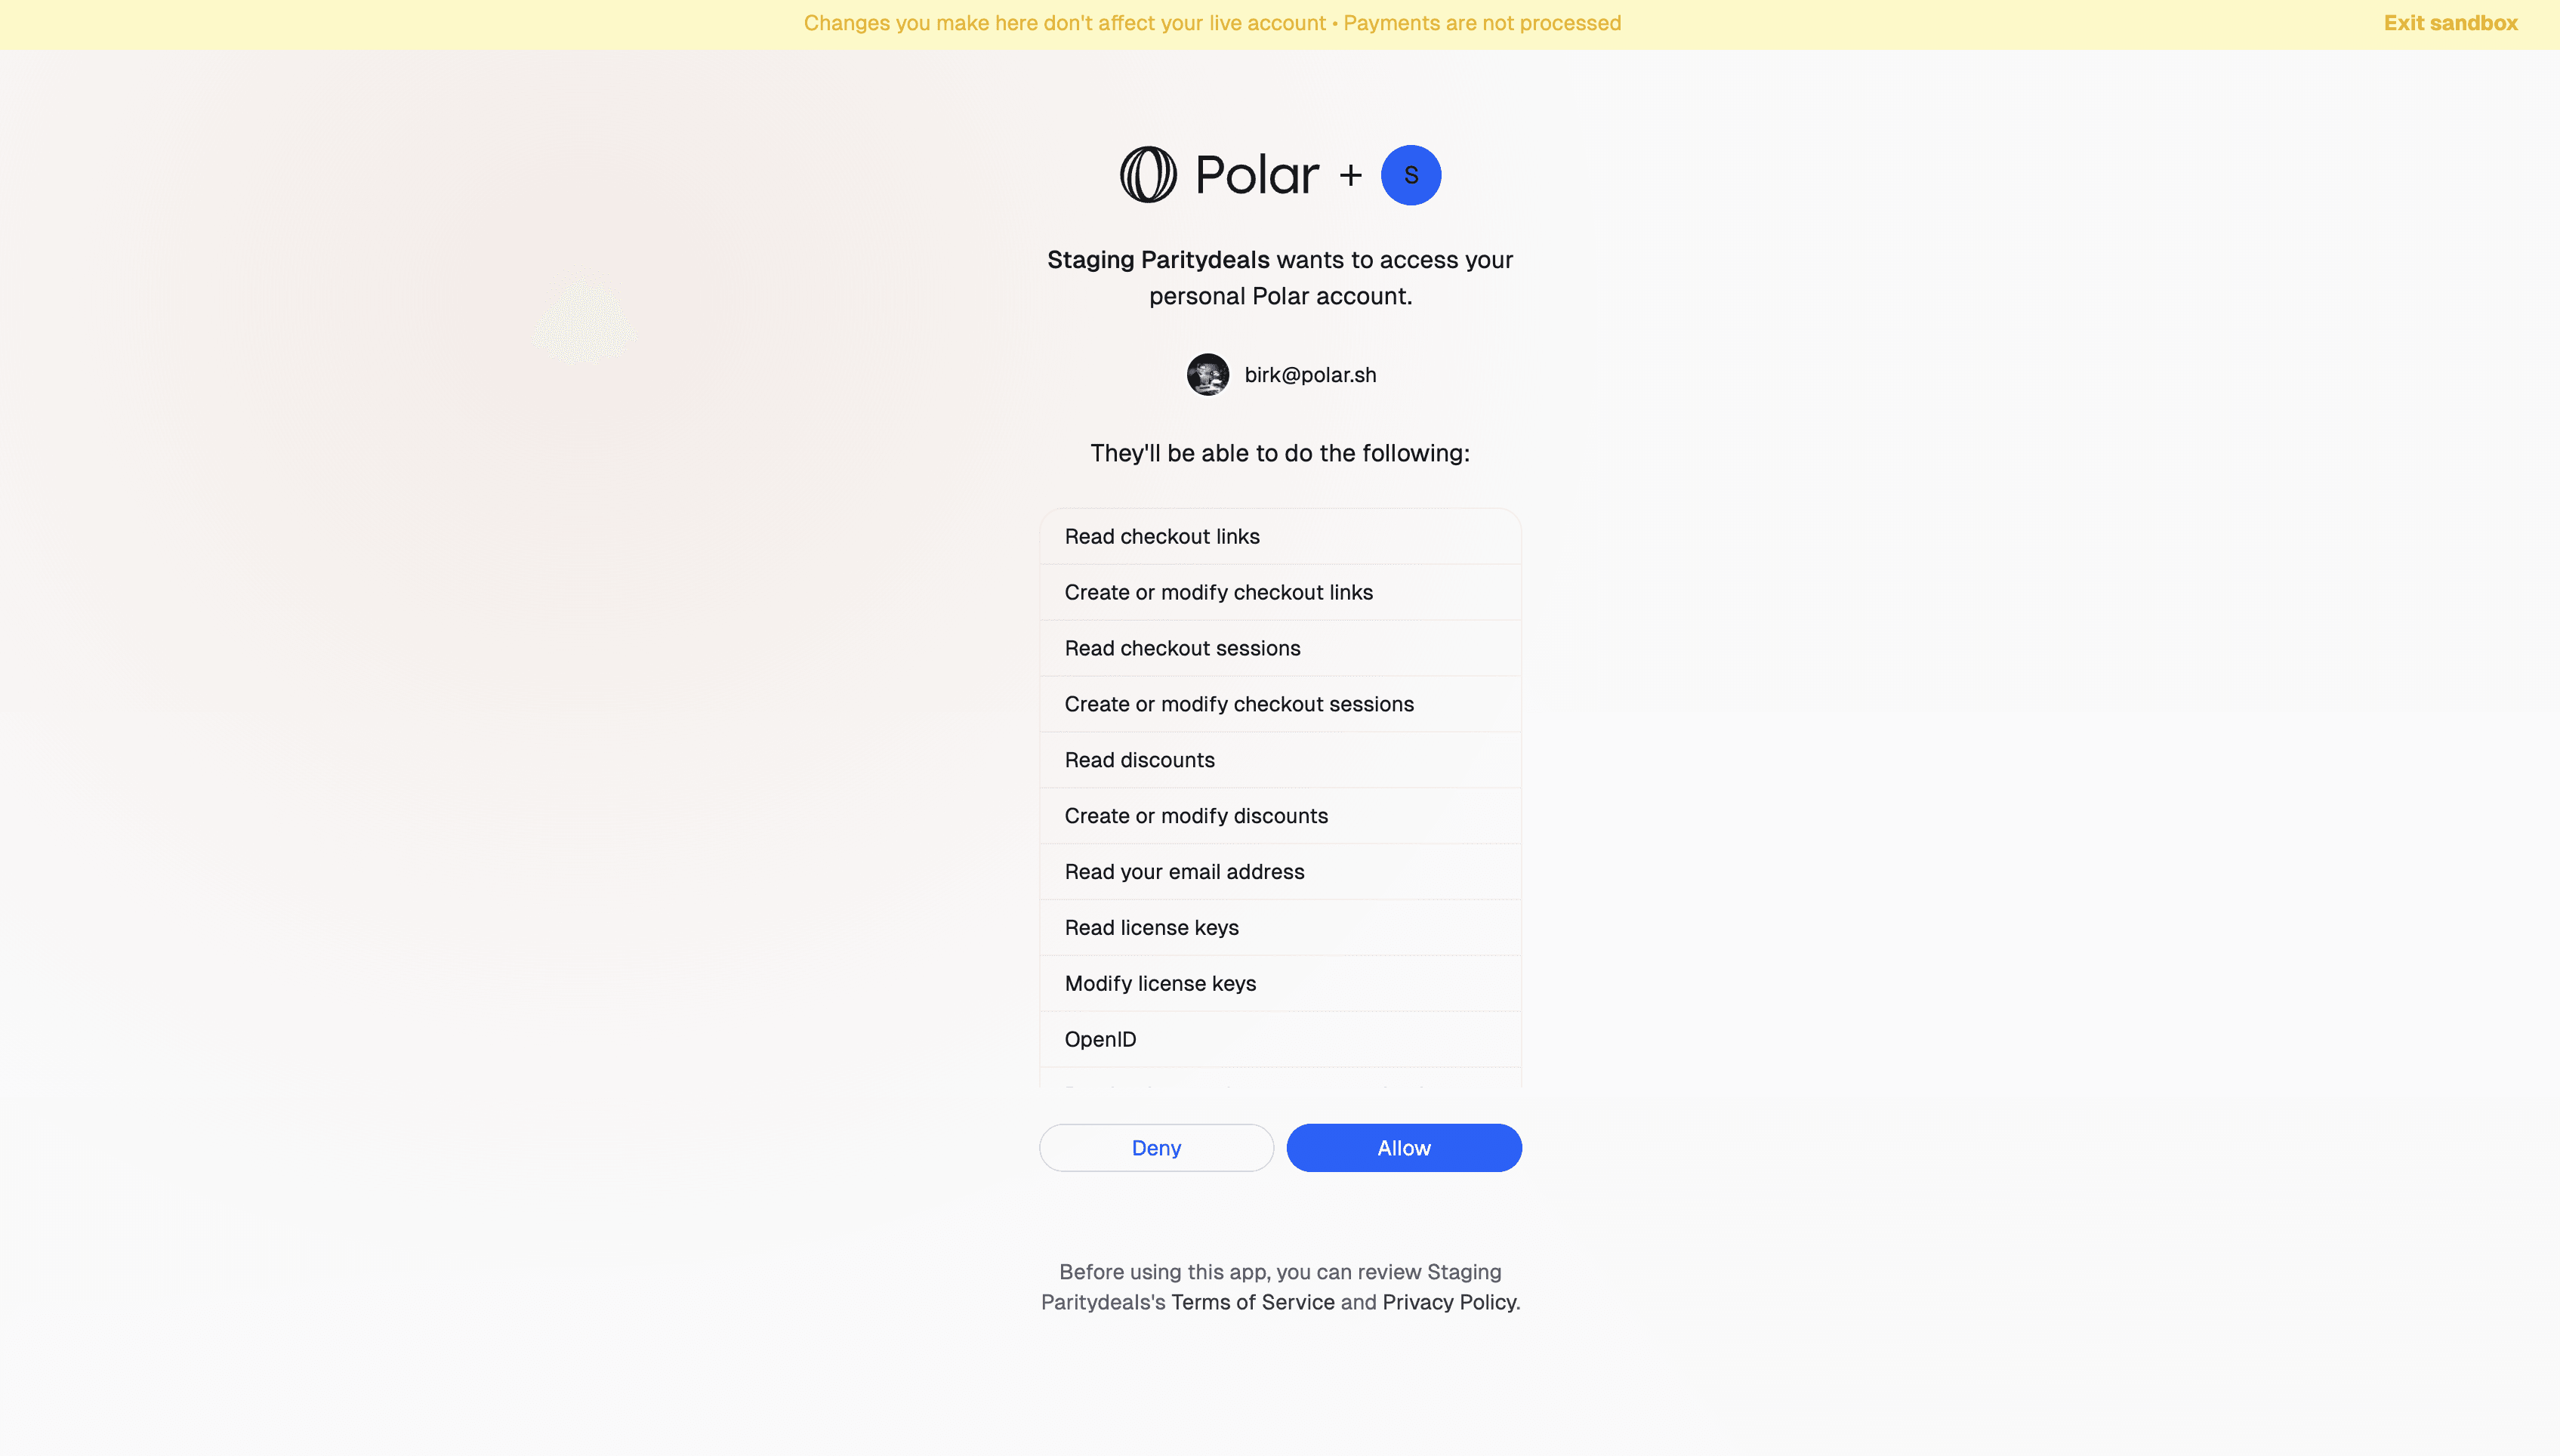
No need to create API access keys and share them externally. Just connect securely and grant the necessary permissions using OurPay OAuth 2.0.
### Grant ParityDeals Access (OAuth 2.0)
No need to create API access keys and share them externally. Just connect securely and grant the necessary permissions using OurPay OAuth 2.0.
 ### Choose Products
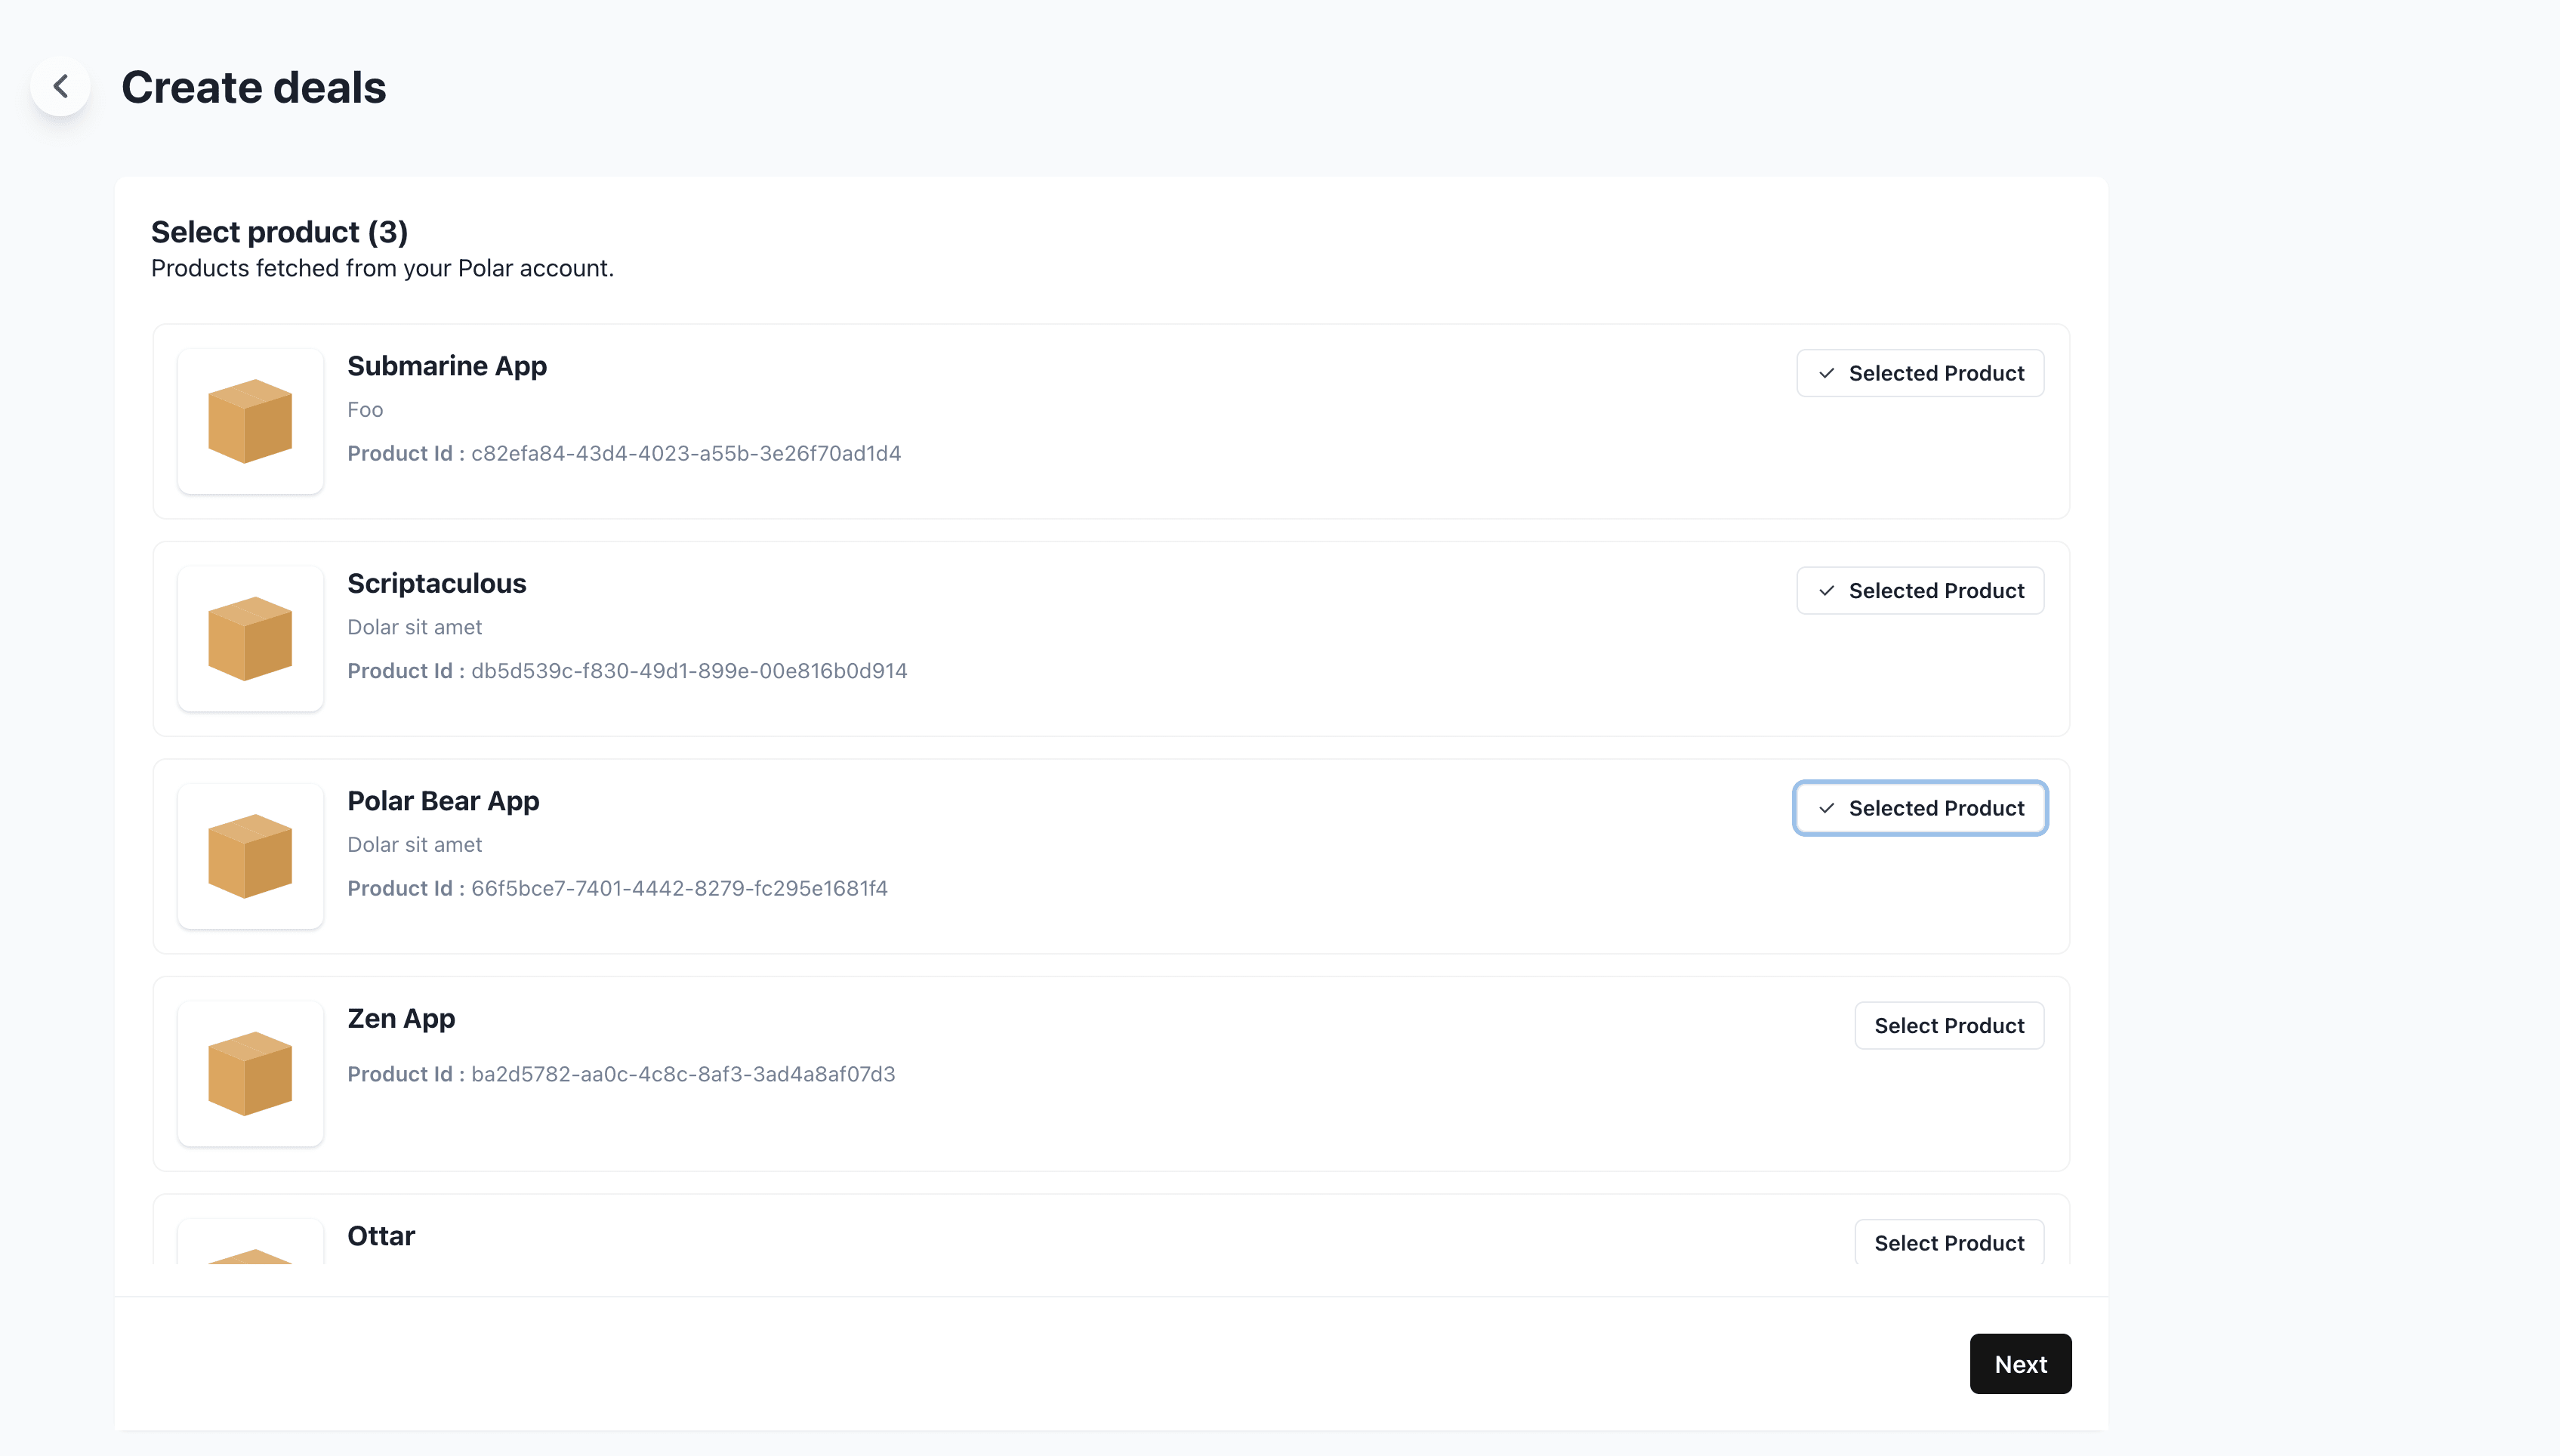
Now, let's select the OurPay products you want to offer deals for.
### Choose Products
Now, let's select the OurPay products you want to offer deals for.
 ### Configure Deals
Let's configure our deal settings.
* Enter your website URL (requires your own site vs. OurPay storefront)
* Enter a targeted URL path, e.g `/pricing` to only show deals on that page
### Configure Deals
Let's configure our deal settings.
* Enter your website URL (requires your own site vs. OurPay storefront)
* Enter a targeted URL path, e.g `/pricing` to only show deals on that page
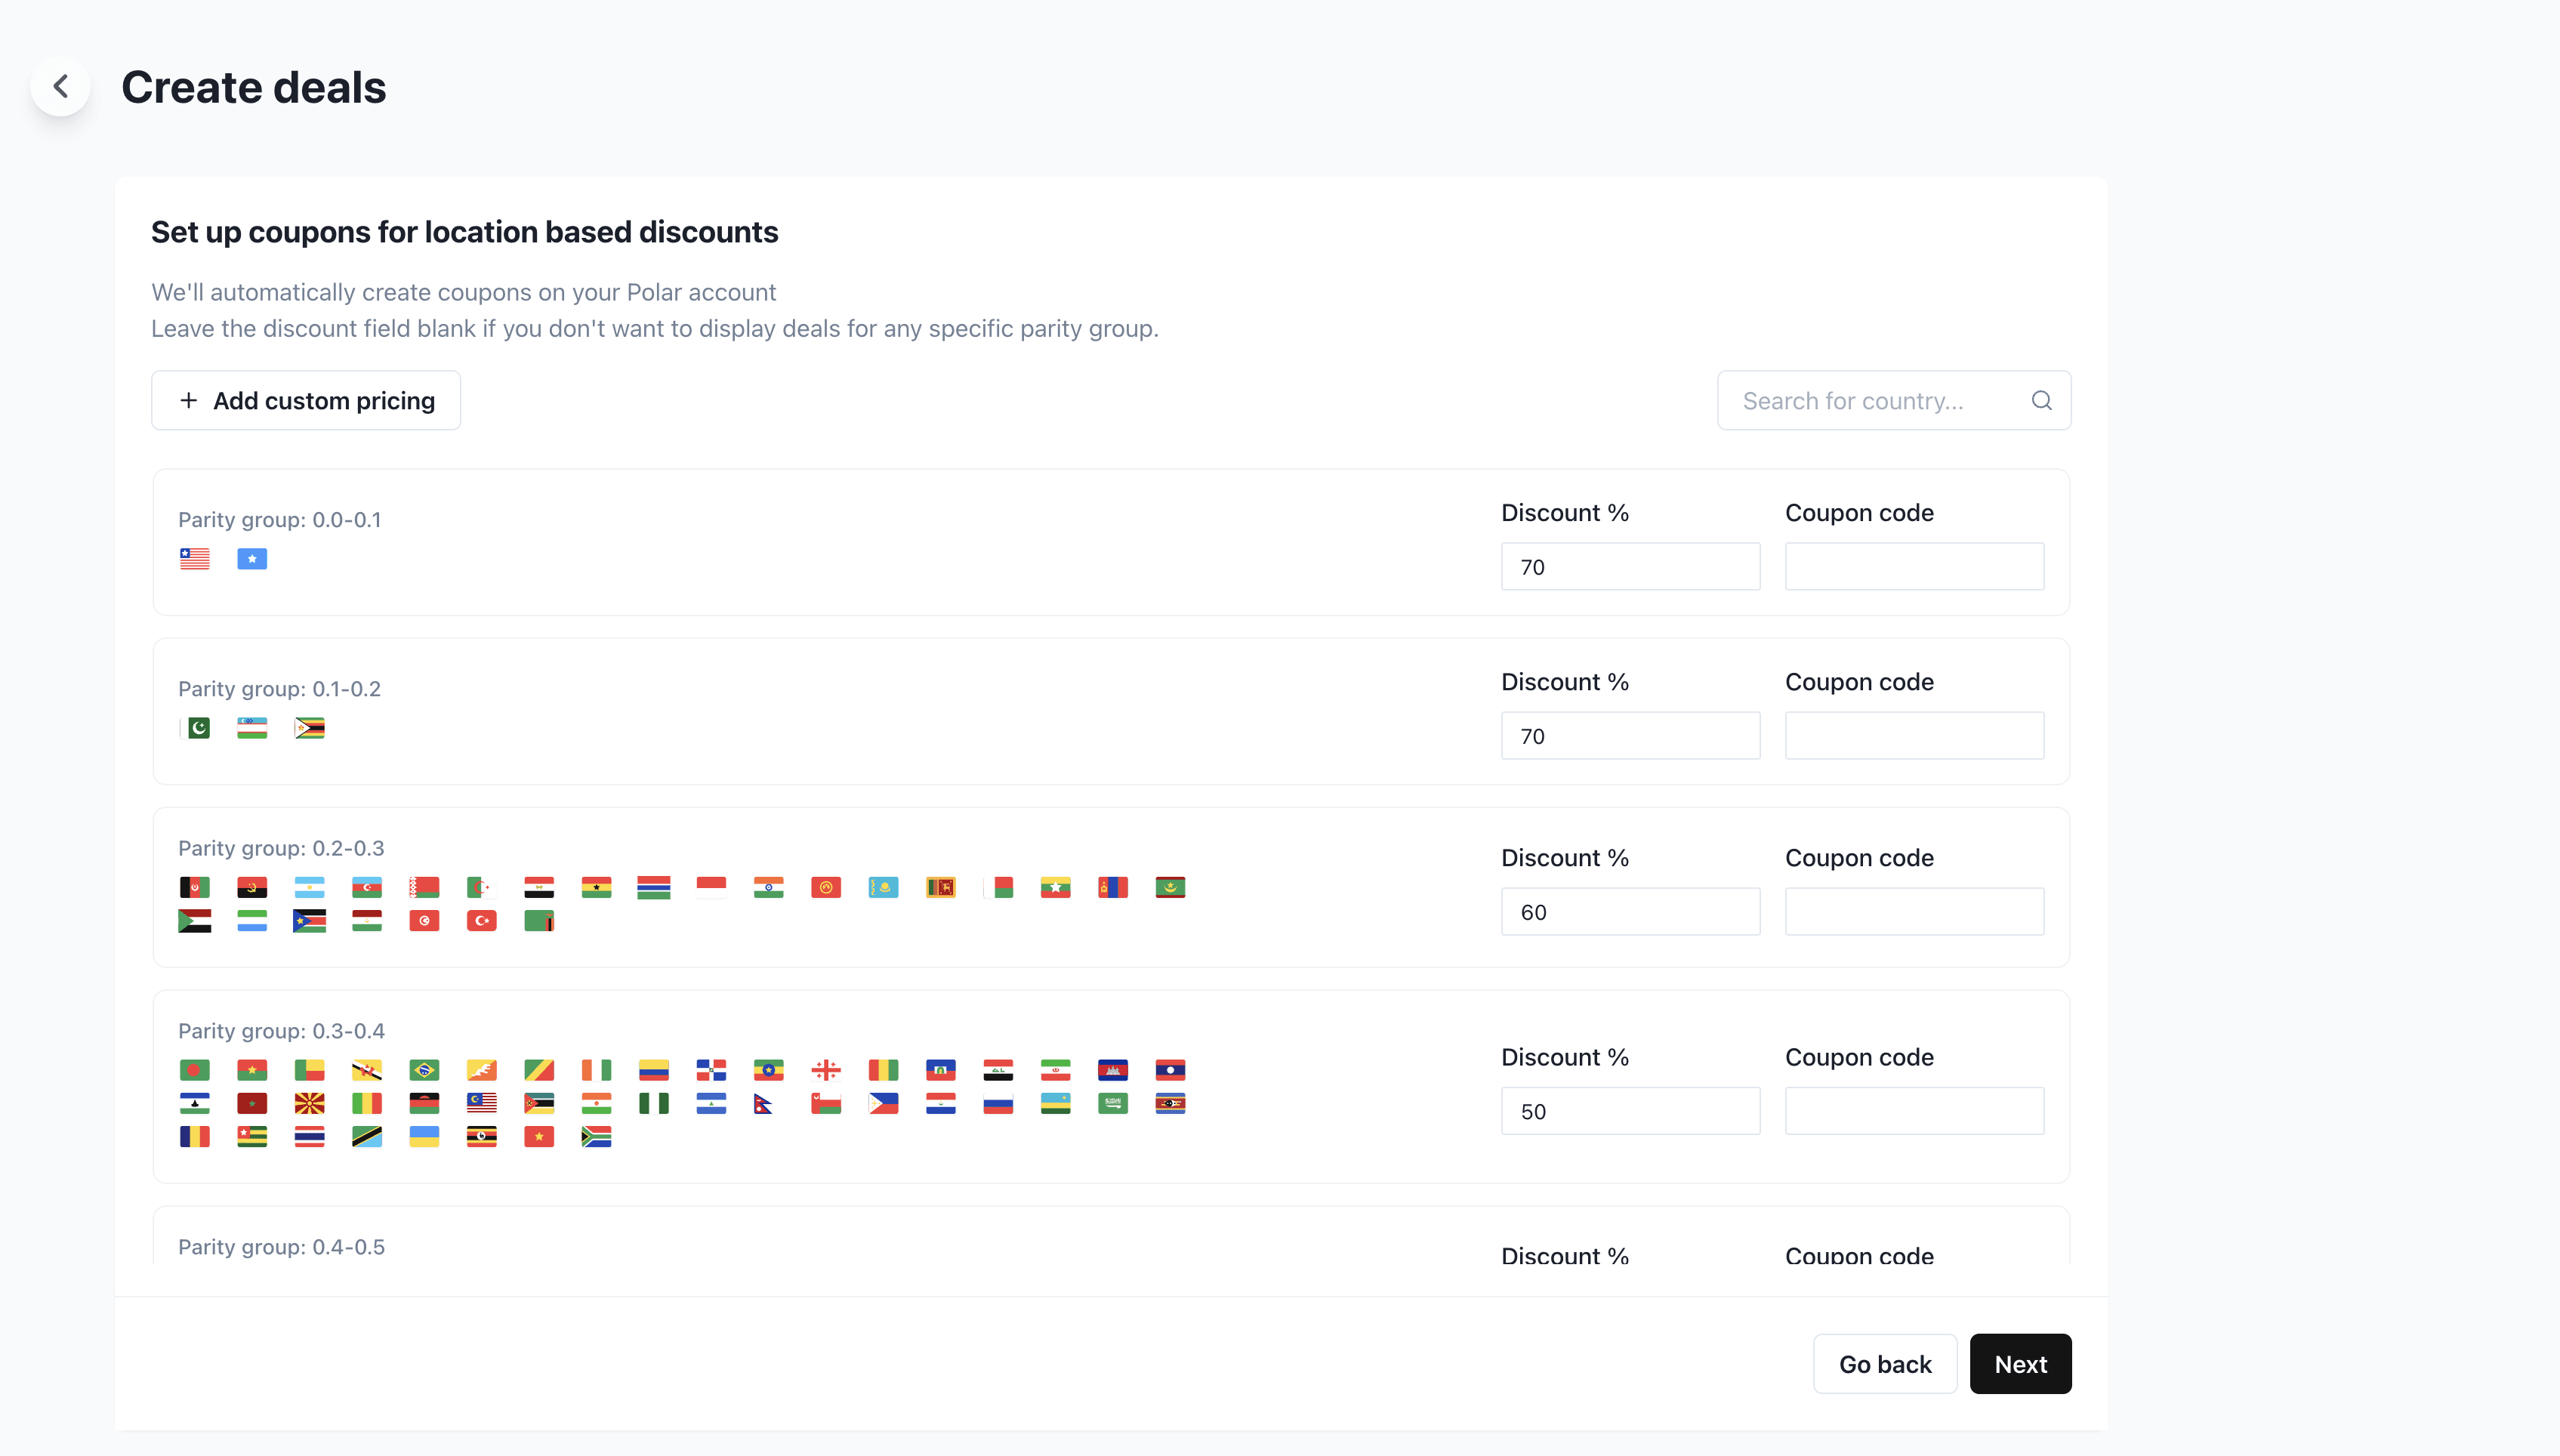
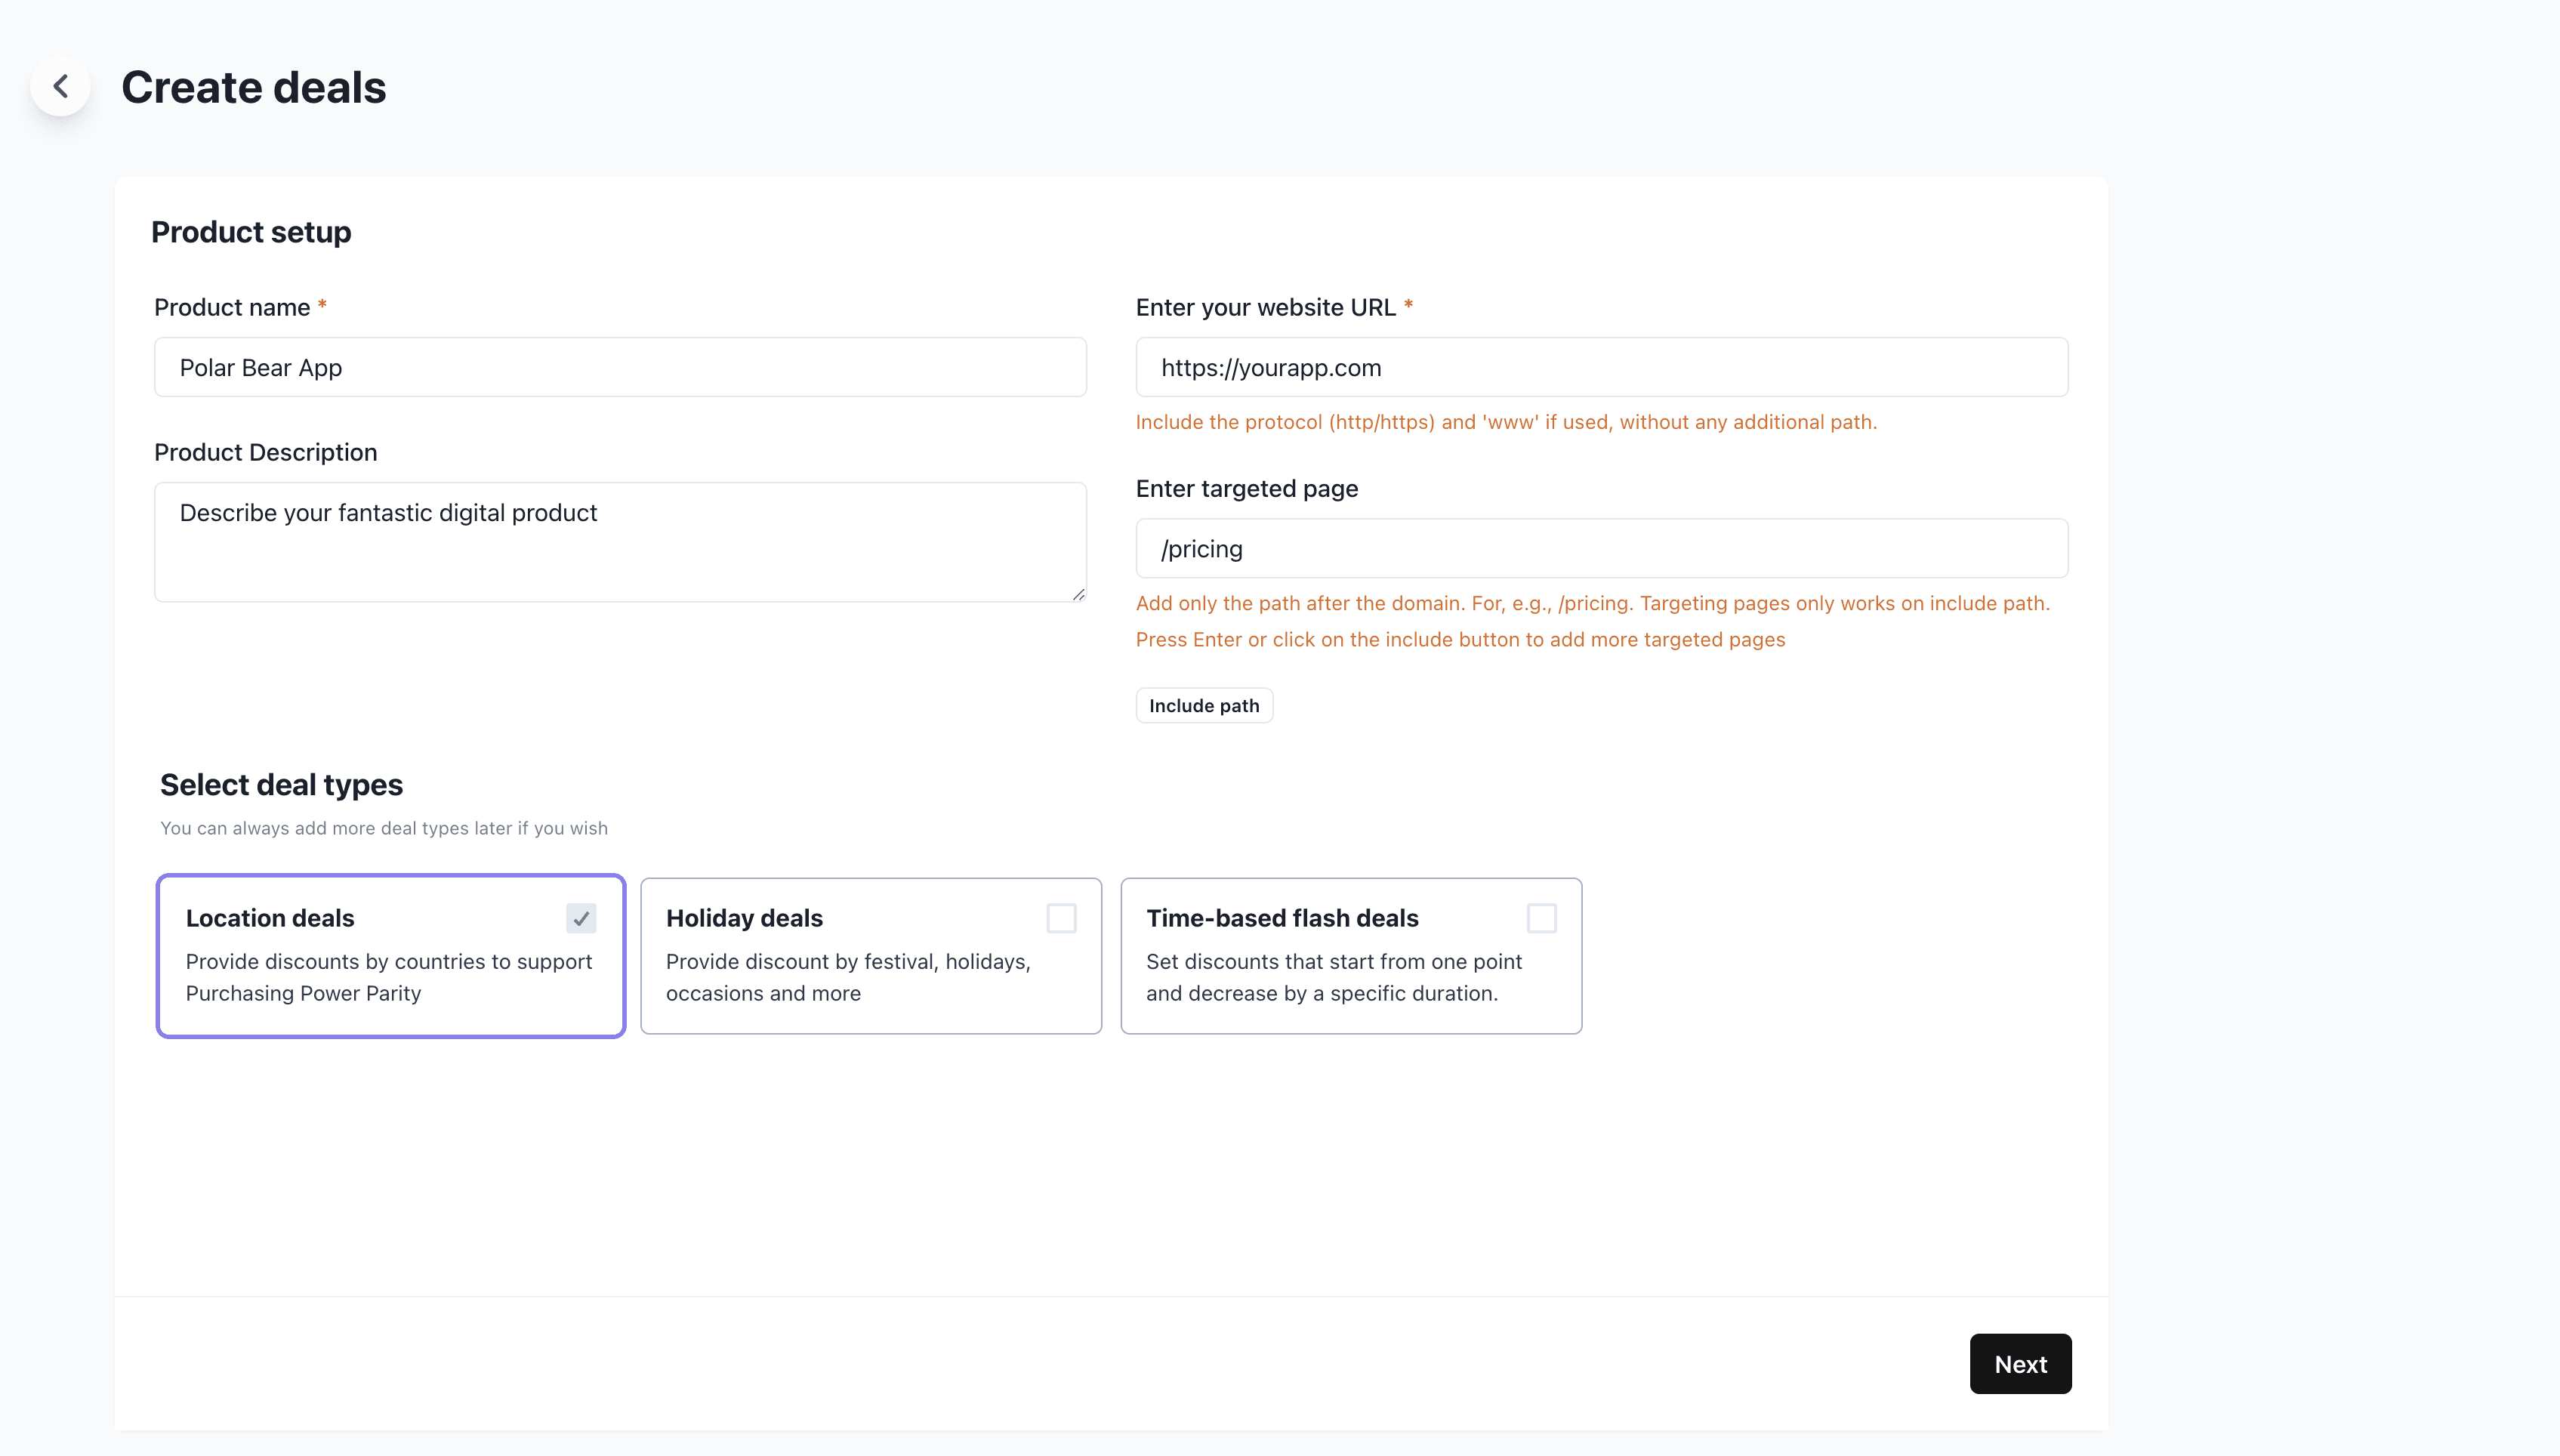 Now we can configure the deals for different countries. ParityDeals offers great defaults, but you can of course change them.
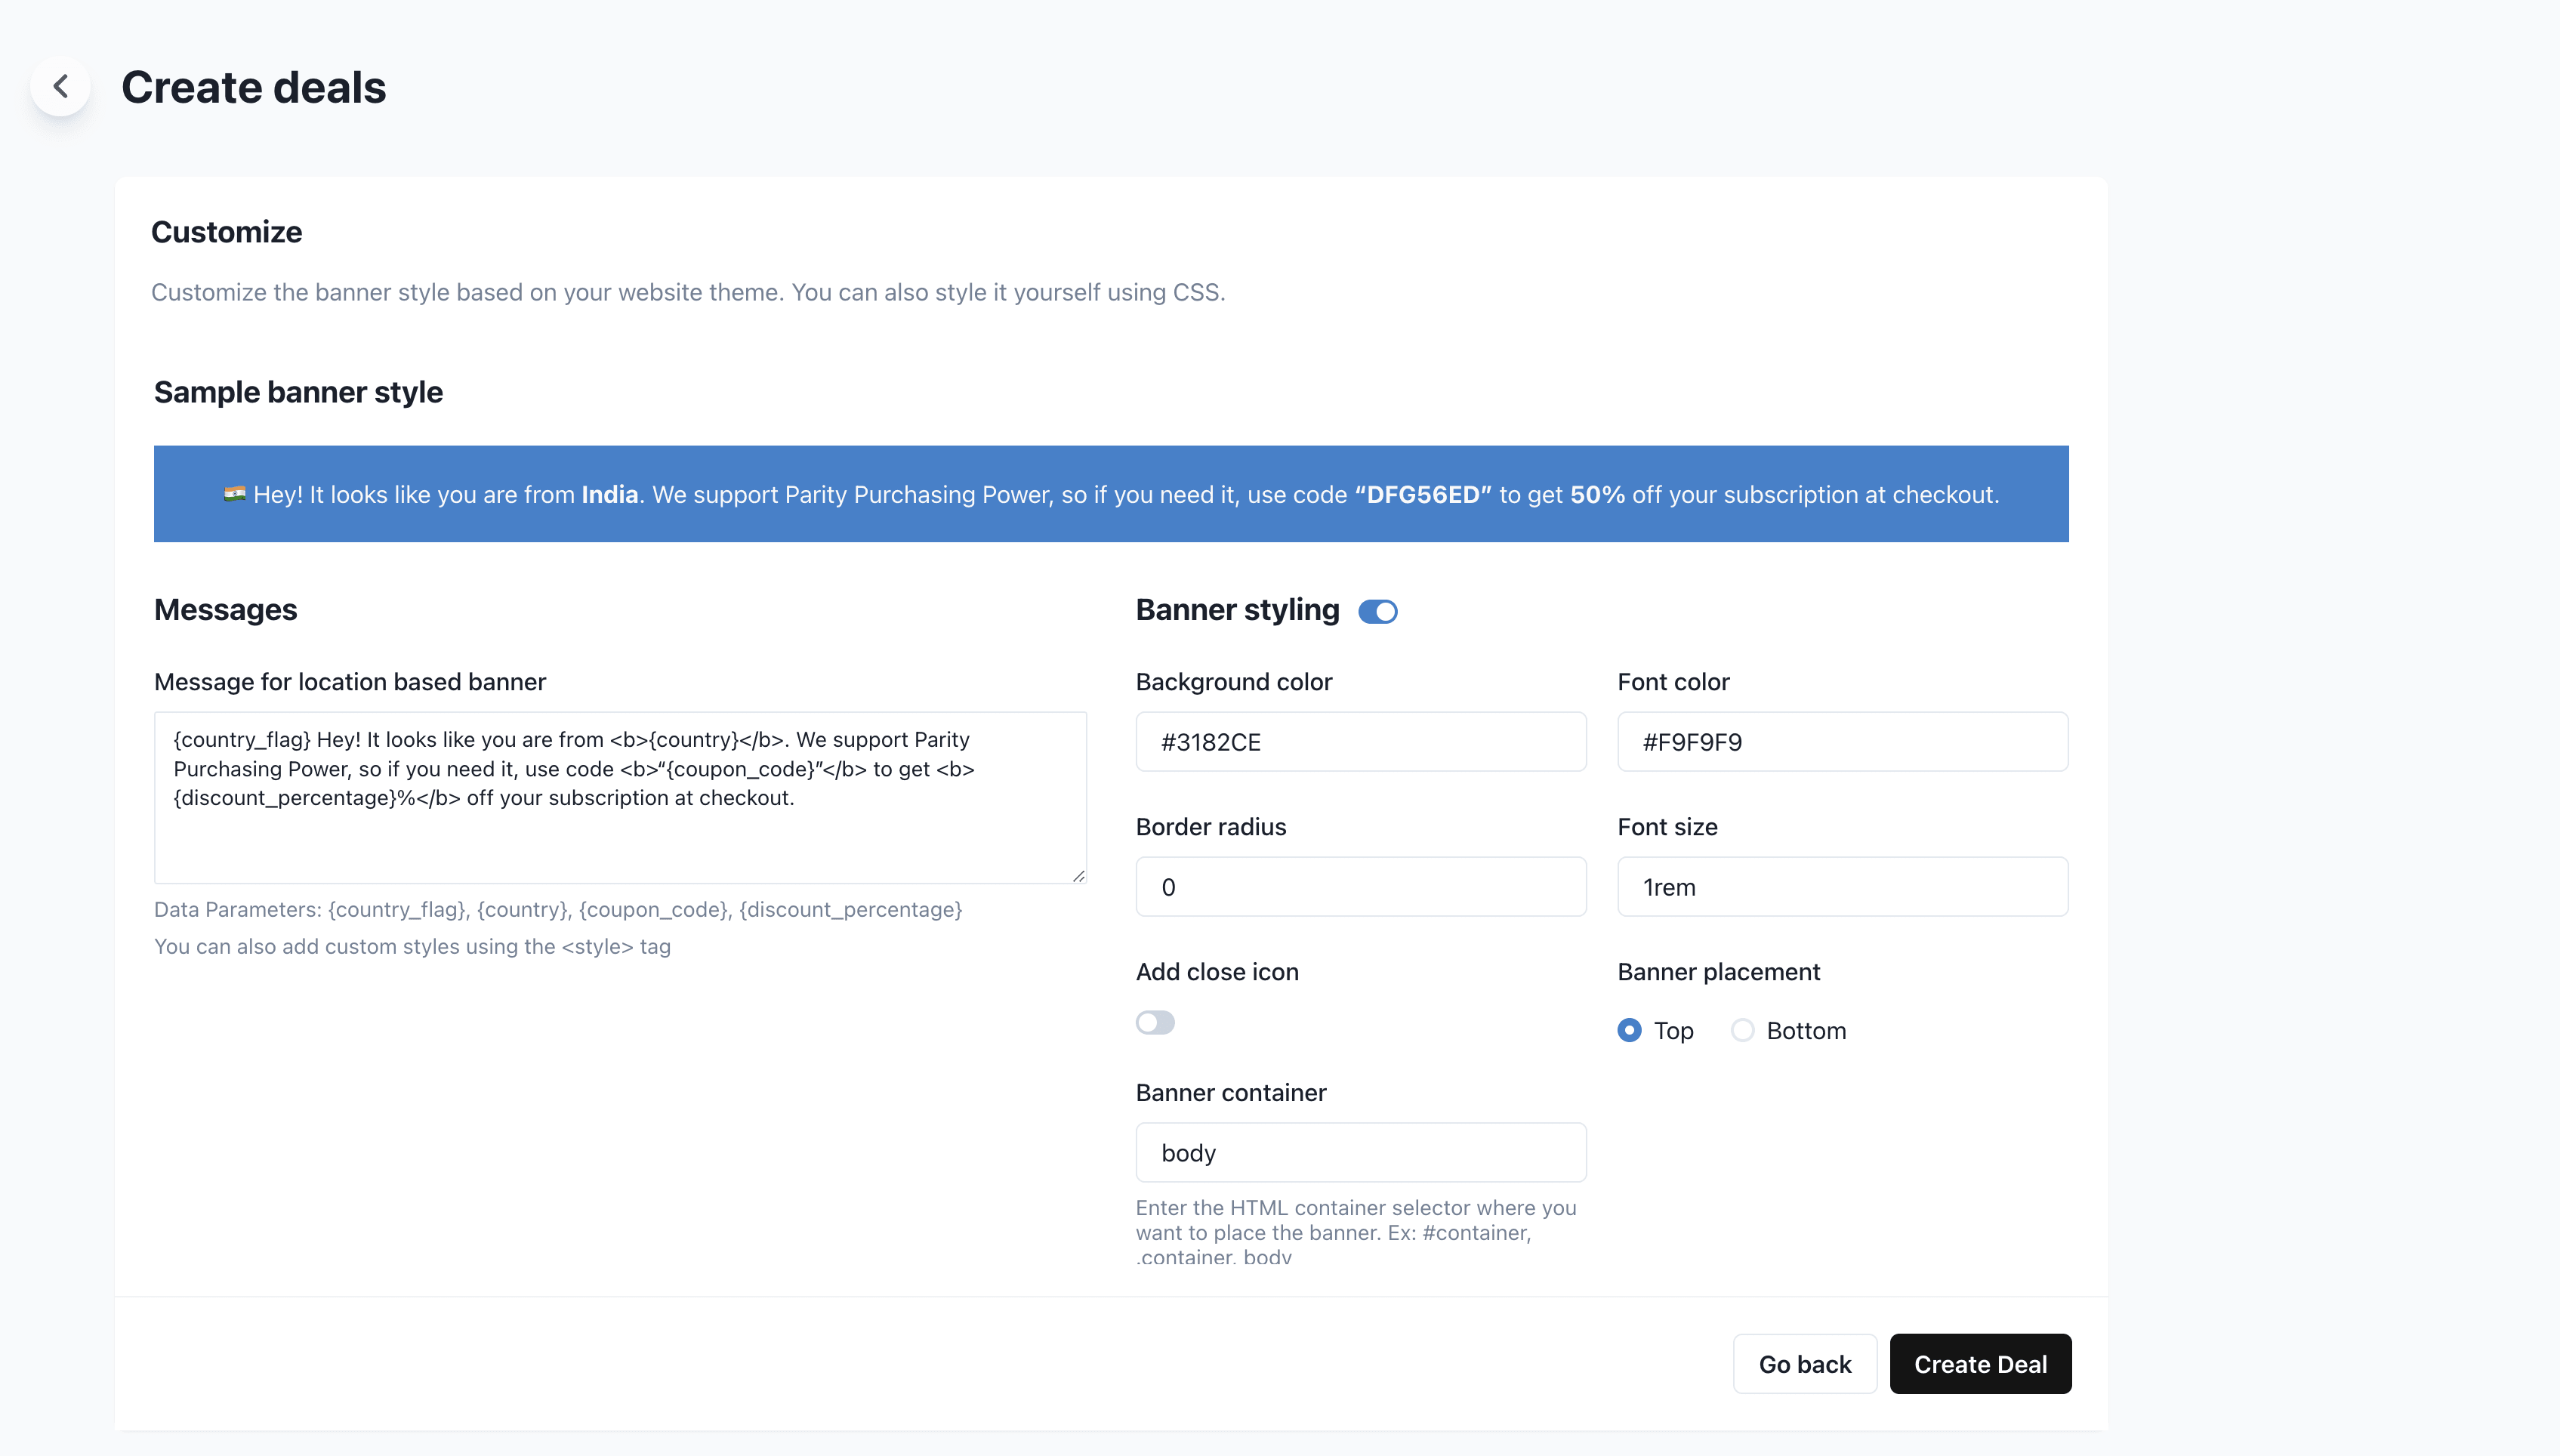
 ### Configure Banner
You can then customize the ParityDeals banner to suit your site and design.
### Configure Banner
You can then customize the ParityDeals banner to suit your site and design.
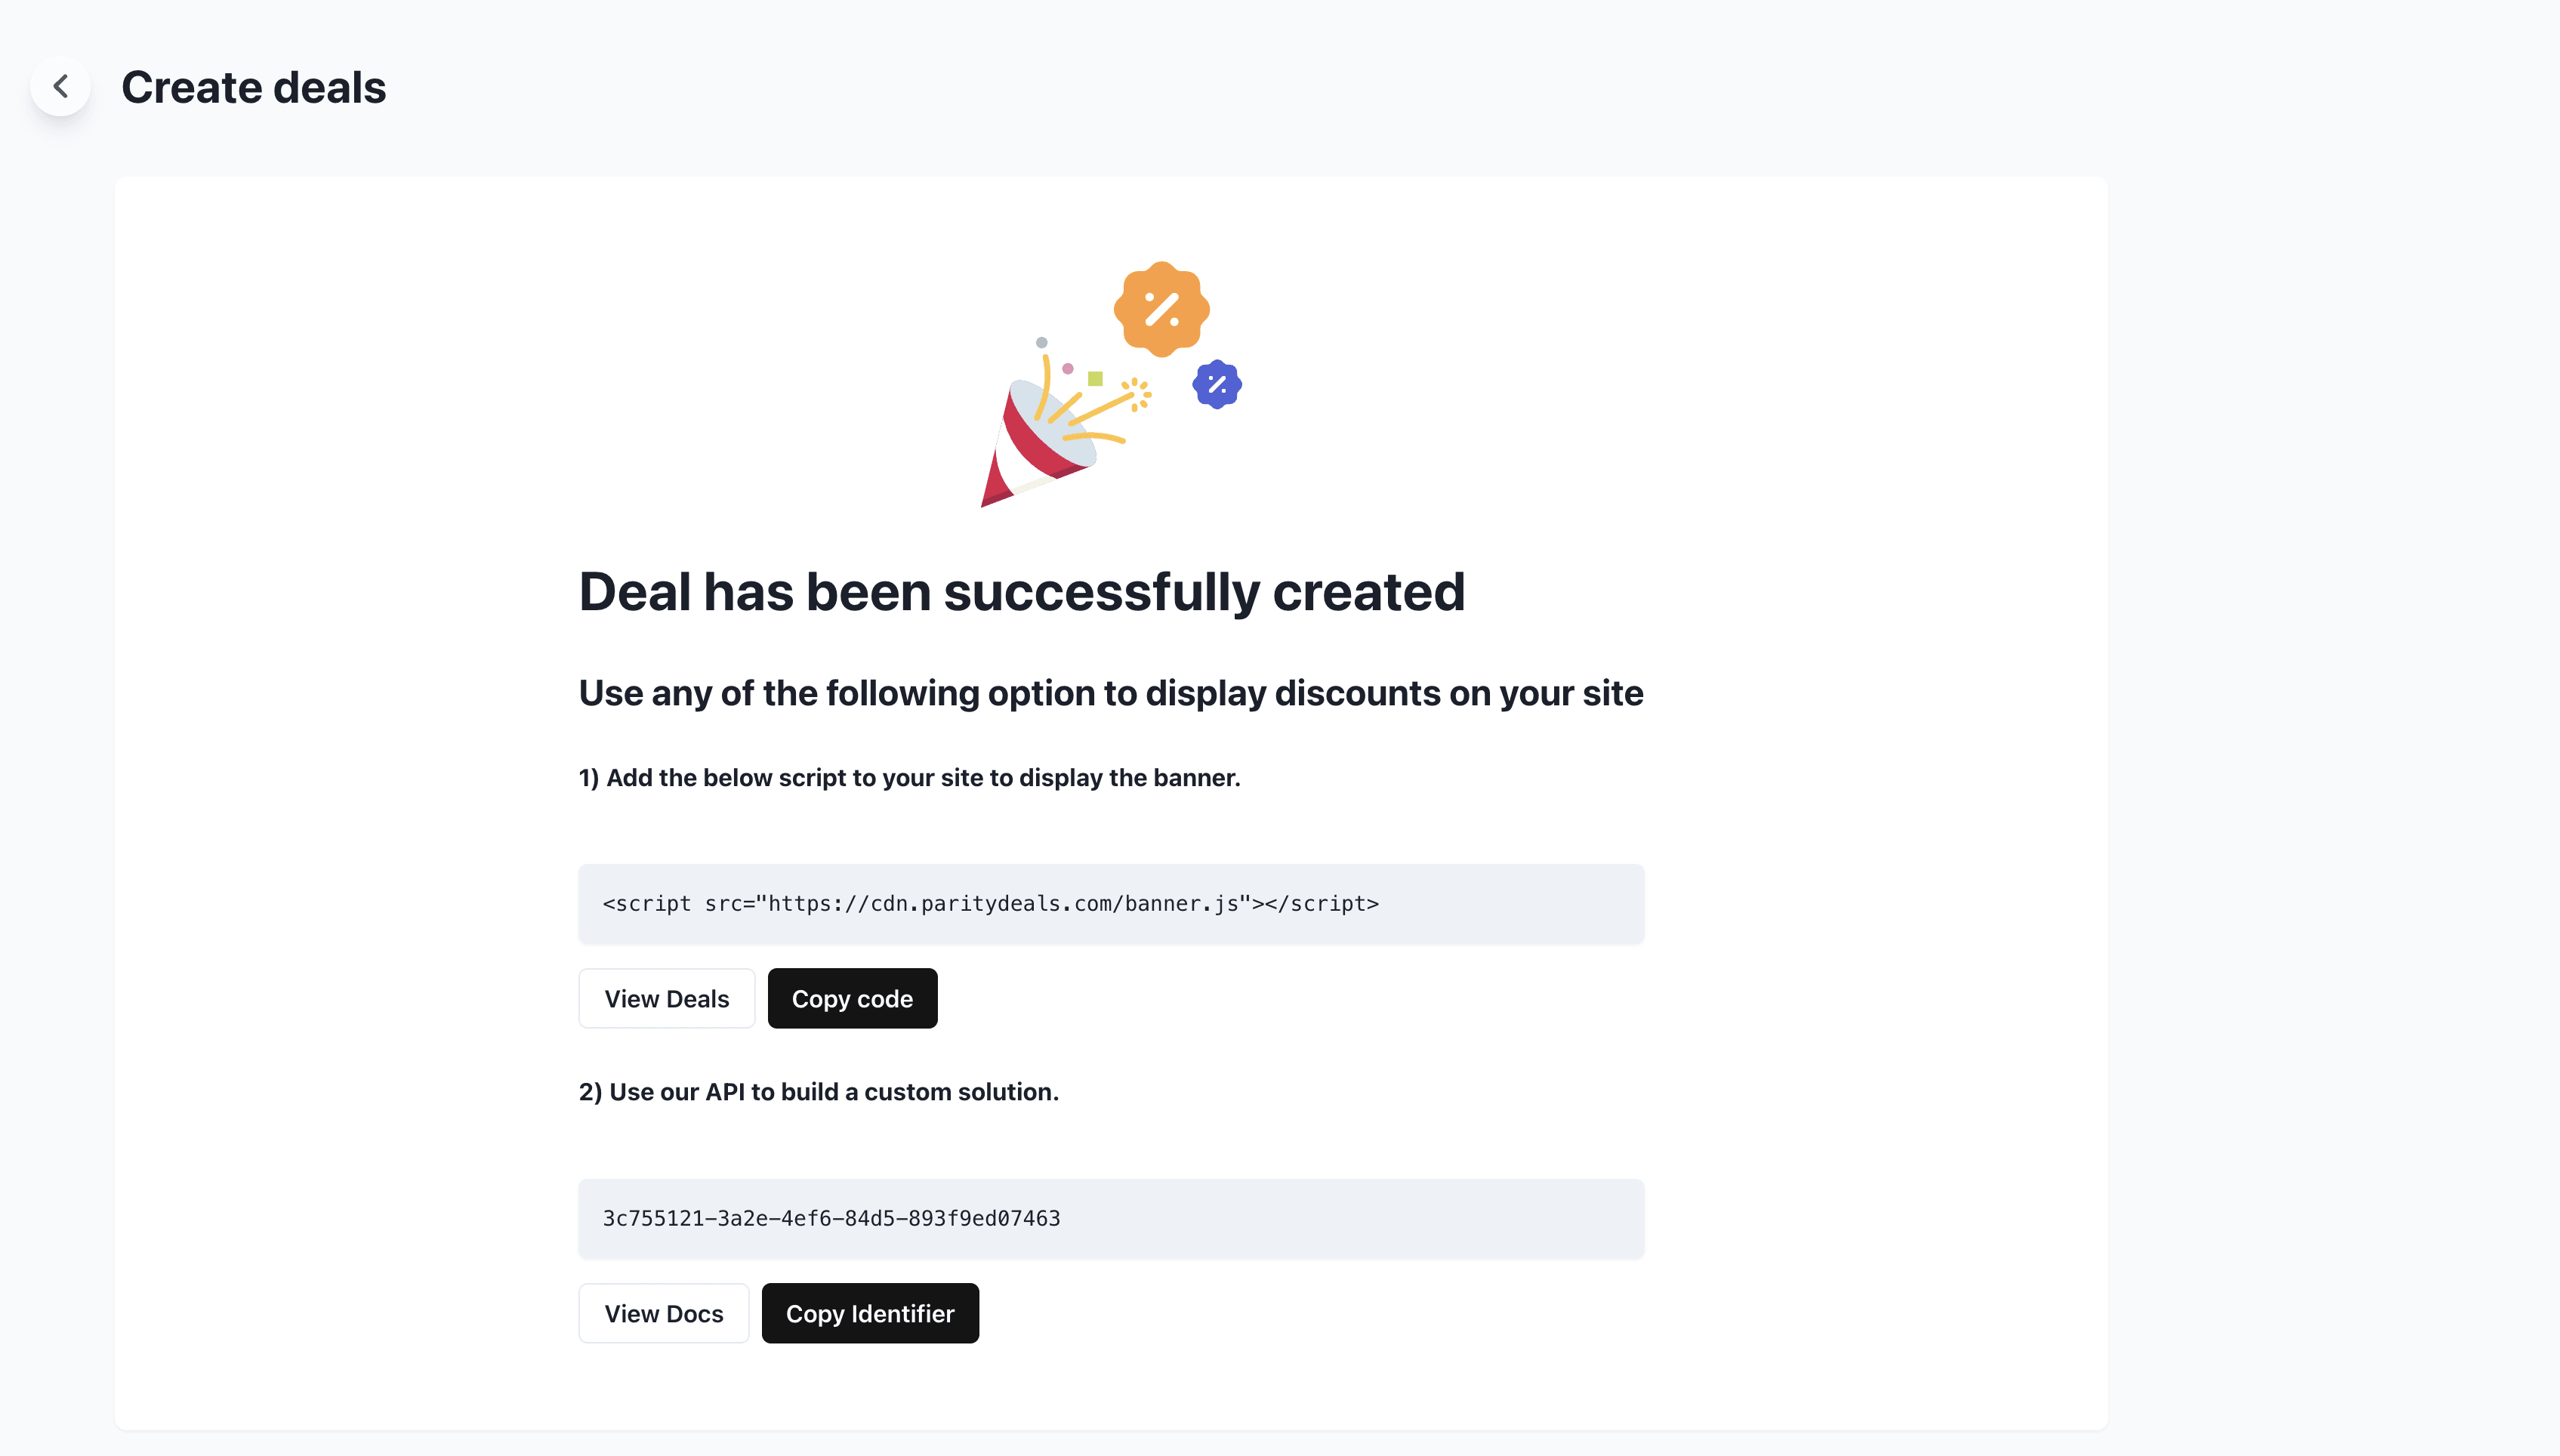
 ### Embed Banner
Finally, we're all setup over at ParityDeals. Just copy the script to their banner and embed it on your site. You're now done 👏🏼
### Embed Banner
Finally, we're all setup over at ParityDeals. Just copy the script to their banner and embed it on your site. You're now done 👏🏼
 Questions & Help
-----------------------
Checkout the [ParityDeals documentation](https://www.paritydeals.com/docs/) for more guides and information.
# OurPay for Raycast
Source: https://docs.ourpay.dev/features/integrations/raycast
Questions & Help
-----------------------
Checkout the [ParityDeals documentation](https://www.paritydeals.com/docs/) for more guides and information.
# OurPay for Raycast
Source: https://docs.ourpay.dev/features/integrations/raycast
 Install Extension
------------------------
[Head over to OurPay on the Raycast Store, and install it from there.](https://www.raycast.com/emilwidlund/ourpay)
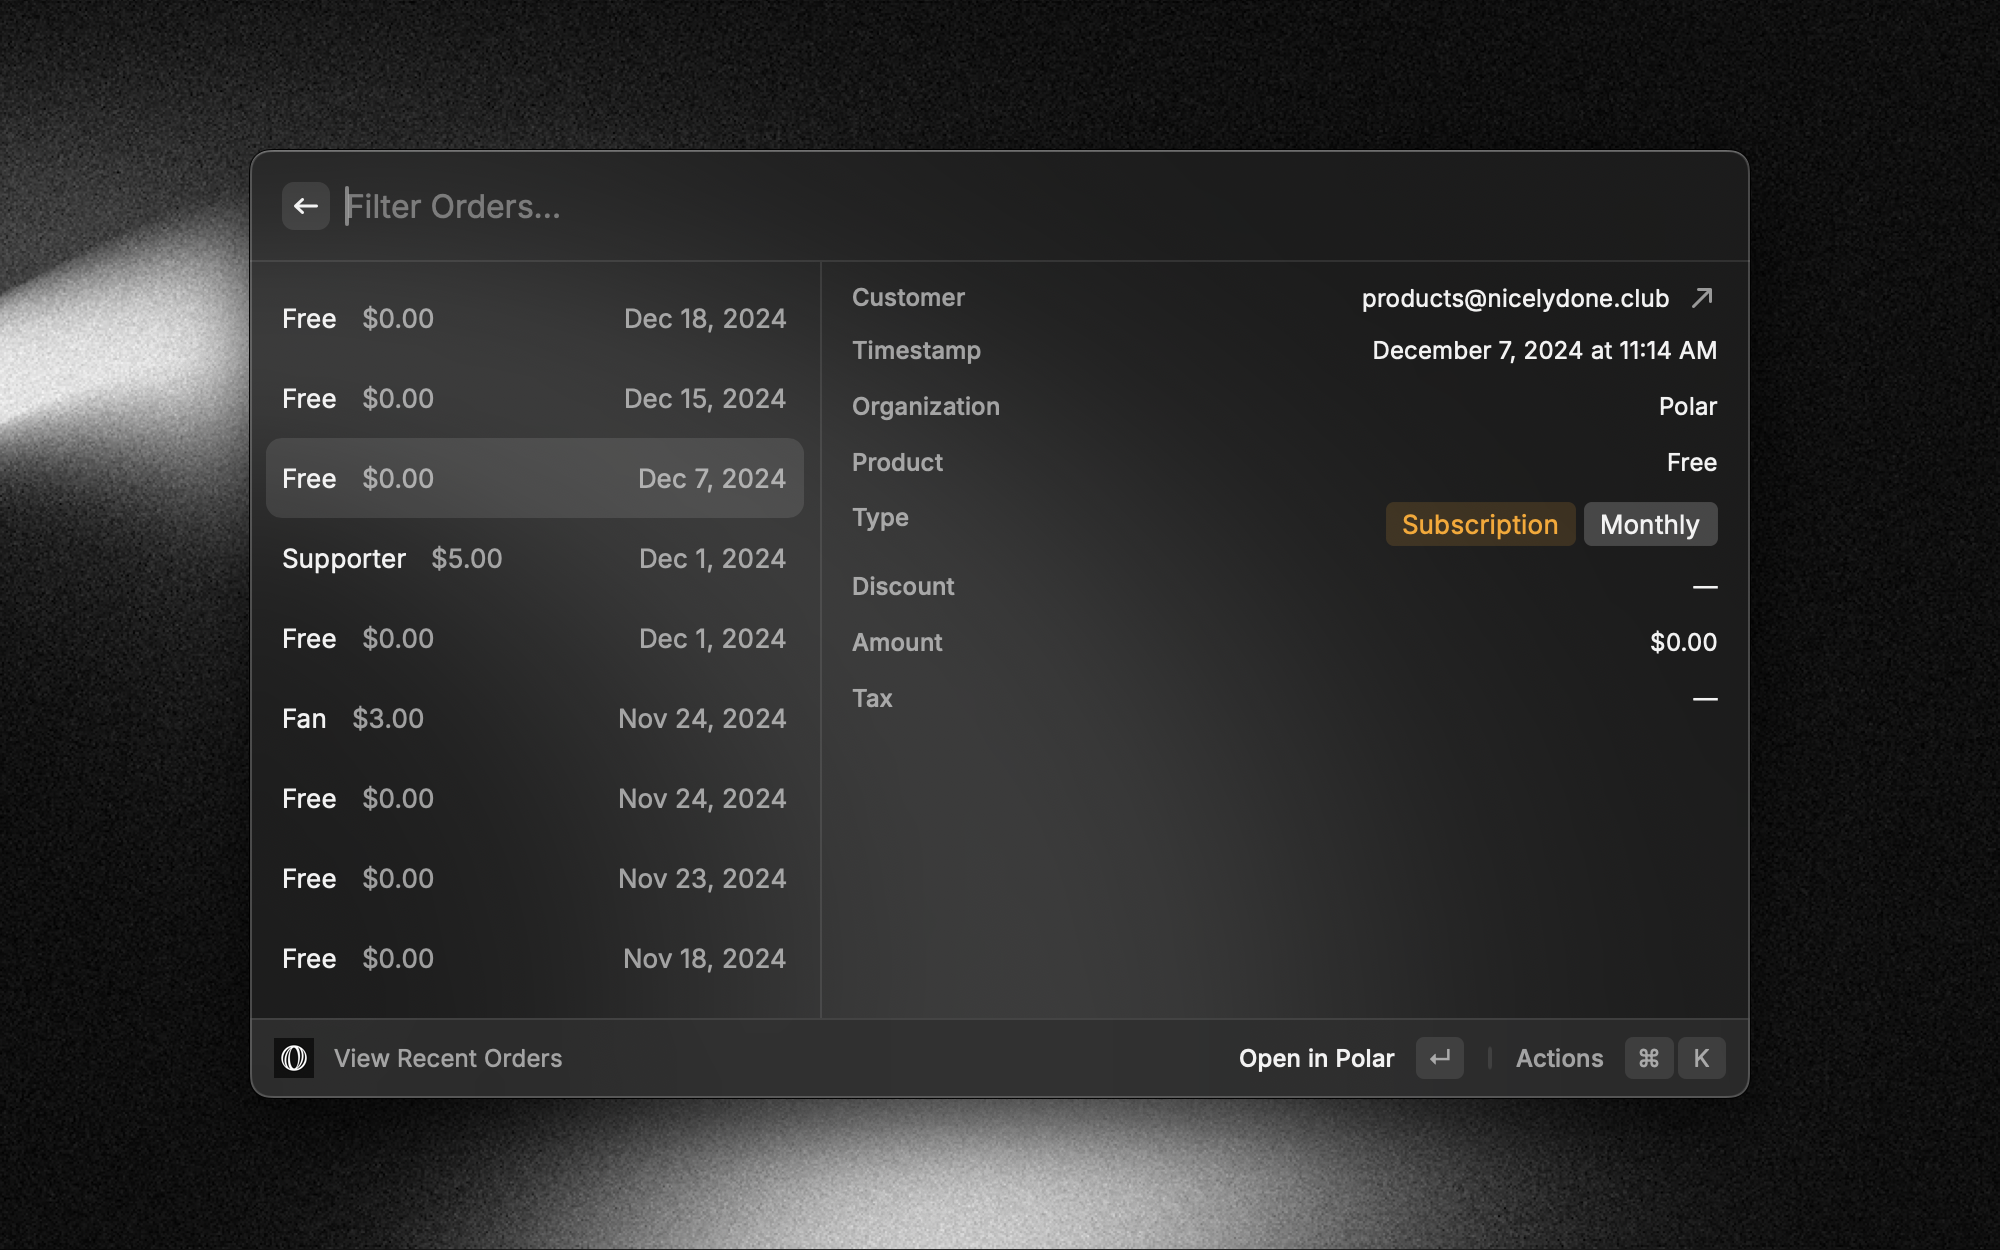
### View Orders
Easily view orders across organizations.
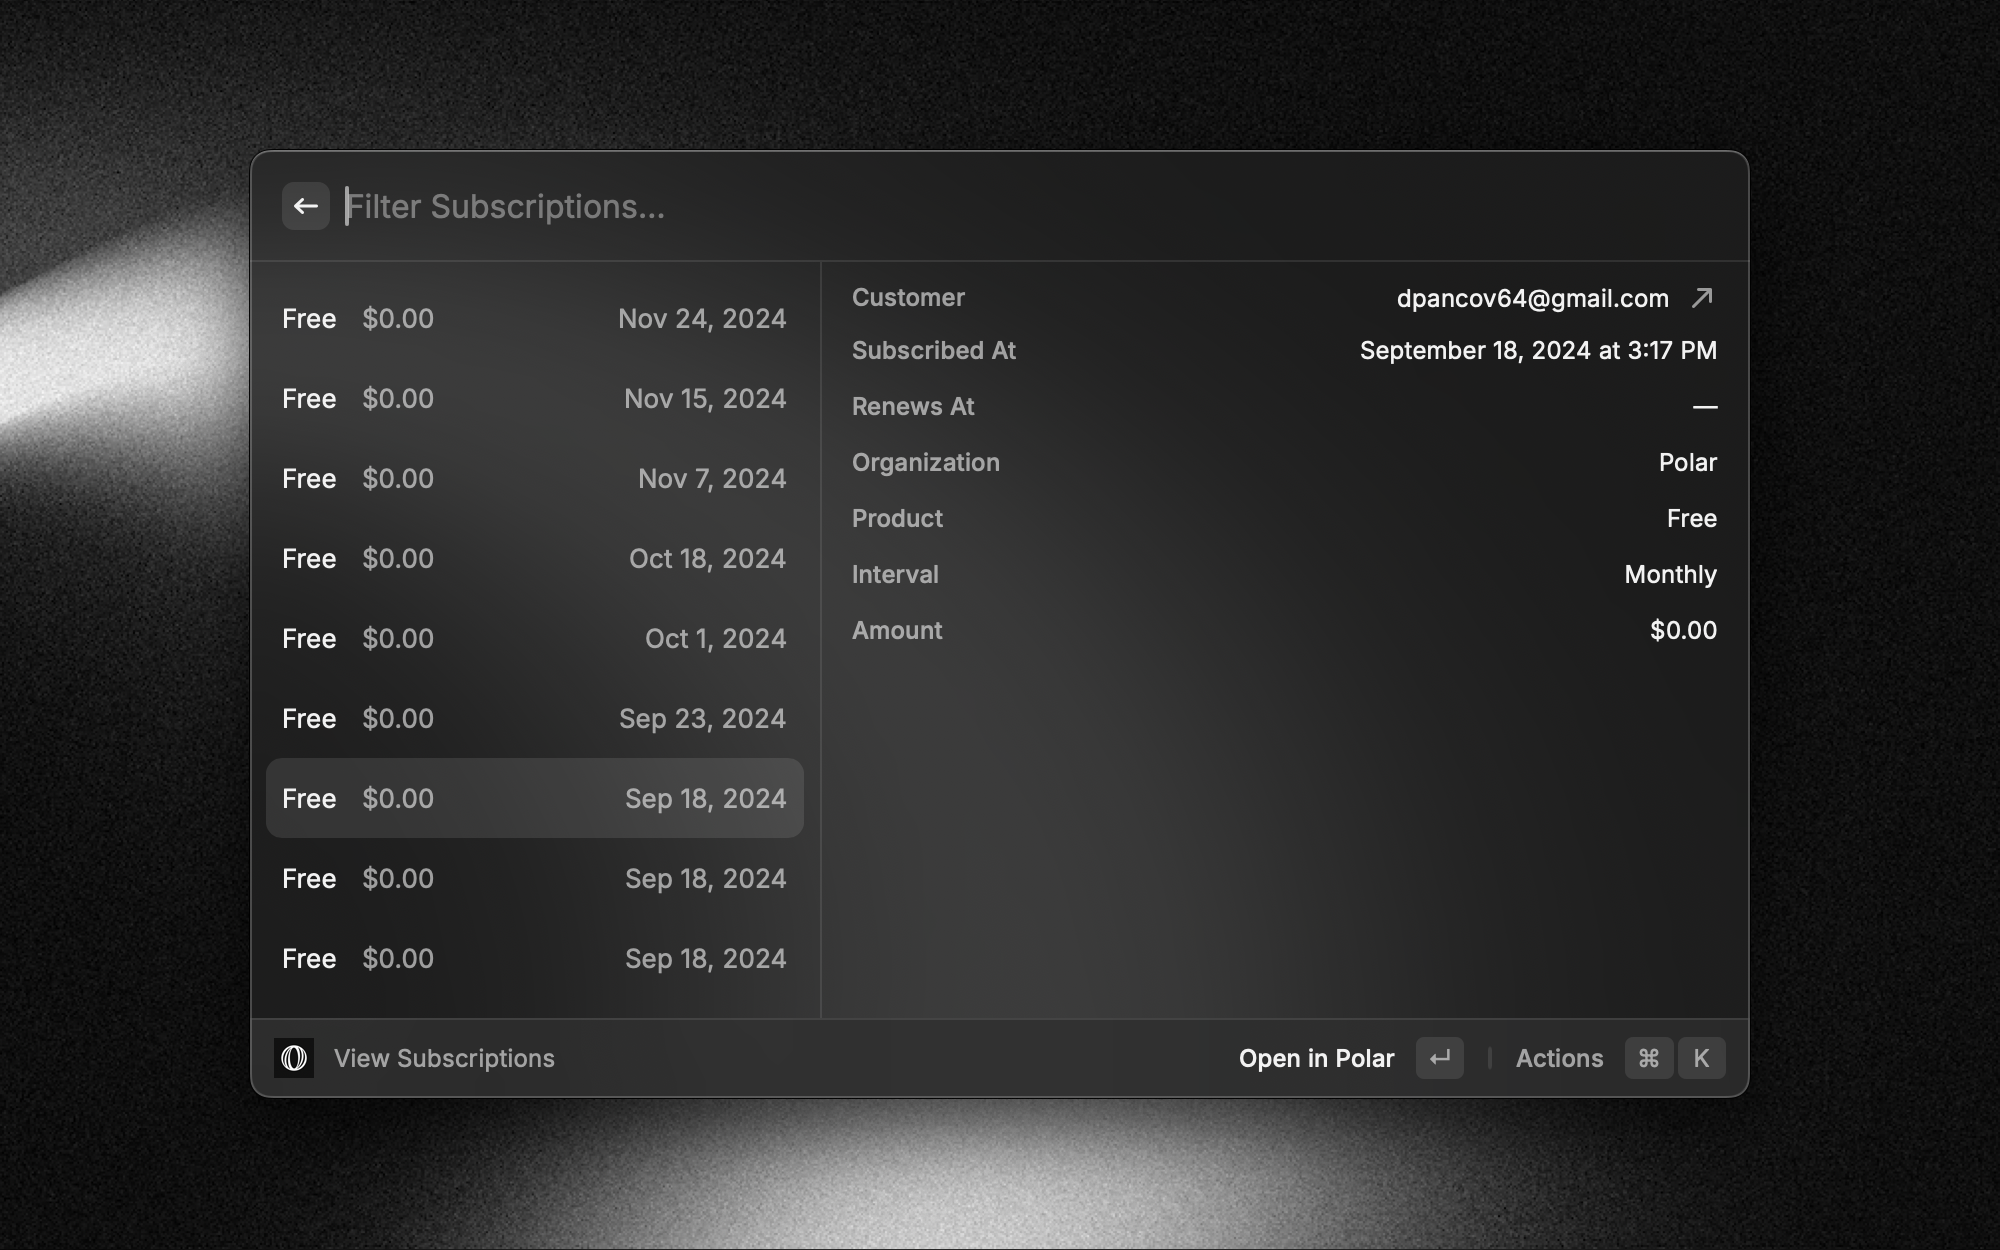
### View Subscriptions
View all active subscriptions across your organizations.
### View Customers
Keep track of all your customers.
# OurPay for Zapier
Source: https://docs.ourpay.dev/features/integrations/zapier
import { ZapierEmbed } from "/snippets/zapier-embed.mdx";
[Zapier](https://zapier.com/apps/ourpay/integrations) lets you connect OurPay to 2,000+ other web services. Automated connections called Zaps, set up in minutes with no coding, can automate your day-to-day tasks and build workflows between apps that otherwise wouldn't be possible.
Each Zap has one app as the **Trigger**, where your information comes from and which causes one or more **Actions** in other apps, where your data gets sent automatically.
Install Extension
------------------------
[Head over to OurPay on the Raycast Store, and install it from there.](https://www.raycast.com/emilwidlund/ourpay)
### View Orders
Easily view orders across organizations.

### View Subscriptions
View all active subscriptions across your organizations.

### View Customers
Keep track of all your customers.
# OurPay for Zapier
Source: https://docs.ourpay.dev/features/integrations/zapier
import { ZapierEmbed } from "/snippets/zapier-embed.mdx";
[Zapier](https://zapier.com/apps/ourpay/integrations) lets you connect OurPay to 2,000+ other web services. Automated connections called Zaps, set up in minutes with no coding, can automate your day-to-day tasks and build workflows between apps that otherwise wouldn't be possible.
Each Zap has one app as the **Trigger**, where your information comes from and which causes one or more **Actions** in other apps, where your data gets sent automatically.
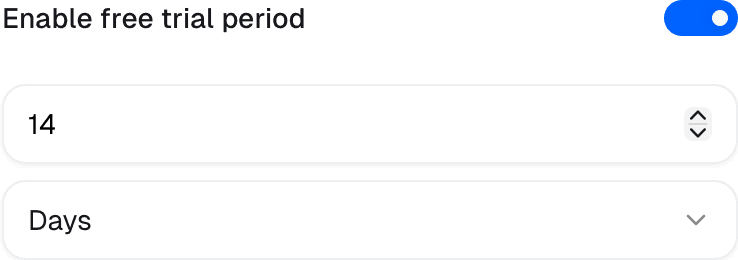
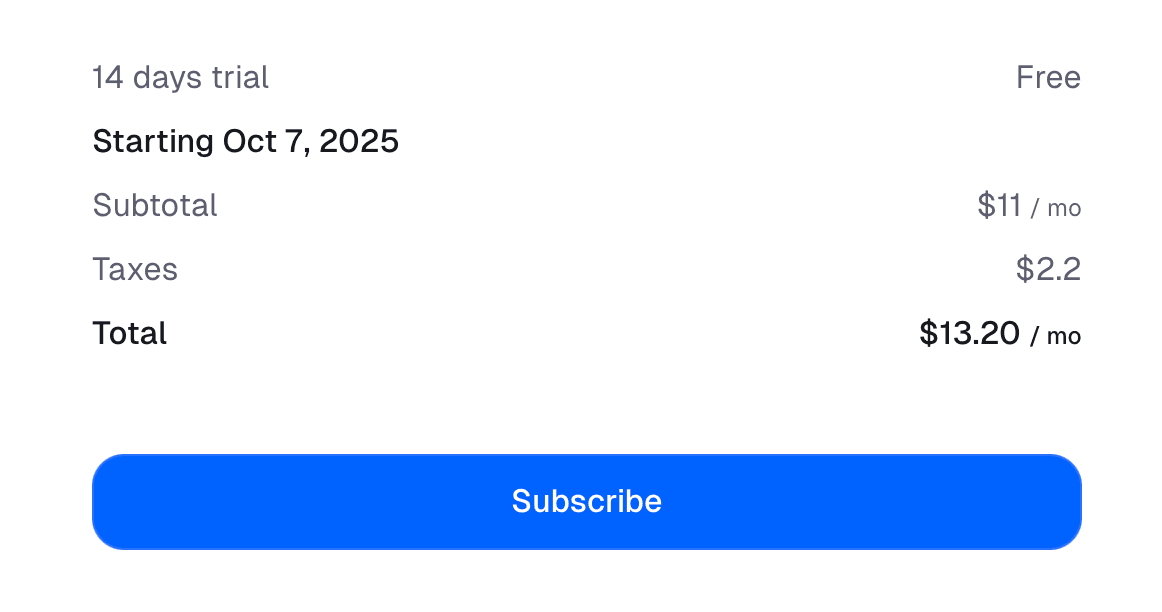
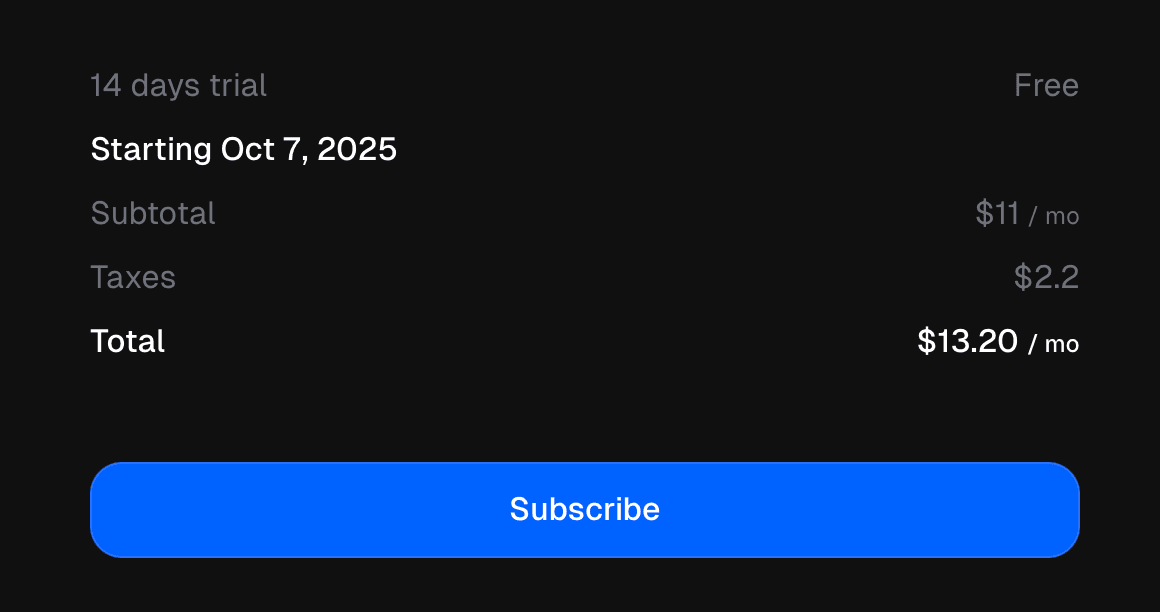
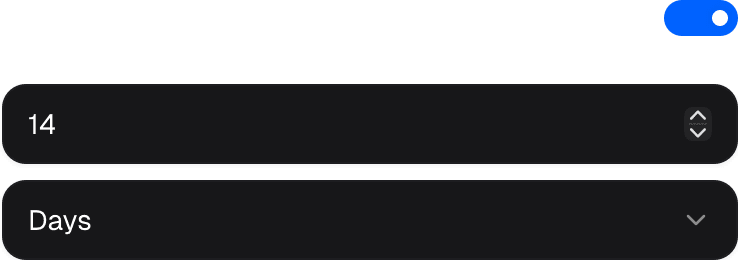 ## Starting a trial
When a customer checks out a subscription product with a trial period, they will not be charged immediately. Instead, they will have access to the product for the duration of the trial period.
We'll still collect their payment information at checkout, but they won't be charged until the trial period ends. This means that if they decide to cancel before the trial ends, they won't be charged at all.
Once the trial period ends, the customer will be automatically charged for the subscription, and their billing cycle will begin.
## Starting a trial
When a customer checks out a subscription product with a trial period, they will not be charged immediately. Instead, they will have access to the product for the duration of the trial period.
We'll still collect their payment information at checkout, but they won't be charged until the trial period ends. This means that if they decide to cancel before the trial ends, they won't be charged at all.
Once the trial period ends, the customer will be automatically charged for the subscription, and their billing cycle will begin.
 ## Adding, extending or canceling a trial
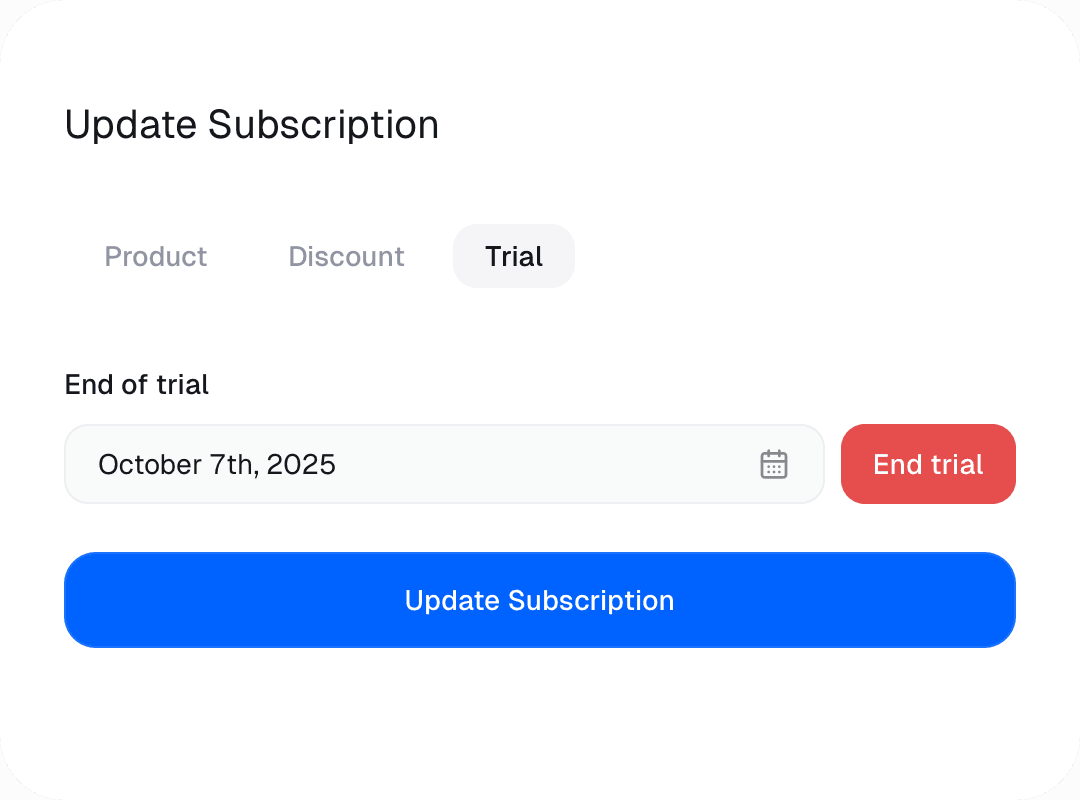
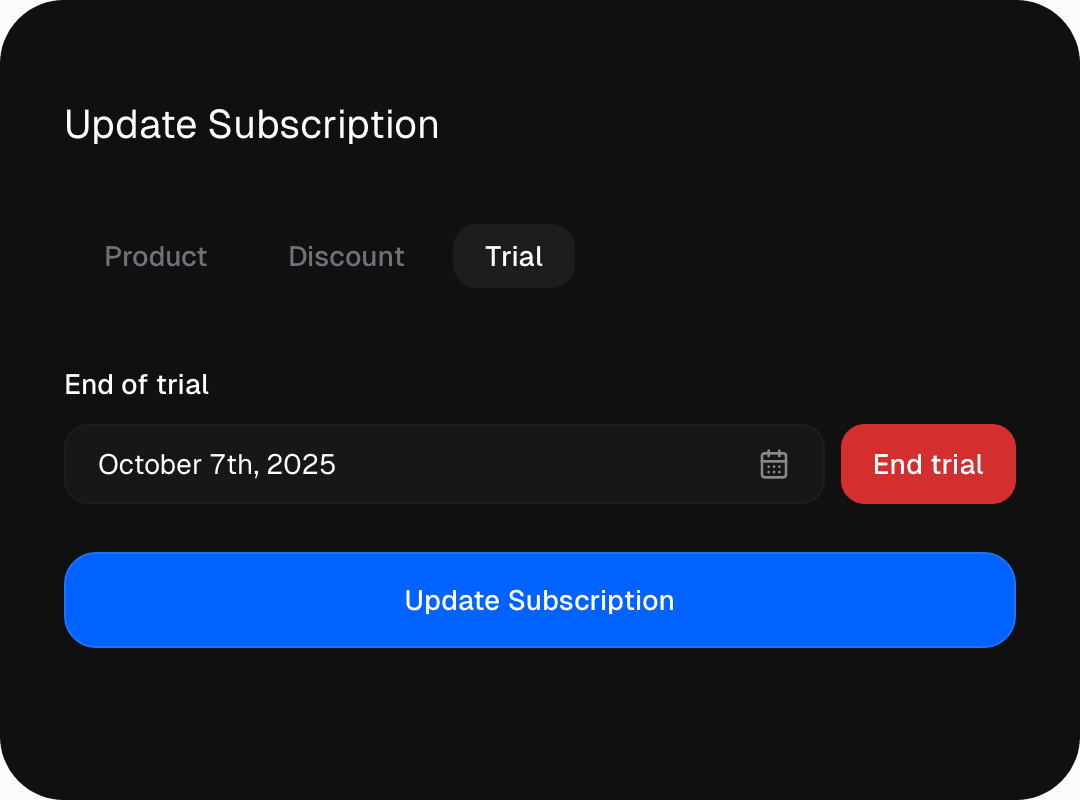
For existing subscriptions, you can add, extend or cancel a customer's trial period at any time through the dashboard, from the subscription details page. Click on **Update Subscription**, then click on the **Trial** tab.
To add or extend a trial, set a new trial end date in the future. If the subscription was active, its status will be changed to **trialing**, and the billing will be postponed until the end of the trial.
To cancel a trial, click on the **End trial** button. The subscription will become active immediately, and the customer will be charged immediately for a new billing cycle.
## Adding, extending or canceling a trial
For existing subscriptions, you can add, extend or cancel a customer's trial period at any time through the dashboard, from the subscription details page. Click on **Update Subscription**, then click on the **Trial** tab.
To add or extend a trial, set a new trial end date in the future. If the subscription was active, its status will be changed to **trialing**, and the billing will be postponed until the end of the trial.
To cancel a trial, click on the **End trial** button. The subscription will become active immediately, and the customer will be charged immediately for a new billing cycle.
 ## Trial conversion reminders
Before a trial ends, OurPay emails the customer to remind them that they're about to be charged. This keeps conversions transparent and avoids surprise charges that often end in chargebacks.
When the reminder goes out depends on the length of the trial:
- **Trials of 3 days or more** — reminder sent **3 days before** the trial ends.
- **Trials between 1 and 3 days** — reminder sent **1 day before** the trial ends.
- **Trials shorter than 1 day** — no reminder is sent (there isn't enough runway).
Reminders are skipped for fully free subscriptions and for trialing subscriptions already scheduled to cancel at period end.
You can turn trial conversion reminders off under [**Settings → Customer notifications**](https://ourpay.dev/to/dashboard/settings) if you prefer to handle that communication yourself.
## Preventing trial abuse
To protect your business from customers repeatedly signing up for trials, you can enable the **Prevent trial abuse** feature from your organization's subscription settings.
### How it works
When this feature is enabled, OurPay tracks trial redemptions using:
- **Email addresses**: We automatically detect and normalize email aliases (e.g., `user+alias@example.com` is treated as `user@example.com`) to prevent abuse through simple email variations.
- **Payment method fingerprints**: We track the unique fingerprint of payment methods (credit cards) used during checkout to identify returning customers even if they use a different email address.
A customer will be blocked from starting a new trial if they have previously redeemed a trial for any of your products and match either:
- The same unaliased email address, OR
- The same payment method fingerprint
### Enabling the feature
1. Open your organization's [**Settings**](https://ourpay.dev/to/dashboard/settings) page
2. Navigate to the **Subscription** section
3. Toggle on **Prevent trial abuse**
Once enabled, the feature will apply to all future trial checkout attempts across all your products.
### Customer experience
When a customer who has already used a trial attempts to check out again:
1. They will see an error message: "You have already used a trial for this product. Trials can only be used once per customer."
2. The checkout will automatically refresh without the trial period
3. The customer can still complete their purchase and subscribe at the regular price
This approach ensures a smooth experience while protecting your business from trial abuse.
# Tax Inclusive Pricing
Source: https://docs.ourpay.dev/features/tax-inclusive-pricing
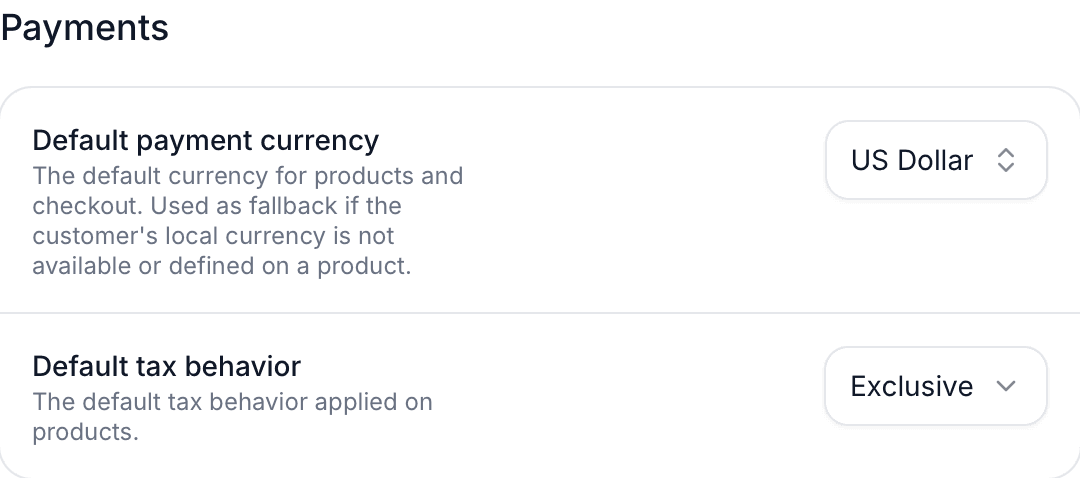
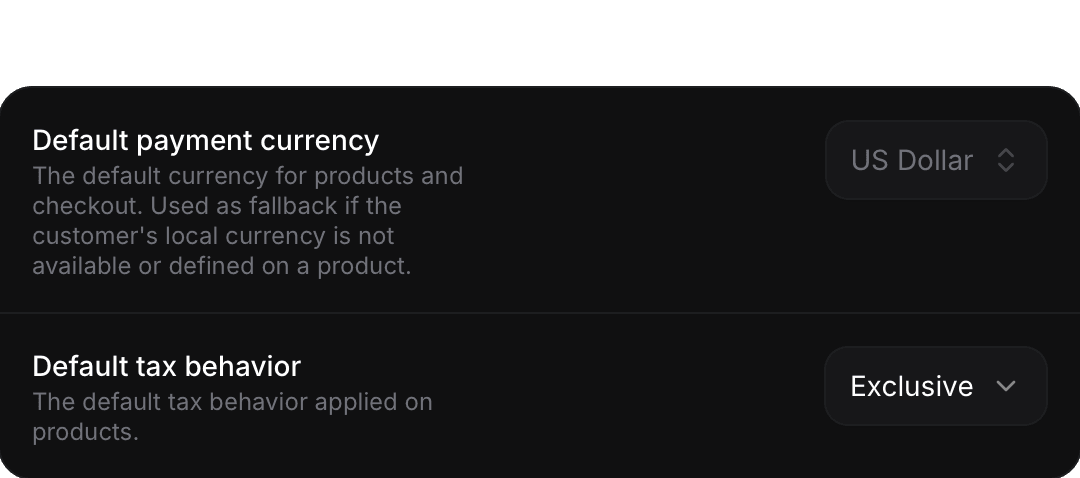
When displaying a price to a customer, there are two common conventions: either the displayed price **already includes tax** (inclusive), or tax is **calculated and added on top** at checkout (exclusive). OurPay gives you fine-grained control over this behavior at both the organization level and on individual product prices.
## Tax Behavior Options
There are three options available:
| Option | Description |
| ------------------ | -------------------------------------------------------------------------------------------------- |
| **Location-based** | OurPay automatically picks the right behavior based on the customer's country. This is the default. |
| **Inclusive** | The price shown to the customer already includes tax. Tax is extracted from the total at checkout. |
| **Exclusive** | The price shown to the customer is before tax. Tax is calculated and added on top at checkout. |
## Trial conversion reminders
Before a trial ends, OurPay emails the customer to remind them that they're about to be charged. This keeps conversions transparent and avoids surprise charges that often end in chargebacks.
When the reminder goes out depends on the length of the trial:
- **Trials of 3 days or more** — reminder sent **3 days before** the trial ends.
- **Trials between 1 and 3 days** — reminder sent **1 day before** the trial ends.
- **Trials shorter than 1 day** — no reminder is sent (there isn't enough runway).
Reminders are skipped for fully free subscriptions and for trialing subscriptions already scheduled to cancel at period end.
You can turn trial conversion reminders off under [**Settings → Customer notifications**](https://ourpay.dev/to/dashboard/settings) if you prefer to handle that communication yourself.
## Preventing trial abuse
To protect your business from customers repeatedly signing up for trials, you can enable the **Prevent trial abuse** feature from your organization's subscription settings.
### How it works
When this feature is enabled, OurPay tracks trial redemptions using:
- **Email addresses**: We automatically detect and normalize email aliases (e.g., `user+alias@example.com` is treated as `user@example.com`) to prevent abuse through simple email variations.
- **Payment method fingerprints**: We track the unique fingerprint of payment methods (credit cards) used during checkout to identify returning customers even if they use a different email address.
A customer will be blocked from starting a new trial if they have previously redeemed a trial for any of your products and match either:
- The same unaliased email address, OR
- The same payment method fingerprint
### Enabling the feature
1. Open your organization's [**Settings**](https://ourpay.dev/to/dashboard/settings) page
2. Navigate to the **Subscription** section
3. Toggle on **Prevent trial abuse**
Once enabled, the feature will apply to all future trial checkout attempts across all your products.
### Customer experience
When a customer who has already used a trial attempts to check out again:
1. They will see an error message: "You have already used a trial for this product. Trials can only be used once per customer."
2. The checkout will automatically refresh without the trial period
3. The customer can still complete their purchase and subscribe at the regular price
This approach ensures a smooth experience while protecting your business from trial abuse.
# Tax Inclusive Pricing
Source: https://docs.ourpay.dev/features/tax-inclusive-pricing
When displaying a price to a customer, there are two common conventions: either the displayed price **already includes tax** (inclusive), or tax is **calculated and added on top** at checkout (exclusive). OurPay gives you fine-grained control over this behavior at both the organization level and on individual product prices.
## Tax Behavior Options
There are three options available:
| Option | Description |
| ------------------ | -------------------------------------------------------------------------------------------------- |
| **Location-based** | OurPay automatically picks the right behavior based on the customer's country. This is the default. |
| **Inclusive** | The price shown to the customer already includes tax. Tax is extracted from the total at checkout. |
| **Exclusive** | The price shown to the customer is before tax. Tax is calculated and added on top at checkout. |
 ## Location-based Behavior in Detail
When the tax behavior is set to **Location-based**, OurPay resolves the actual inclusive/exclusive behavior at checkout time based on the customer's billing address:
| Countries | Behavior |
| ---------------------------- | ----------------------------------------------------------- |
| United States, Canada, India | **Exclusive** — tax is added on top of the listed price |
| All other countries | **Inclusive** — tax is already included in the listed price |
This follows prevailing regional conventions: North American and Indian consumers generally expect prices before tax, while European and most other international customers expect VAT-inclusive pricing.
## Relationship with Merchant of Record
As a [Merchant of Record](/merchant-of-record/introduction), we handle the calculation, collection, and remittance of sales taxes globally on your behalf. Tax behavior only controls **how the price is presented** to your customer — it does not affect whether tax is collected or how much is owed.
Regardless of the tax behavior chosen, OurPay always:
- Calculates the correct tax amount for the customer's jurisdiction.
- Displays the tax breakdown clearly on the checkout page.
- Issues a compliant receipt that itemizes the tax amount.
- Remits the collected tax to the appropriate tax authorities.
## Location-based Behavior in Detail
When the tax behavior is set to **Location-based**, OurPay resolves the actual inclusive/exclusive behavior at checkout time based on the customer's billing address:
| Countries | Behavior |
| ---------------------------- | ----------------------------------------------------------- |
| United States, Canada, India | **Exclusive** — tax is added on top of the listed price |
| All other countries | **Inclusive** — tax is already included in the listed price |
This follows prevailing regional conventions: North American and Indian consumers generally expect prices before tax, while European and most other international customers expect VAT-inclusive pricing.
## Relationship with Merchant of Record
As a [Merchant of Record](/merchant-of-record/introduction), we handle the calculation, collection, and remittance of sales taxes globally on your behalf. Tax behavior only controls **how the price is presented** to your customer — it does not affect whether tax is collected or how much is owed.
Regardless of the tax behavior chosen, OurPay always:
- Calculates the correct tax amount for the customer's jurisdiction.
- Displays the tax breakdown clearly on the checkout page.
- Issues a compliant receipt that itemizes the tax amount.
- Remits the collected tax to the appropriate tax authorities.
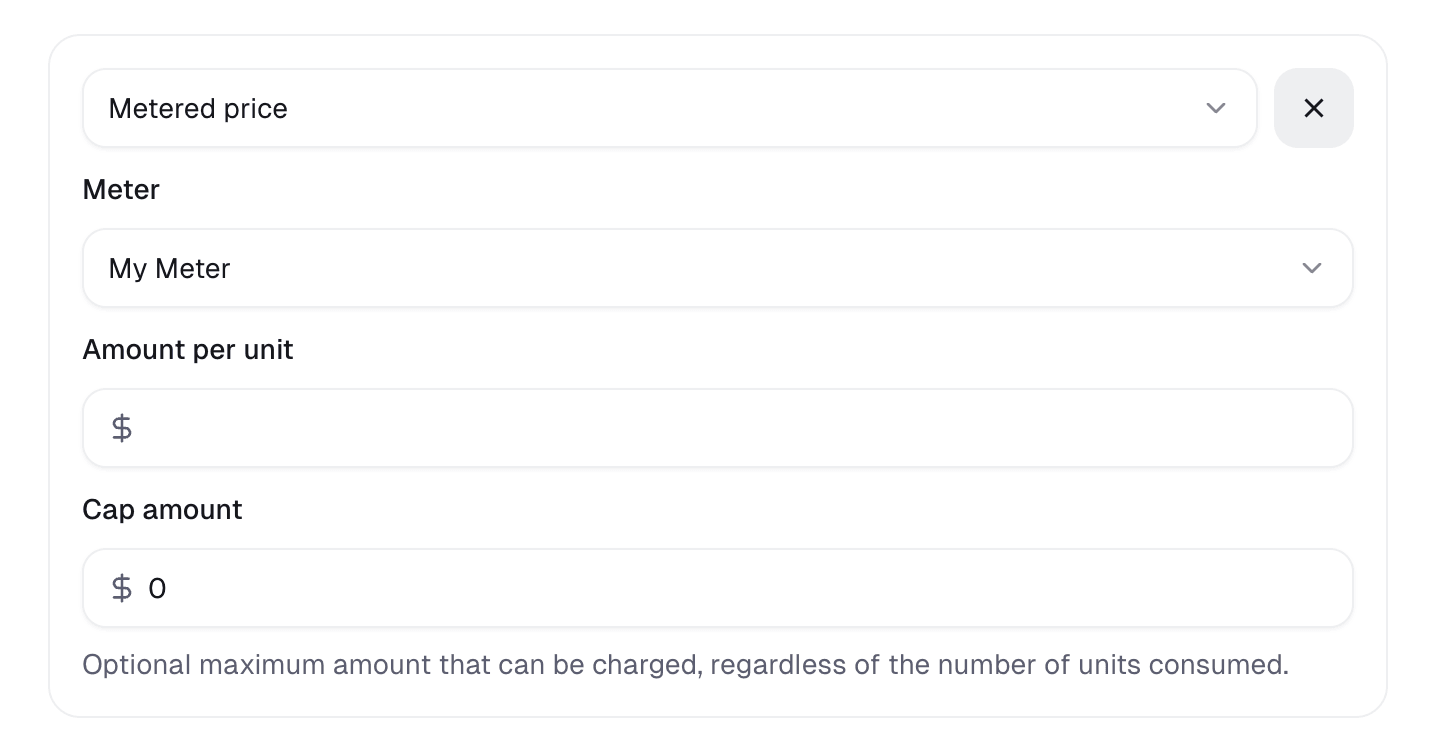
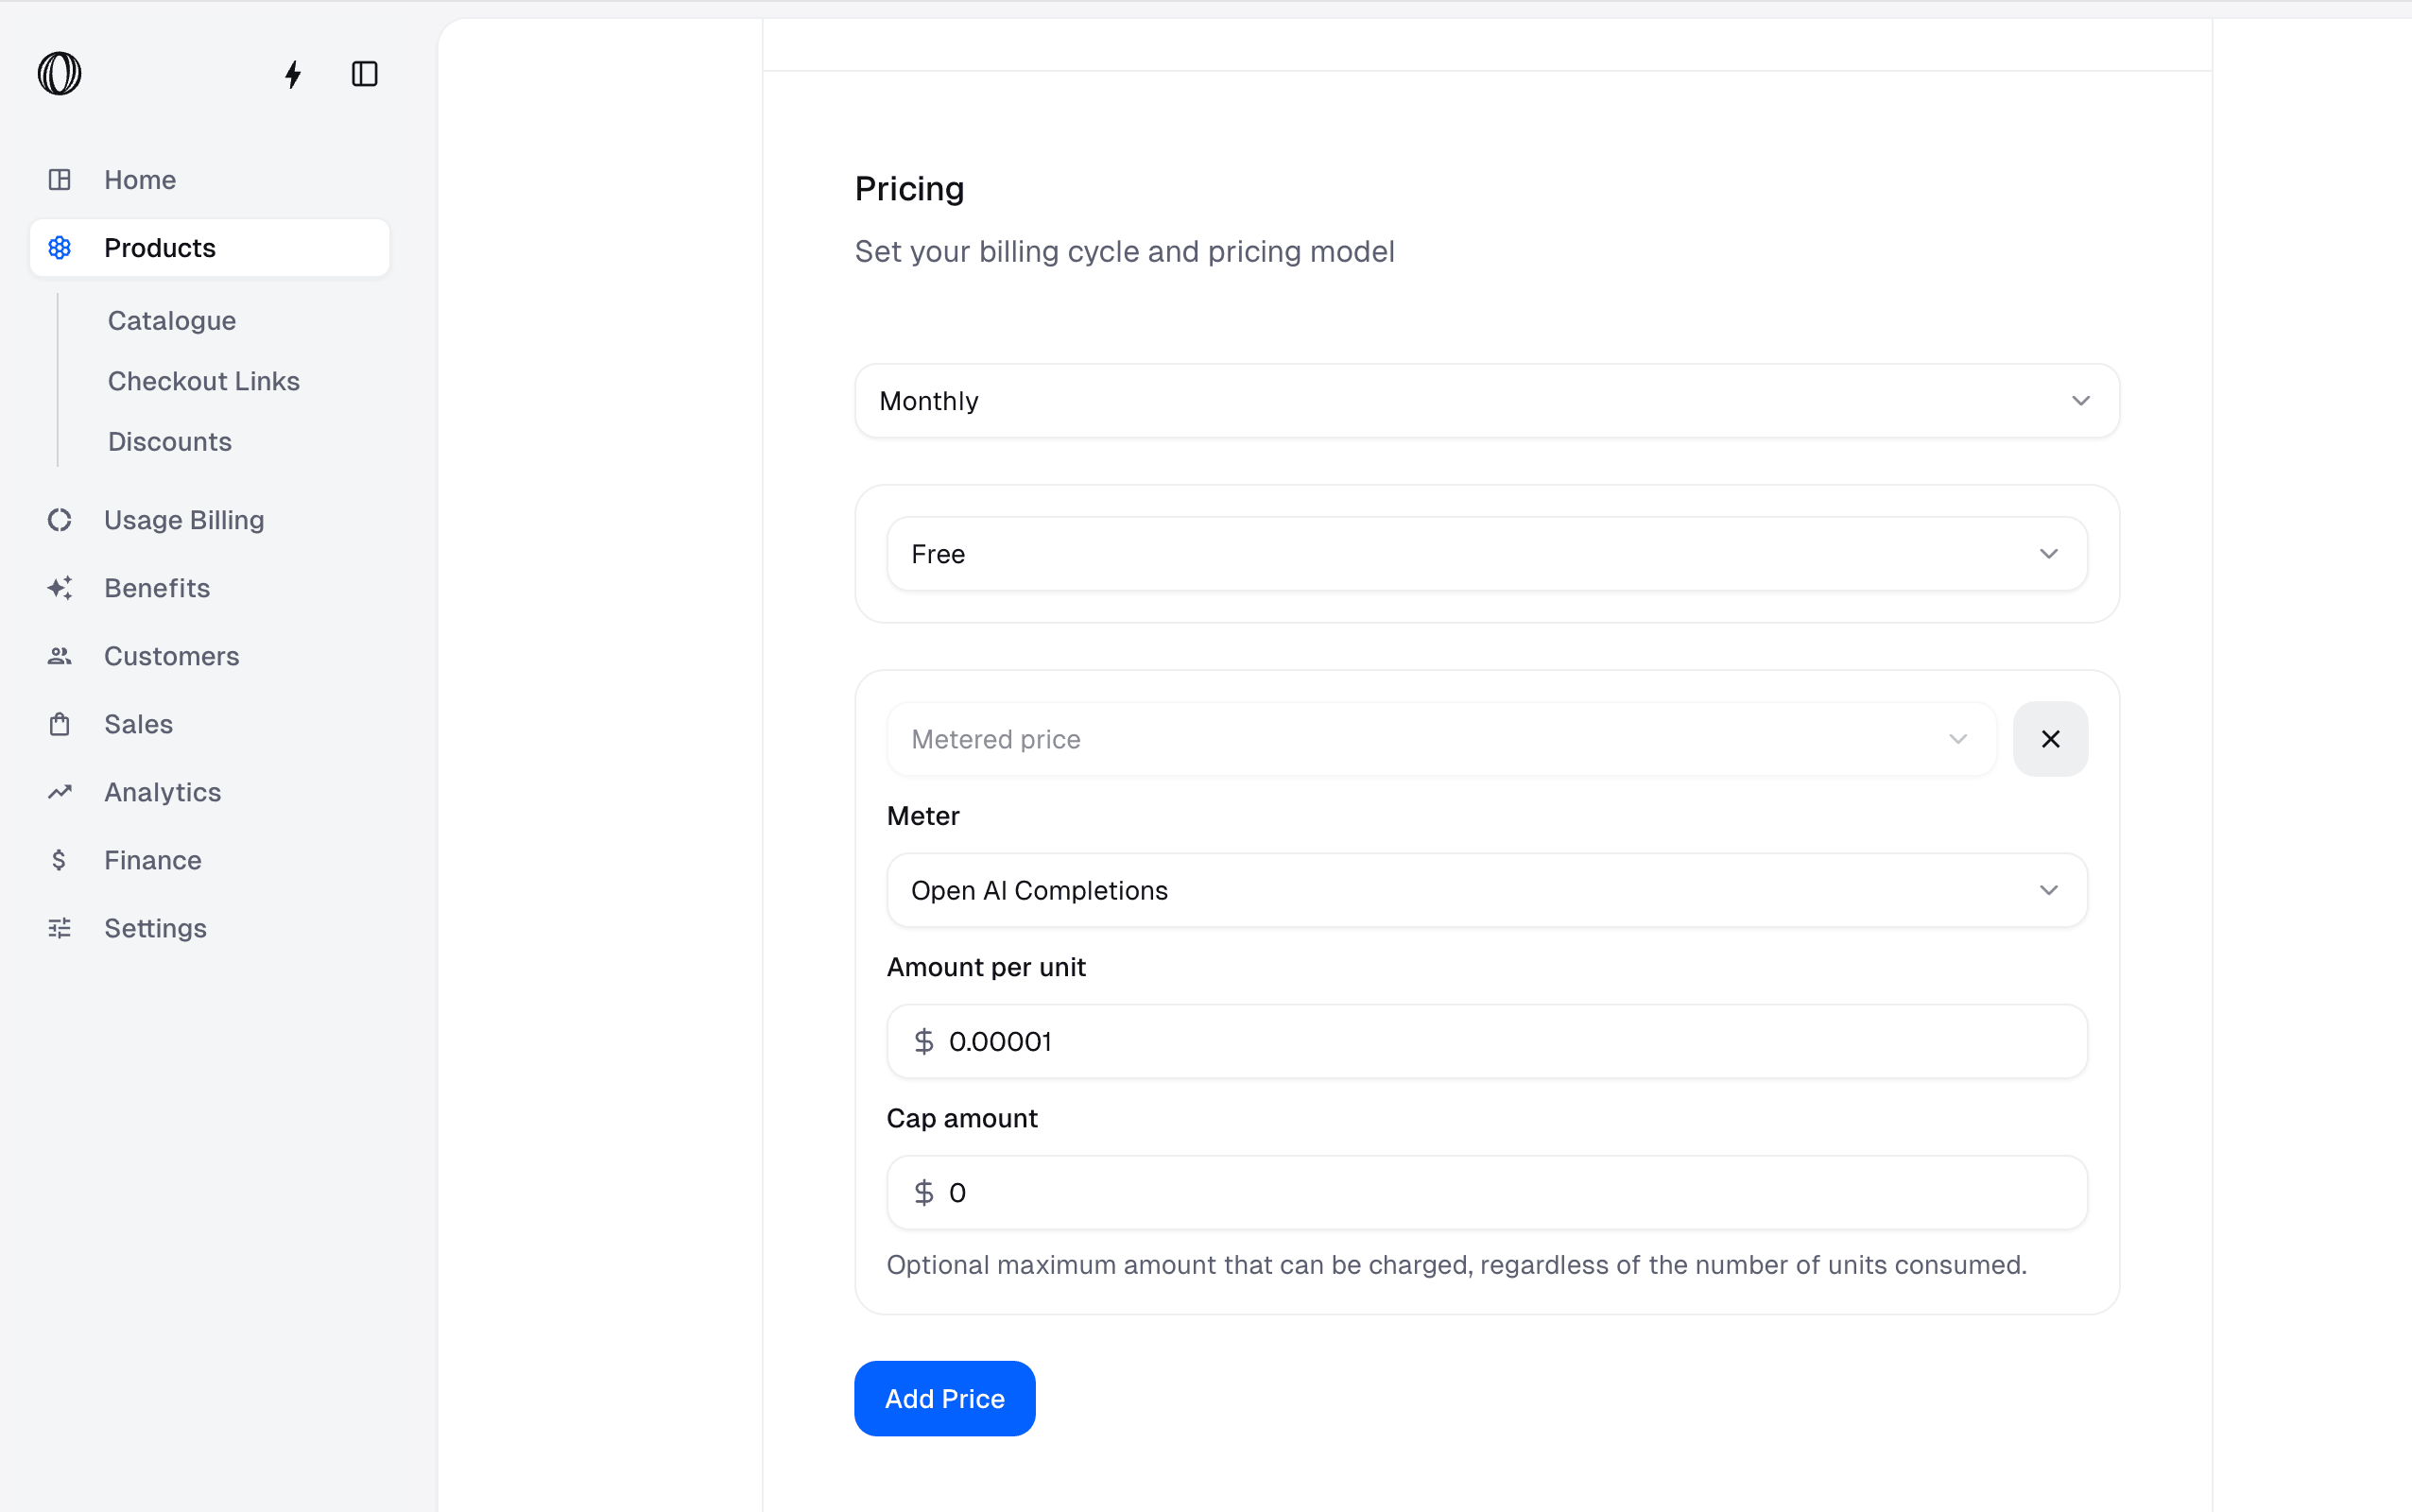
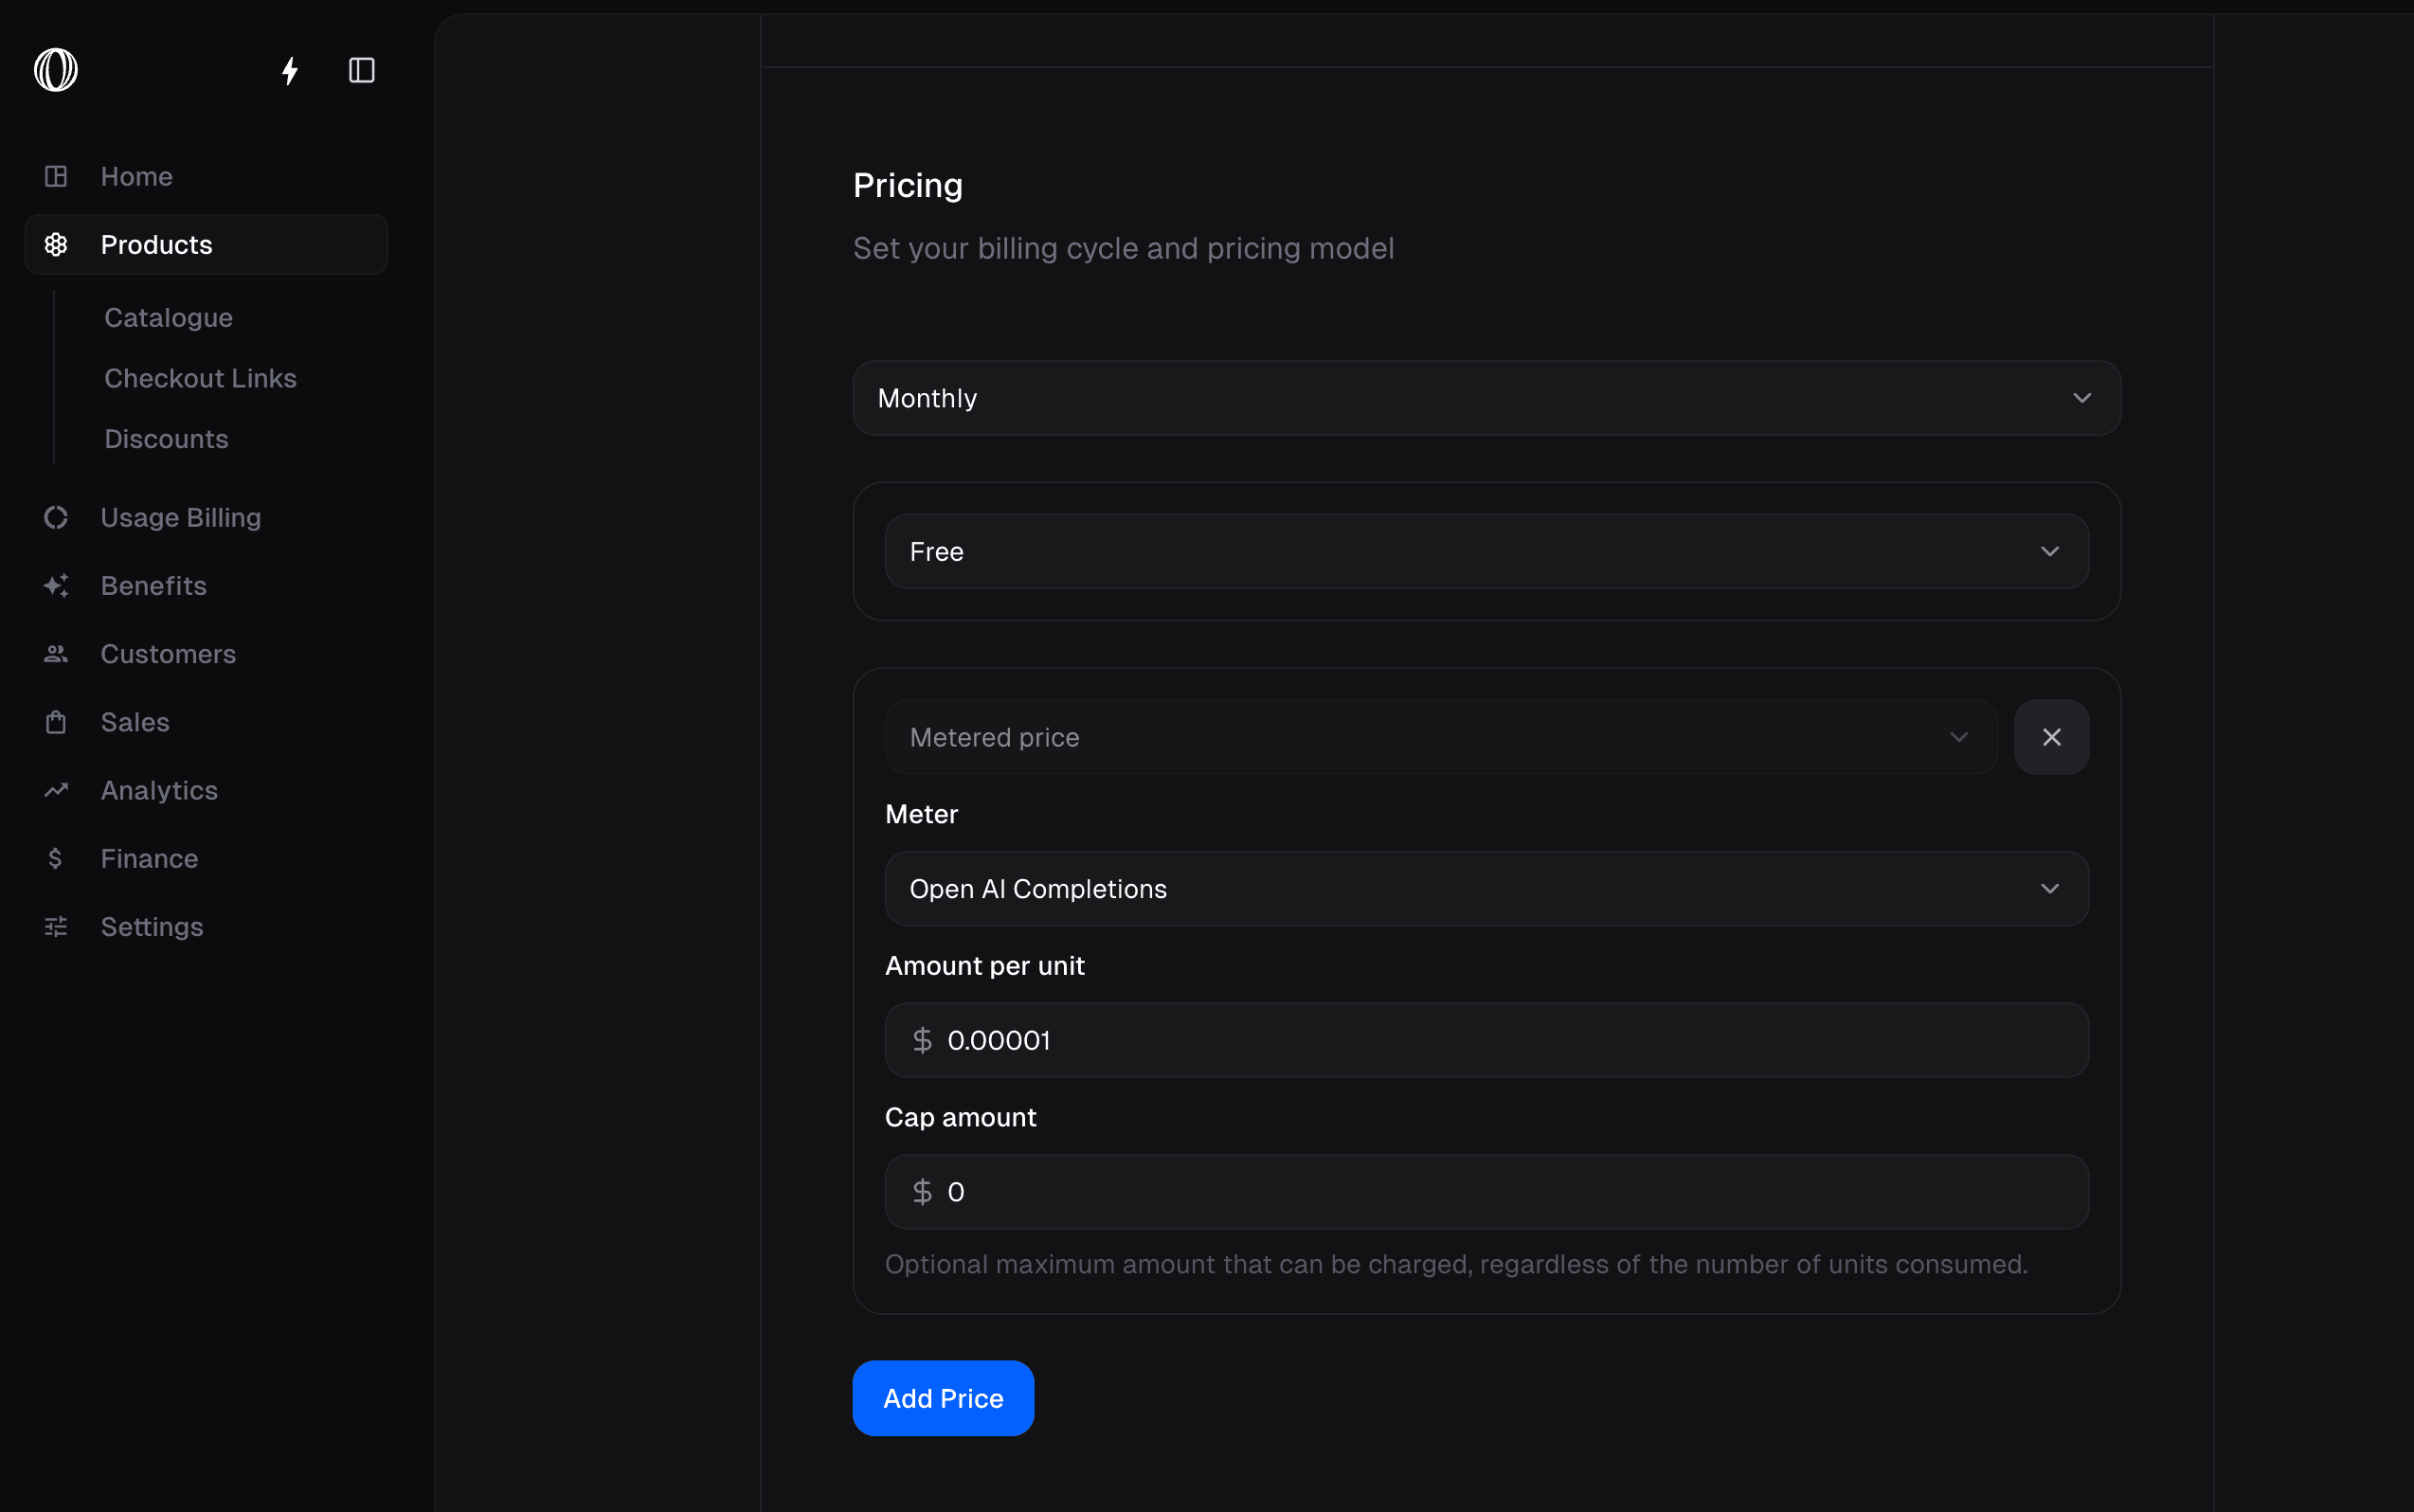
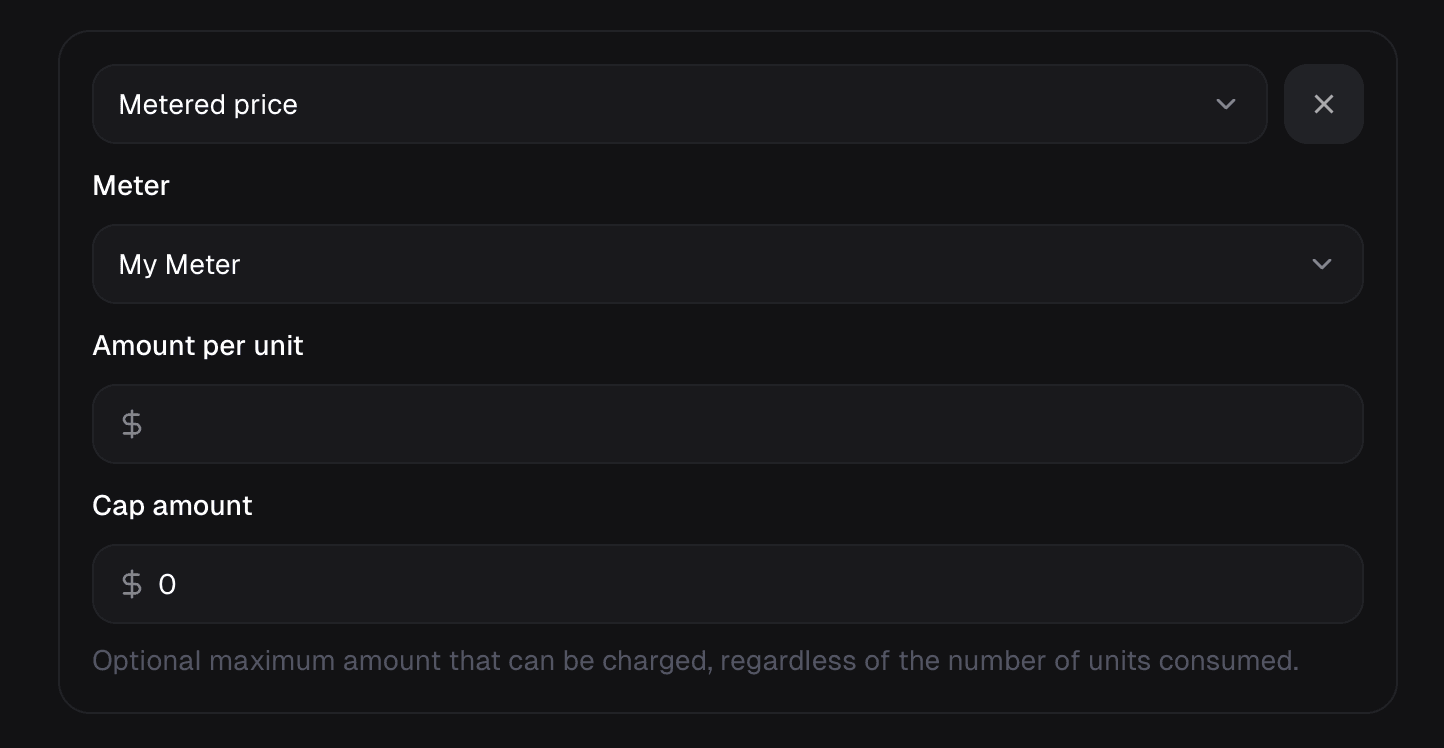 Optionally, you can set a **cap**. The customer will be charged the cap amount if they exceed it, regardless of the usage.
### Monthly Invoicing
If a customer has a subscription with a monthly billing period, usage is aggregated monthly and invoiced at the end of the month with the rest of the subscription.
### Yearly Invoicing
If a customer has a subscription with a yearly billing period, usage is aggregated yearly and invoiced at the end of the year with the rest of the subscription.
### Usage Charges and Subscription Cancellation
When a subscription is canceled, it generally remains active until the end of the current billing period (known as the grace period). During this grace period, all accumulated usage-based charges continue to be tracked. A final invoice will be issued at the end of that period to cover the consumed usage, even if the subscription will not be renewed. This ensures no pending usage charges are lost.
Optionally, you can set a **cap**. The customer will be charged the cap amount if they exceed it, regardless of the usage.
### Monthly Invoicing
If a customer has a subscription with a monthly billing period, usage is aggregated monthly and invoiced at the end of the month with the rest of the subscription.
### Yearly Invoicing
If a customer has a subscription with a yearly billing period, usage is aggregated yearly and invoiced at the end of the year with the rest of the subscription.
### Usage Charges and Subscription Cancellation
When a subscription is canceled, it generally remains active until the end of the current billing period (known as the grace period). During this grace period, all accumulated usage-based charges continue to be tracked. A final invoice will be issued at the end of that period to cover the consumed usage, even if the subscription will not be renewed. This ensures no pending usage charges are lost.
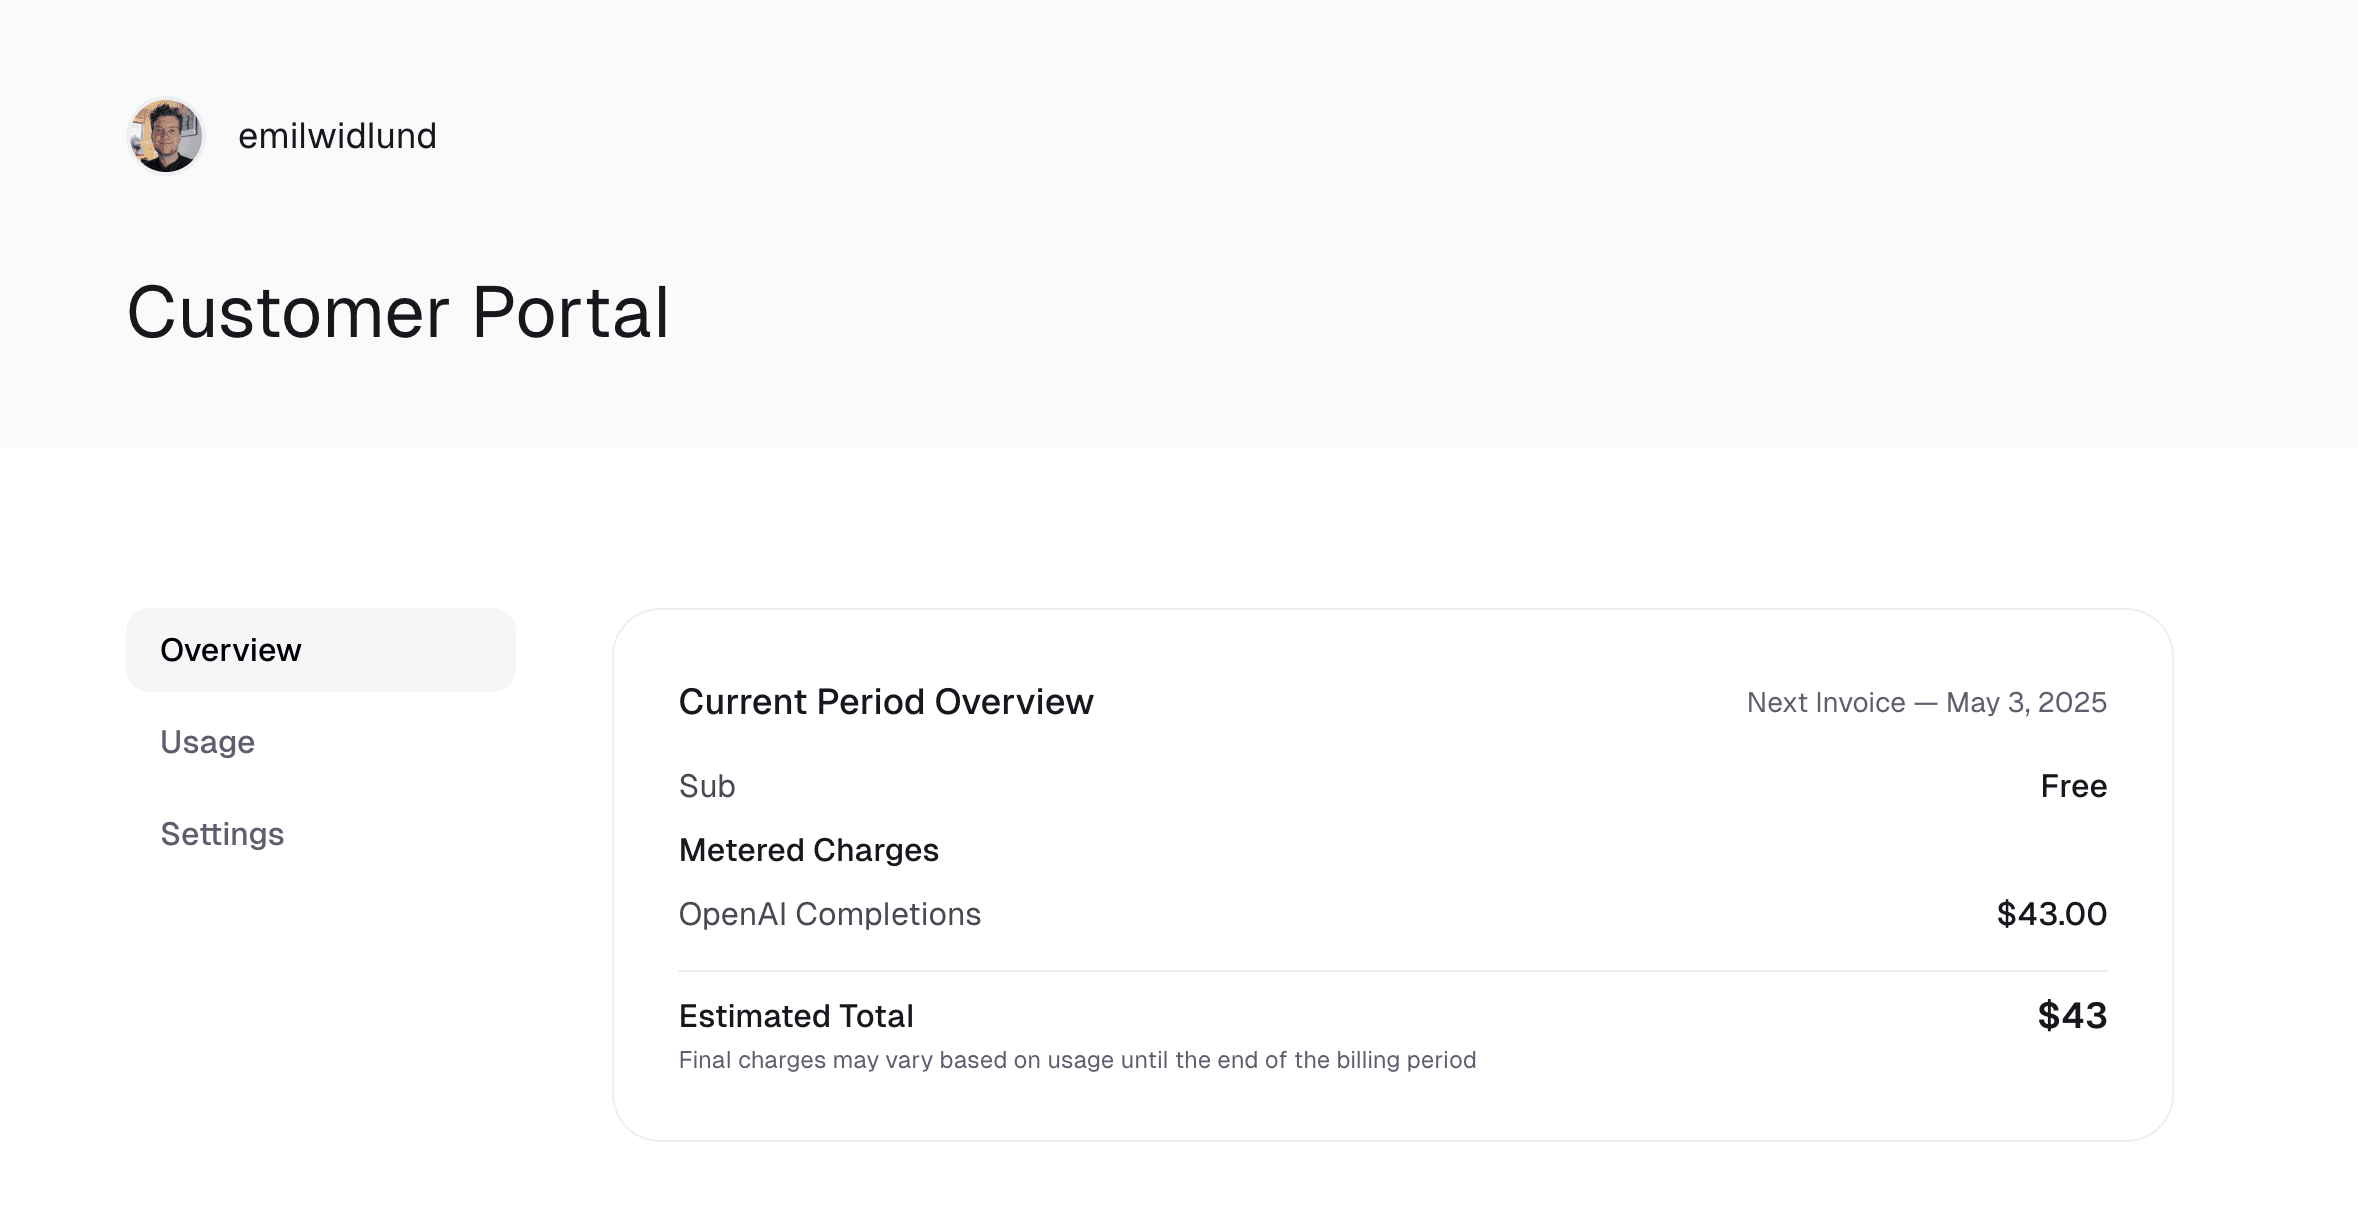
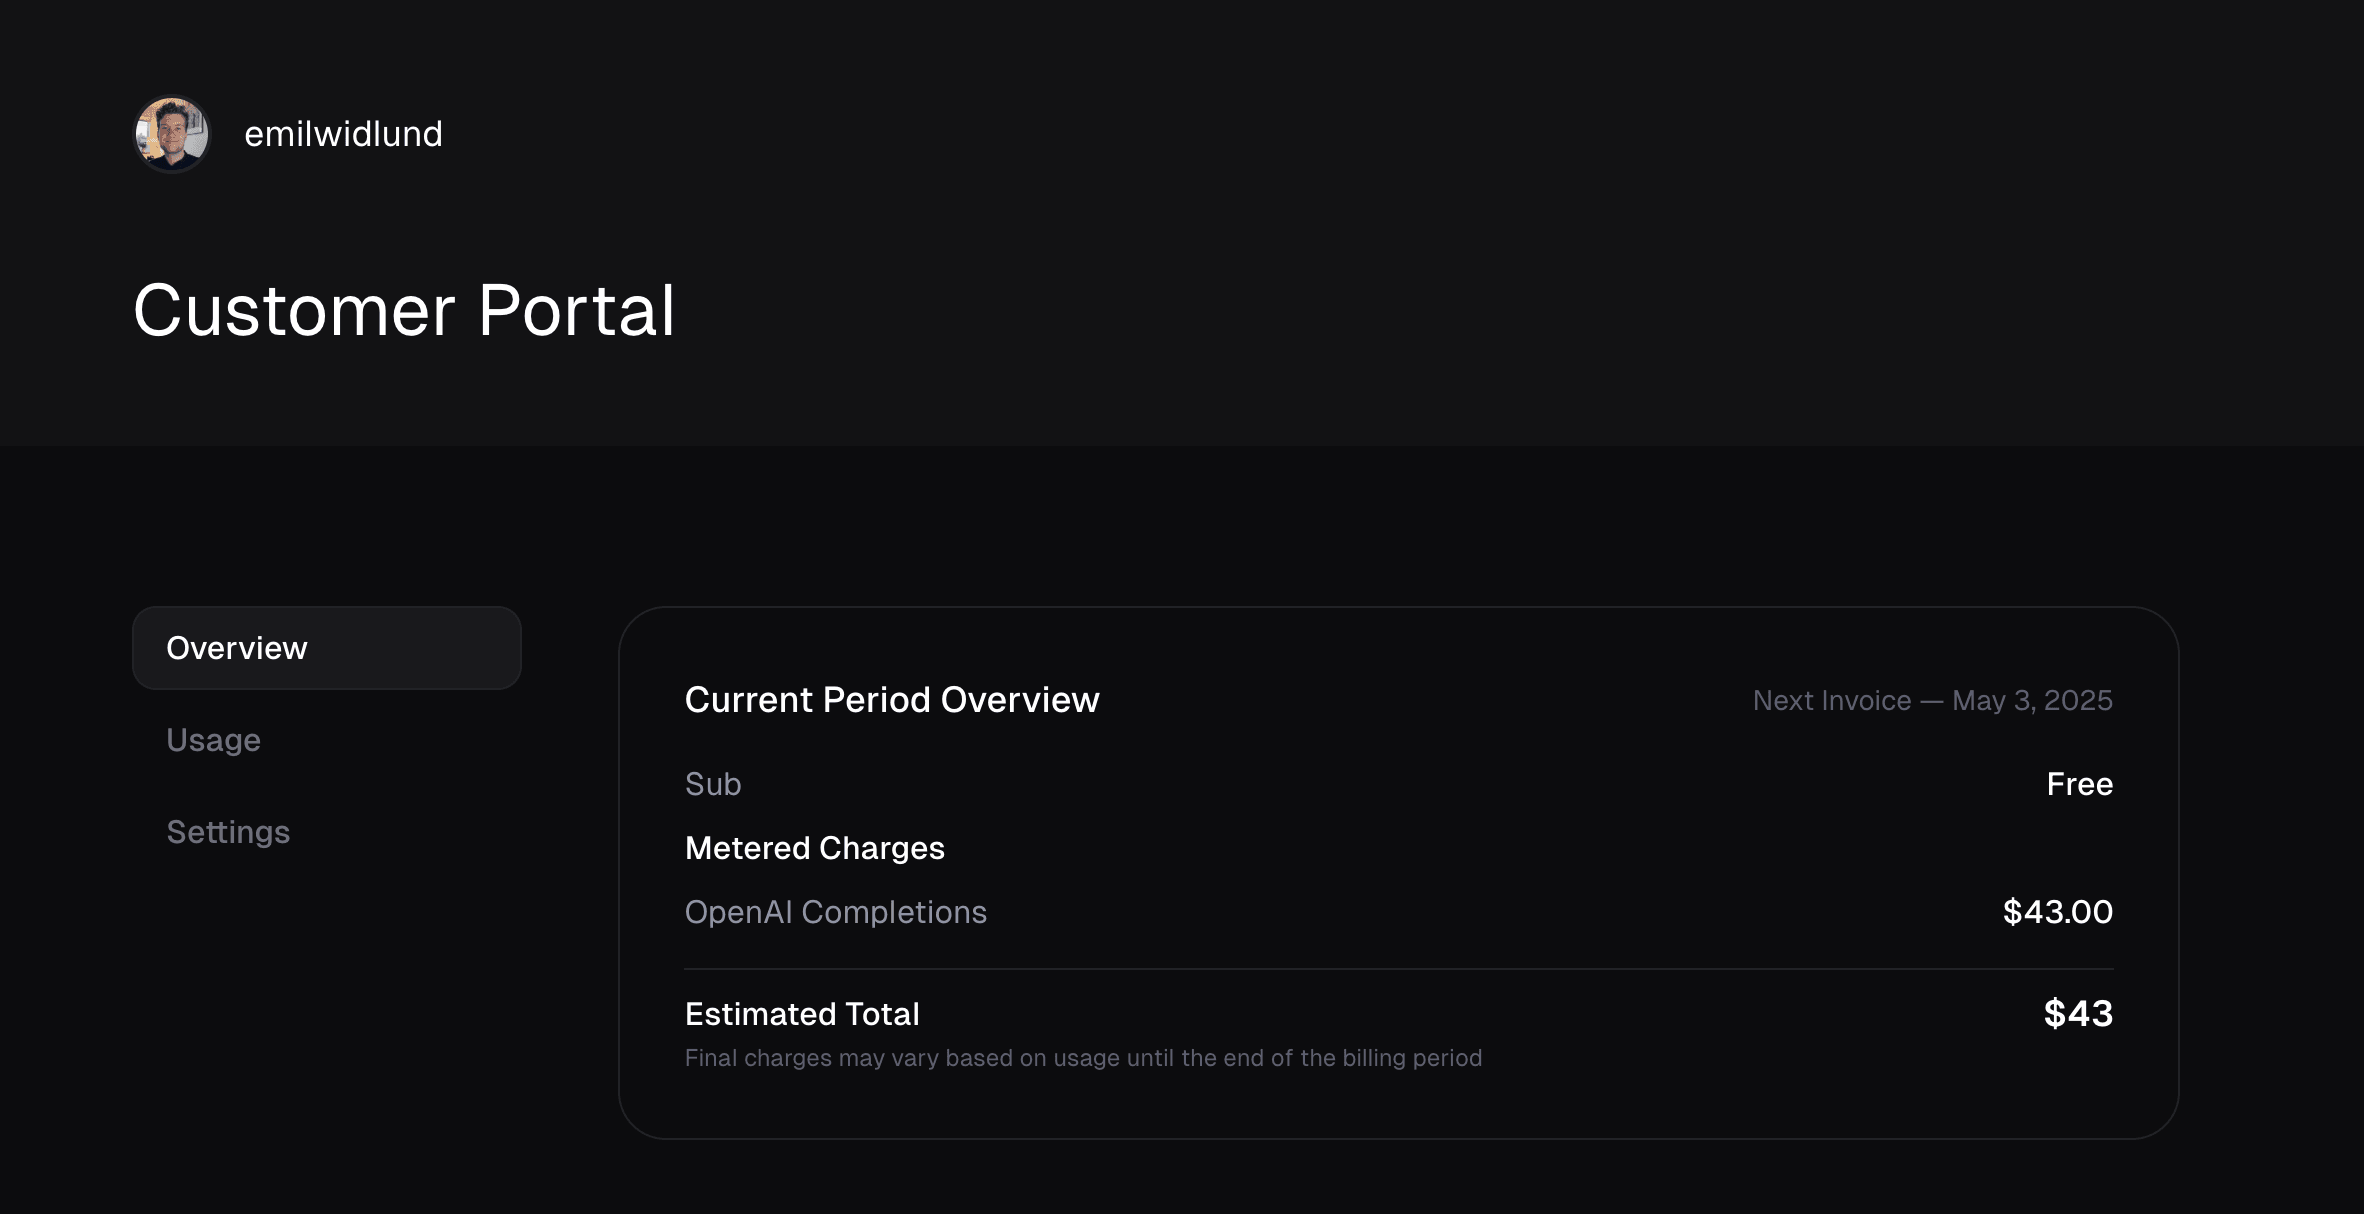 # Credits
Source: https://docs.ourpay.dev/features/usage-based-billing/credits
Credits is the way to pre-pay for usage in OurPay. It allows you to give your customers the ability to pre-pay for usage instead of risk getting a hefty bill at the end of the month.
## How Credits Work
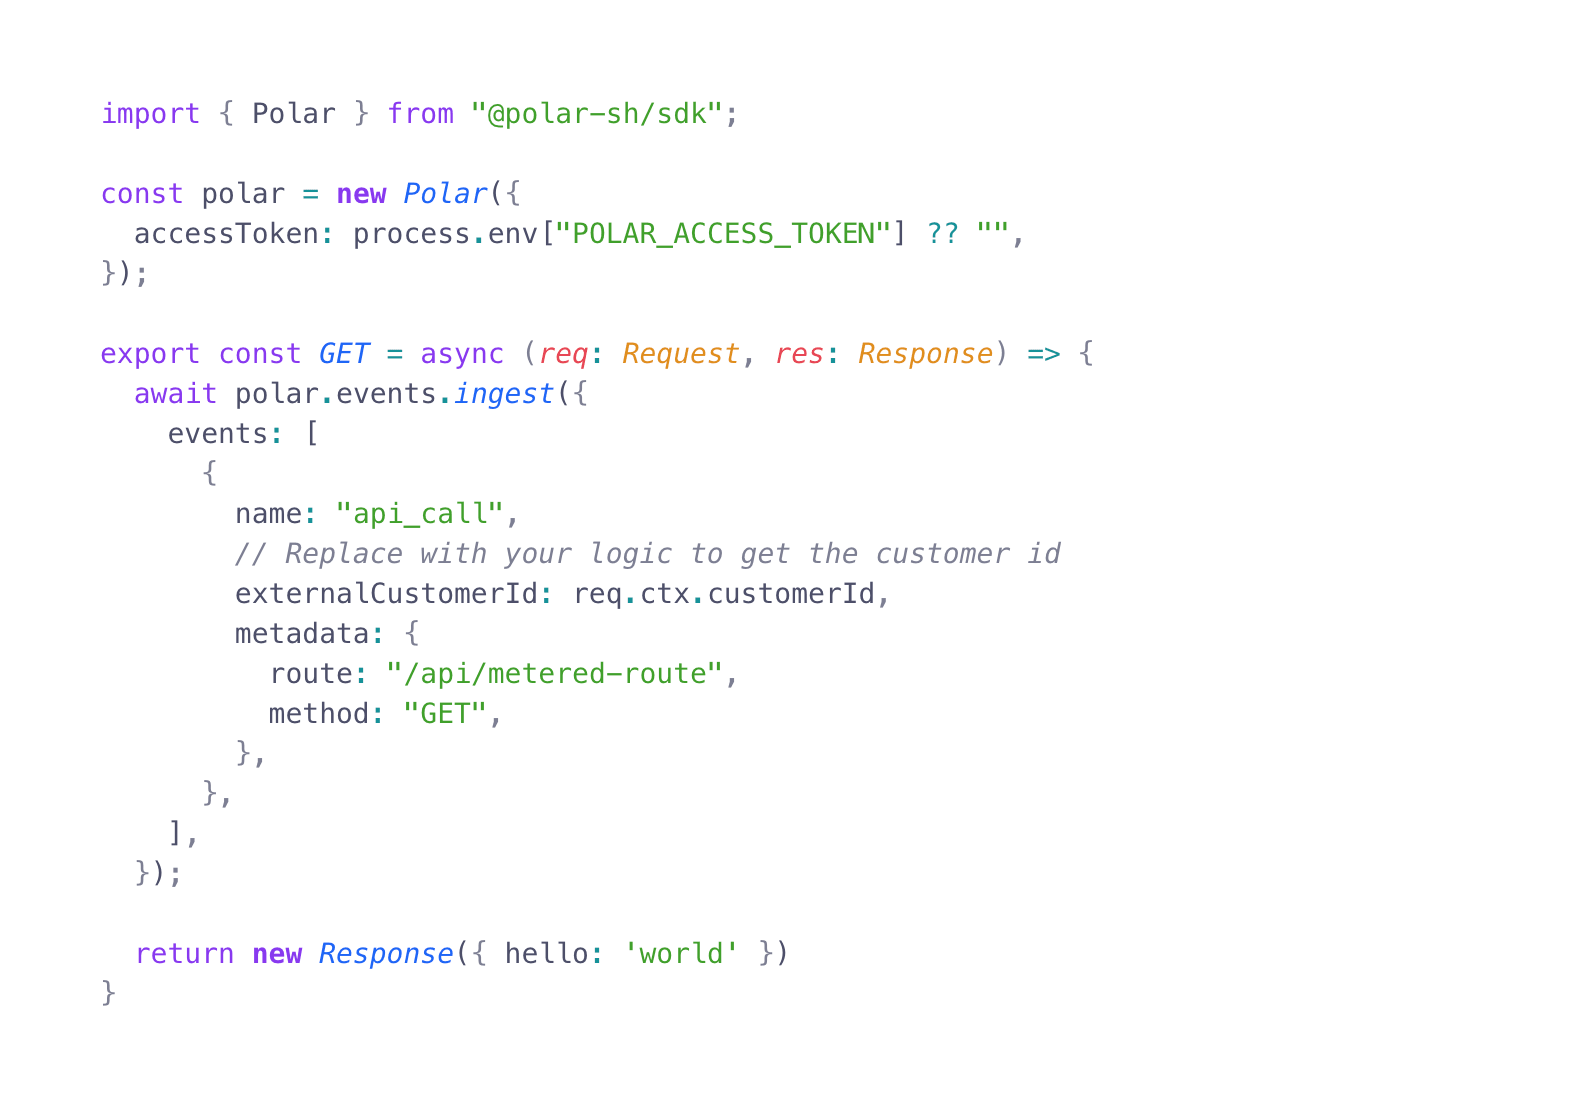
When you ingest events into a Usage Meter, customers will be charged for the usage based on the product's pricing model.
However, sometimes you may want to give your customers the ability to pre-pay for usage instead of risk getting a hefty bill at the end of the month.
When you issue Credits to a customer, we first deduct the Credits from their Usage Meter balance. If the Usage Meter balance reaches 0, the customer will be charged for the overage.
### Credits-only spending
To avoid any overage charges, don't create any Metered price on your product. This way, billing won't be triggered at all for the meter
## Issuing Credits with the Credits Benefit
# Credits
Source: https://docs.ourpay.dev/features/usage-based-billing/credits
Credits is the way to pre-pay for usage in OurPay. It allows you to give your customers the ability to pre-pay for usage instead of risk getting a hefty bill at the end of the month.
## How Credits Work
When you ingest events into a Usage Meter, customers will be charged for the usage based on the product's pricing model.
However, sometimes you may want to give your customers the ability to pre-pay for usage instead of risk getting a hefty bill at the end of the month.
When you issue Credits to a customer, we first deduct the Credits from their Usage Meter balance. If the Usage Meter balance reaches 0, the customer will be charged for the overage.
### Credits-only spending
To avoid any overage charges, don't create any Metered price on your product. This way, billing won't be triggered at all for the meter
## Issuing Credits with the Credits Benefit
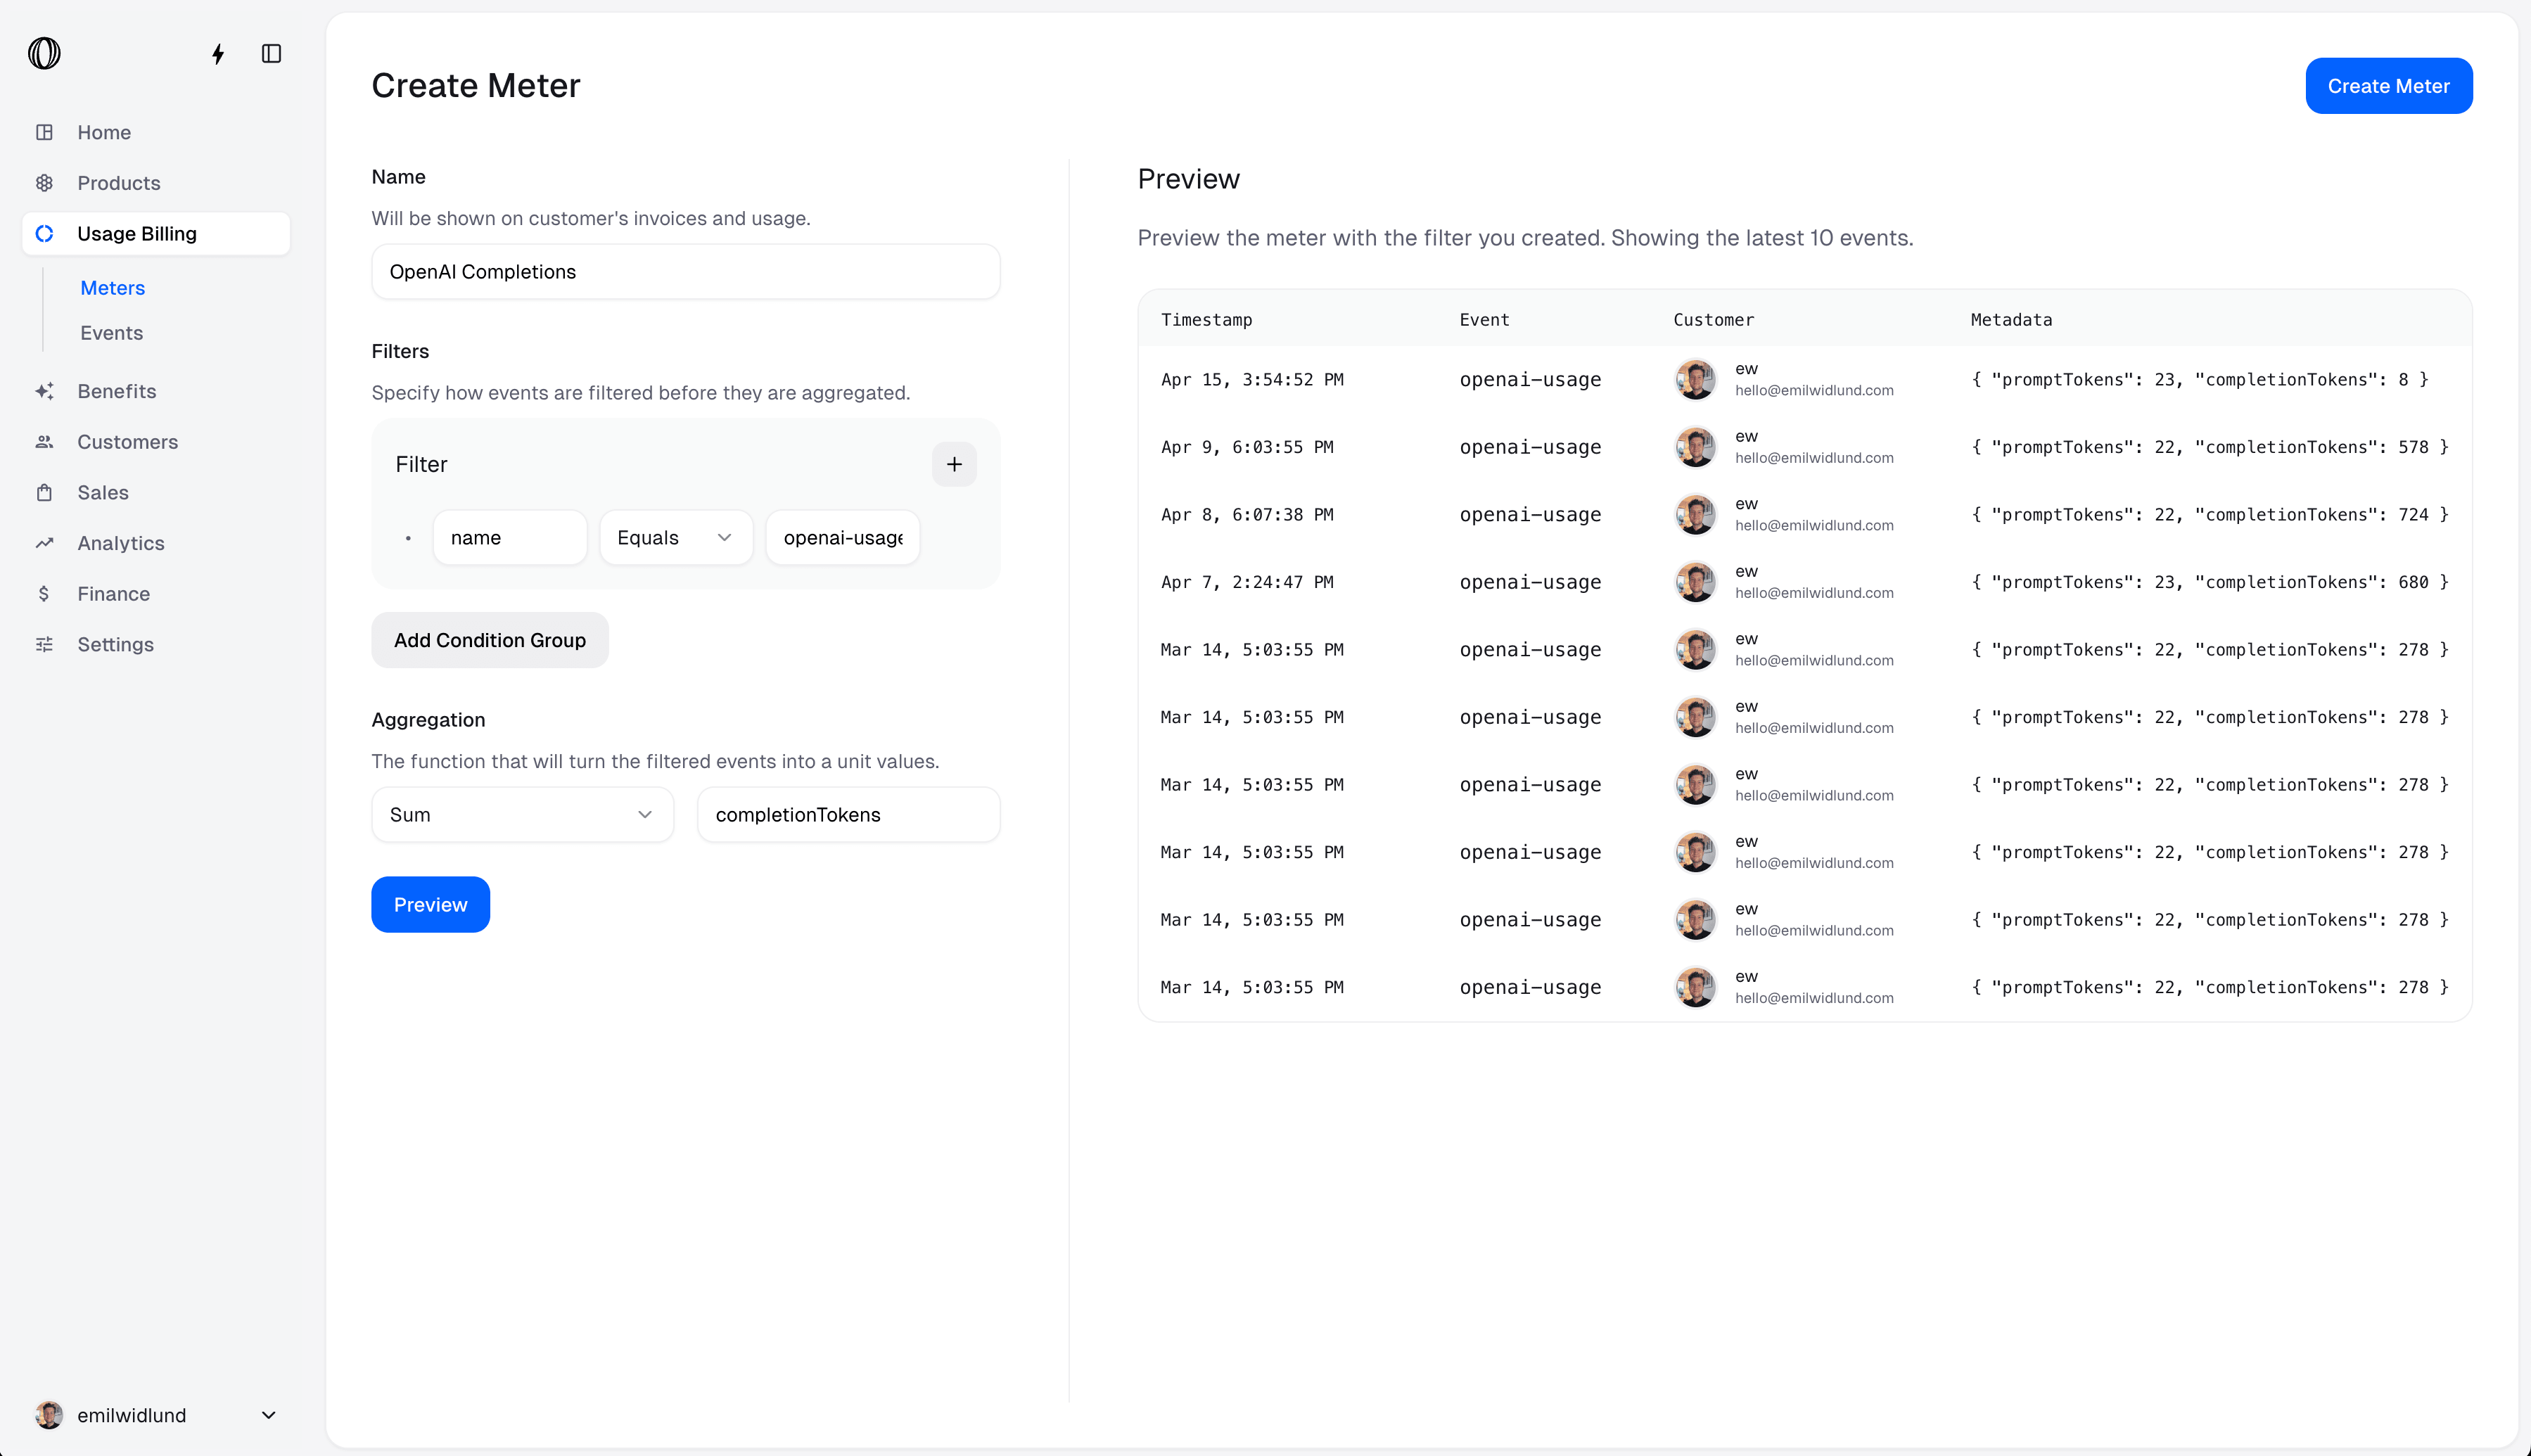
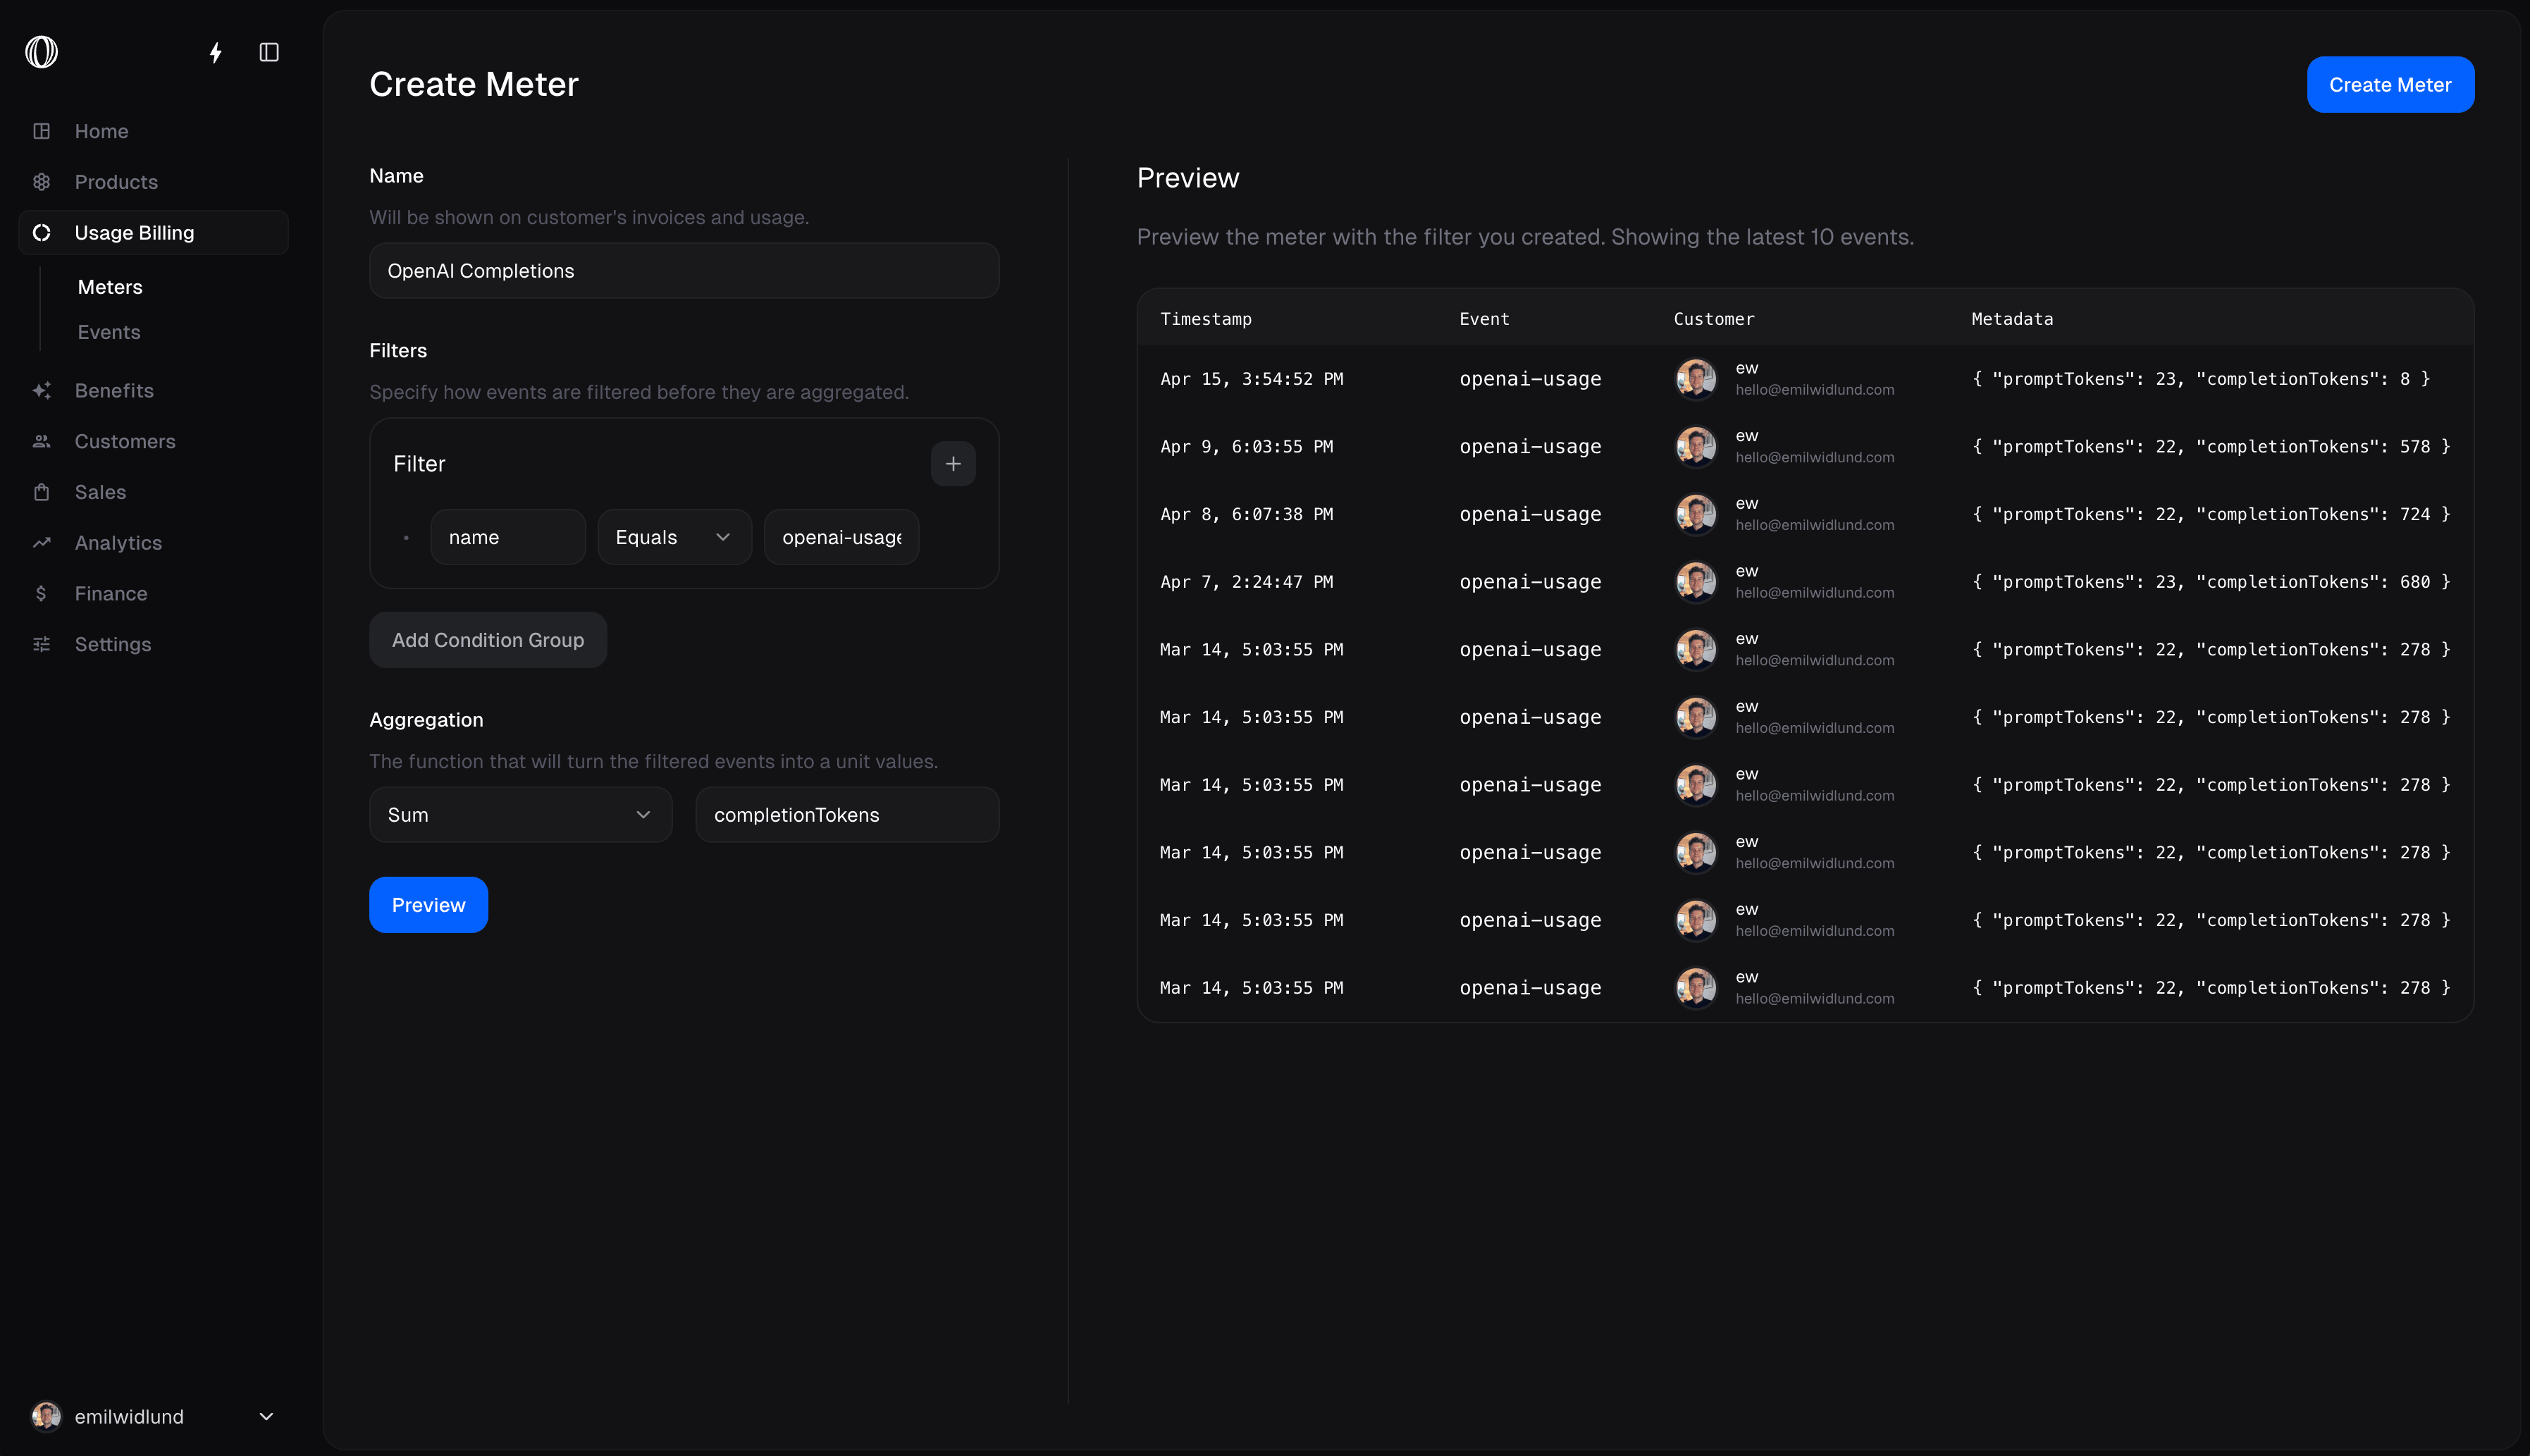
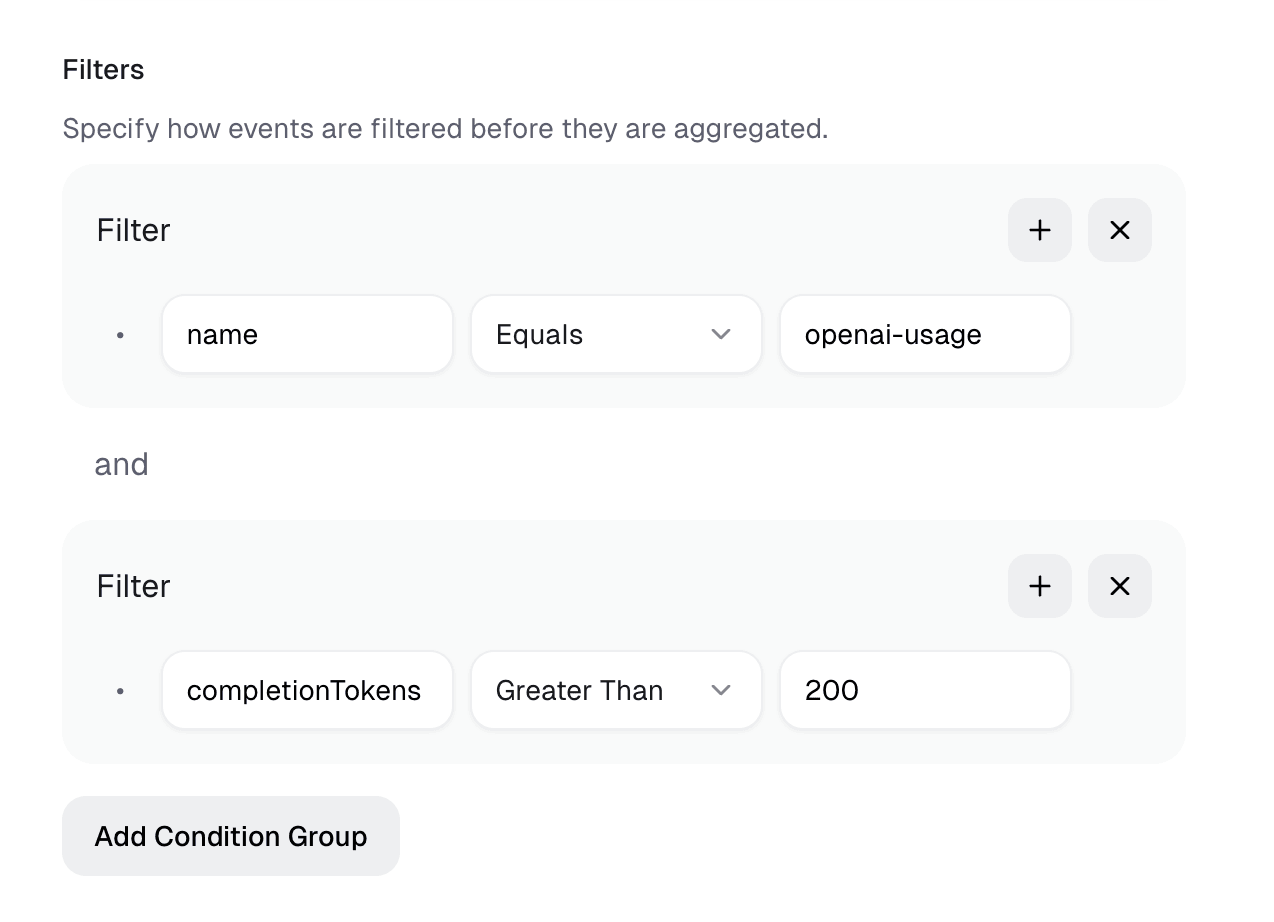
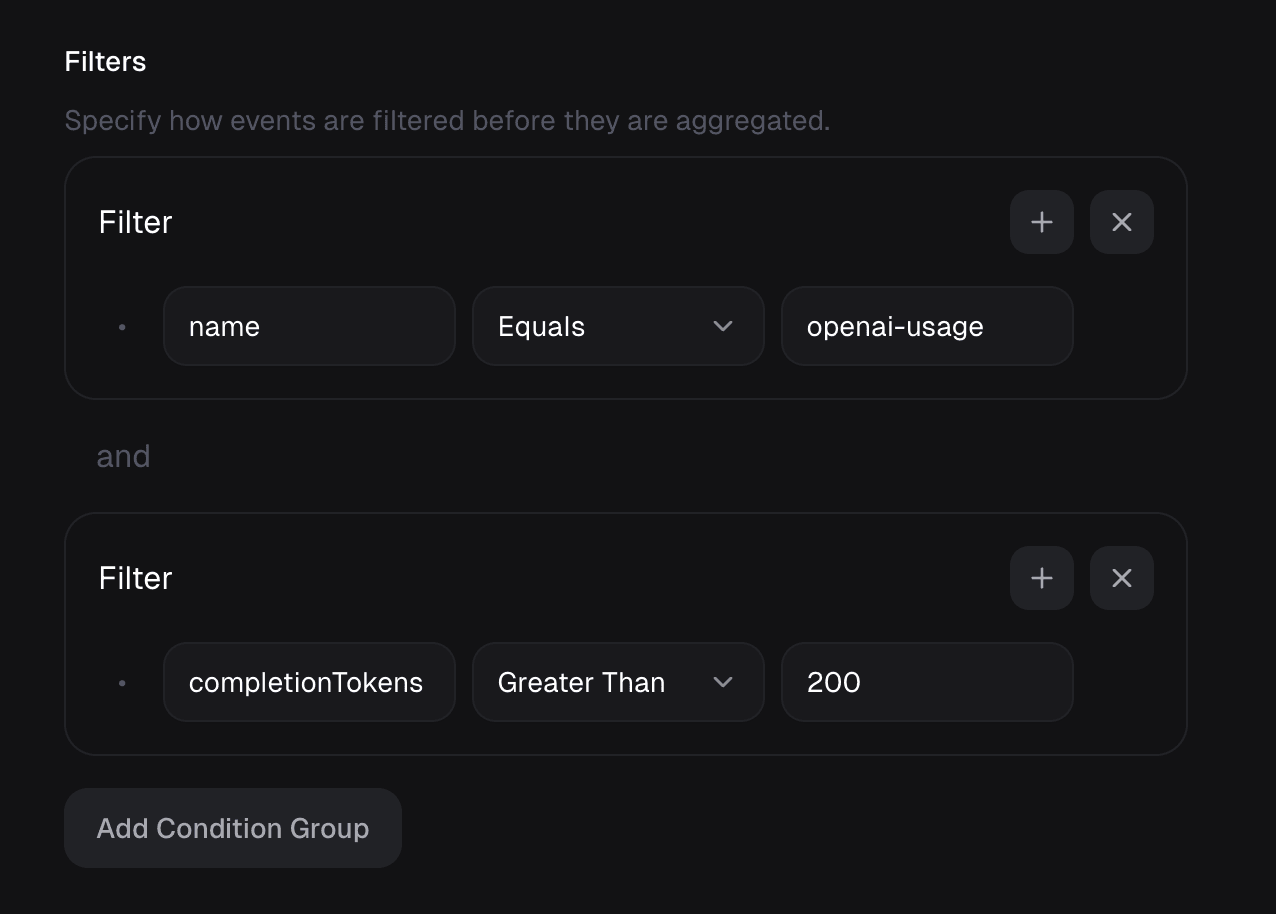 ### Clauses
A clause is a condition that an event must meet to be included in the meter.
#### Property
Properties are the properties of the event that you want to filter on.
If you want to match on a metadata field, you can use the metadata key directly. No need to include a `metadata.` prefix.
#### Operator
Operators are the operators that you want to use to filter the events.
- **Equals**
- **Not equals**
- **Greater Than**
- **Greater Than or Equals**
- **Less Than**
- **Less Than or Equals**
- **Contains**
- **Does Not Contain**
#### Value
Values are automatically parsed in the filter builder. They're parsed in the following order:
1. Number — Tries to parse the value as number
2. Boolean — Checks if value is "true" or "false"
3. String — Treats value as string as fallback
### Conjunctions
A conjunction is a logical operator that combines two or more clauses.
- **and** — All clauses must be true for the event to be included.
- **or** — At least one clause must be true for the event to be included.
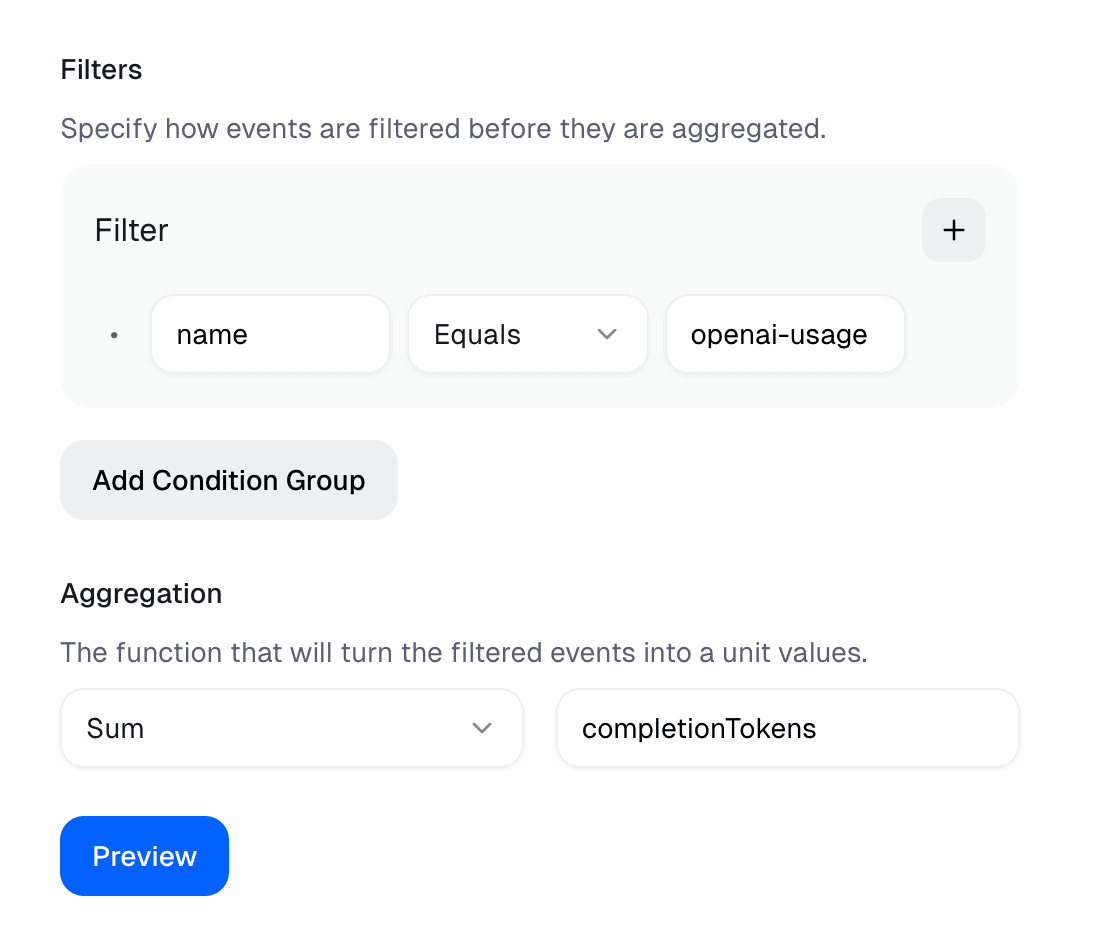
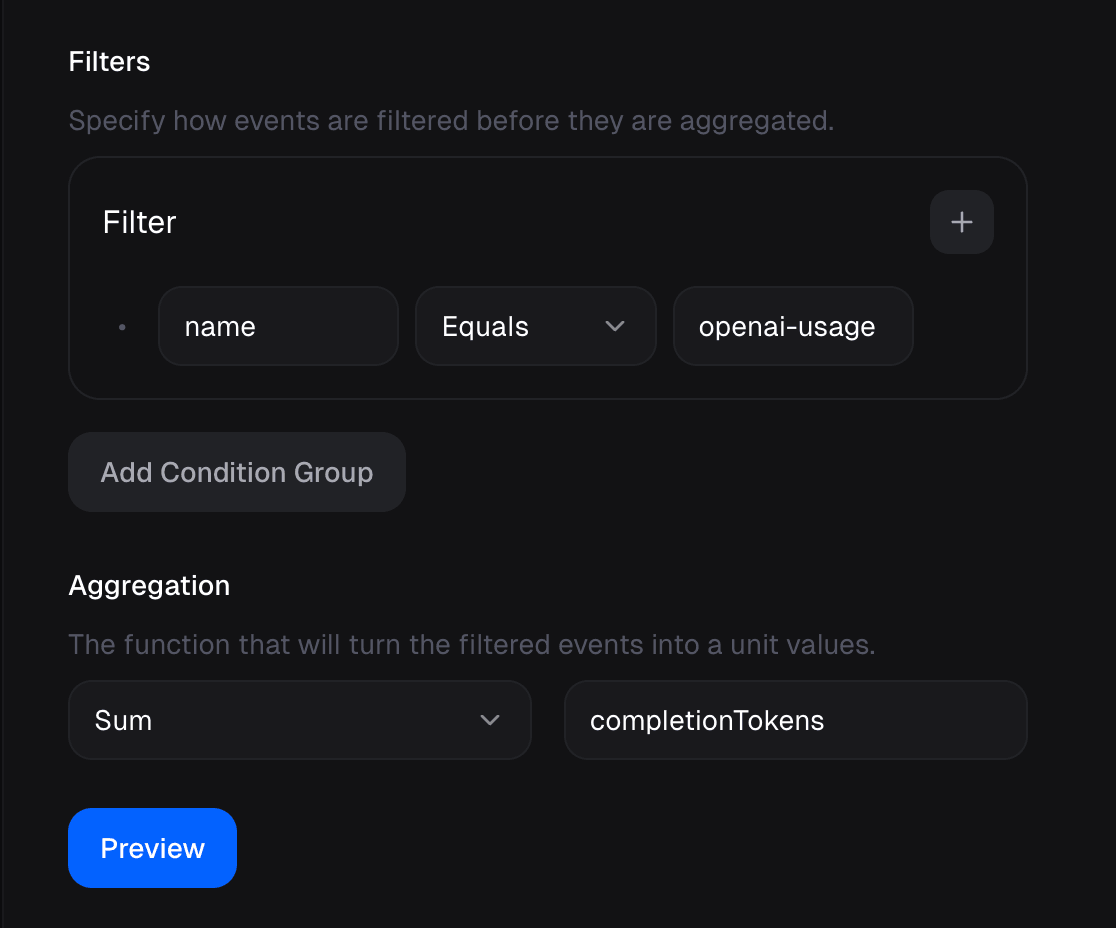
## Aggregation
The aggregation is the function that is used to aggregate the events that match the filter.
For example, if you want to count the number of events that match the filter, you can use the **Count** aggregation. If you want to sum the value of a metadata field, you can use the **Sum** aggregation.
- **Count** — Counts the number of events that match the filter.
- **Sum** — Sums the value of a property.
- **Average** — Computes the average value of a property.
- **Minimum** — Computes the minimum value of a property.
- **Maximum** — Computes the maximum value of a property.
- **Unique** — Counts the number of unique values of a property.
### Clauses
A clause is a condition that an event must meet to be included in the meter.
#### Property
Properties are the properties of the event that you want to filter on.
If you want to match on a metadata field, you can use the metadata key directly. No need to include a `metadata.` prefix.
#### Operator
Operators are the operators that you want to use to filter the events.
- **Equals**
- **Not equals**
- **Greater Than**
- **Greater Than or Equals**
- **Less Than**
- **Less Than or Equals**
- **Contains**
- **Does Not Contain**
#### Value
Values are automatically parsed in the filter builder. They're parsed in the following order:
1. Number — Tries to parse the value as number
2. Boolean — Checks if value is "true" or "false"
3. String — Treats value as string as fallback
### Conjunctions
A conjunction is a logical operator that combines two or more clauses.
- **and** — All clauses must be true for the event to be included.
- **or** — At least one clause must be true for the event to be included.
## Aggregation
The aggregation is the function that is used to aggregate the events that match the filter.
For example, if you want to count the number of events that match the filter, you can use the **Count** aggregation. If you want to sum the value of a metadata field, you can use the **Sum** aggregation.
- **Count** — Counts the number of events that match the filter.
- **Sum** — Sums the value of a property.
- **Average** — Computes the average value of a property.
- **Minimum** — Computes the minimum value of a property.
- **Maximum** — Computes the maximum value of a property.
- **Unique** — Counts the number of unique values of a property.
 Consider following this guide while using the OurPay Sandbox Environment. This will allow you to test your integration without affecting your production data.
OurPay Laravel Example App
--------------------------------
We've created a simple example Laravel application that you can use as a reference.
[View Code on GitHub](https://github.com/sunnycodet/ourpay-laravel)
Setting up environment variables
---------------------------------------
### OurPay API Key
To authenticate with OurPay, you need to create an access token, and supply it to Laravel using a `OURPAY_API_KEY` environment variable.
You can create an organization access token from your organization settings.
Fetching OurPay Products for display
------------------------------------------
### Creating the Products Controller
Go ahead and add the following entry in your `routes/web.php` file:
```php
// routes/web.php
Route::get('/products', [ProductsController::class, 'handle']);
```
Next up, create the `ProductsController` class in the `app/Http/Controllers` directory:
```php
// app/Http/Controllers/ProductsController.php
api.ourpay.workers.dev when ready to go live
// And don't forget to update the .env file with the correct OURPAY_ORGANIZATION_ID and OURPAY_WEBHOOK_SECRET
$data = Http::get('https://sandbox-api.ourpay.workers.dev/v1/products', [
'is_archived' => false,
]);
$products = $data->json();
return view('products', ['products' => $products['items']]);
}
}
```
Displaying Products
--------------------------
Finally, create the `products` view in the `resources/views` directory:
```php
// resources/views/products.blade.php
@foreach ($products as $product)
Consider following this guide while using the OurPay Sandbox Environment. This will allow you to test your integration without affecting your production data.
OurPay Laravel Example App
--------------------------------
We've created a simple example Laravel application that you can use as a reference.
[View Code on GitHub](https://github.com/sunnycodet/ourpay-laravel)
Setting up environment variables
---------------------------------------
### OurPay API Key
To authenticate with OurPay, you need to create an access token, and supply it to Laravel using a `OURPAY_API_KEY` environment variable.
You can create an organization access token from your organization settings.
Fetching OurPay Products for display
------------------------------------------
### Creating the Products Controller
Go ahead and add the following entry in your `routes/web.php` file:
```php
// routes/web.php
Route::get('/products', [ProductsController::class, 'handle']);
```
Next up, create the `ProductsController` class in the `app/Http/Controllers` directory:
```php
// app/Http/Controllers/ProductsController.php
api.ourpay.workers.dev when ready to go live
// And don't forget to update the .env file with the correct OURPAY_ORGANIZATION_ID and OURPAY_WEBHOOK_SECRET
$data = Http::get('https://sandbox-api.ourpay.workers.dev/v1/products', [
'is_archived' => false,
]);
$products = $data->json();
return view('products', ['products' => $products['items']]);
}
}
```
Displaying Products
--------------------------
Finally, create the `products` view in the `resources/views` directory:
```php
// resources/views/products.blade.php
@foreach ($products as $product)
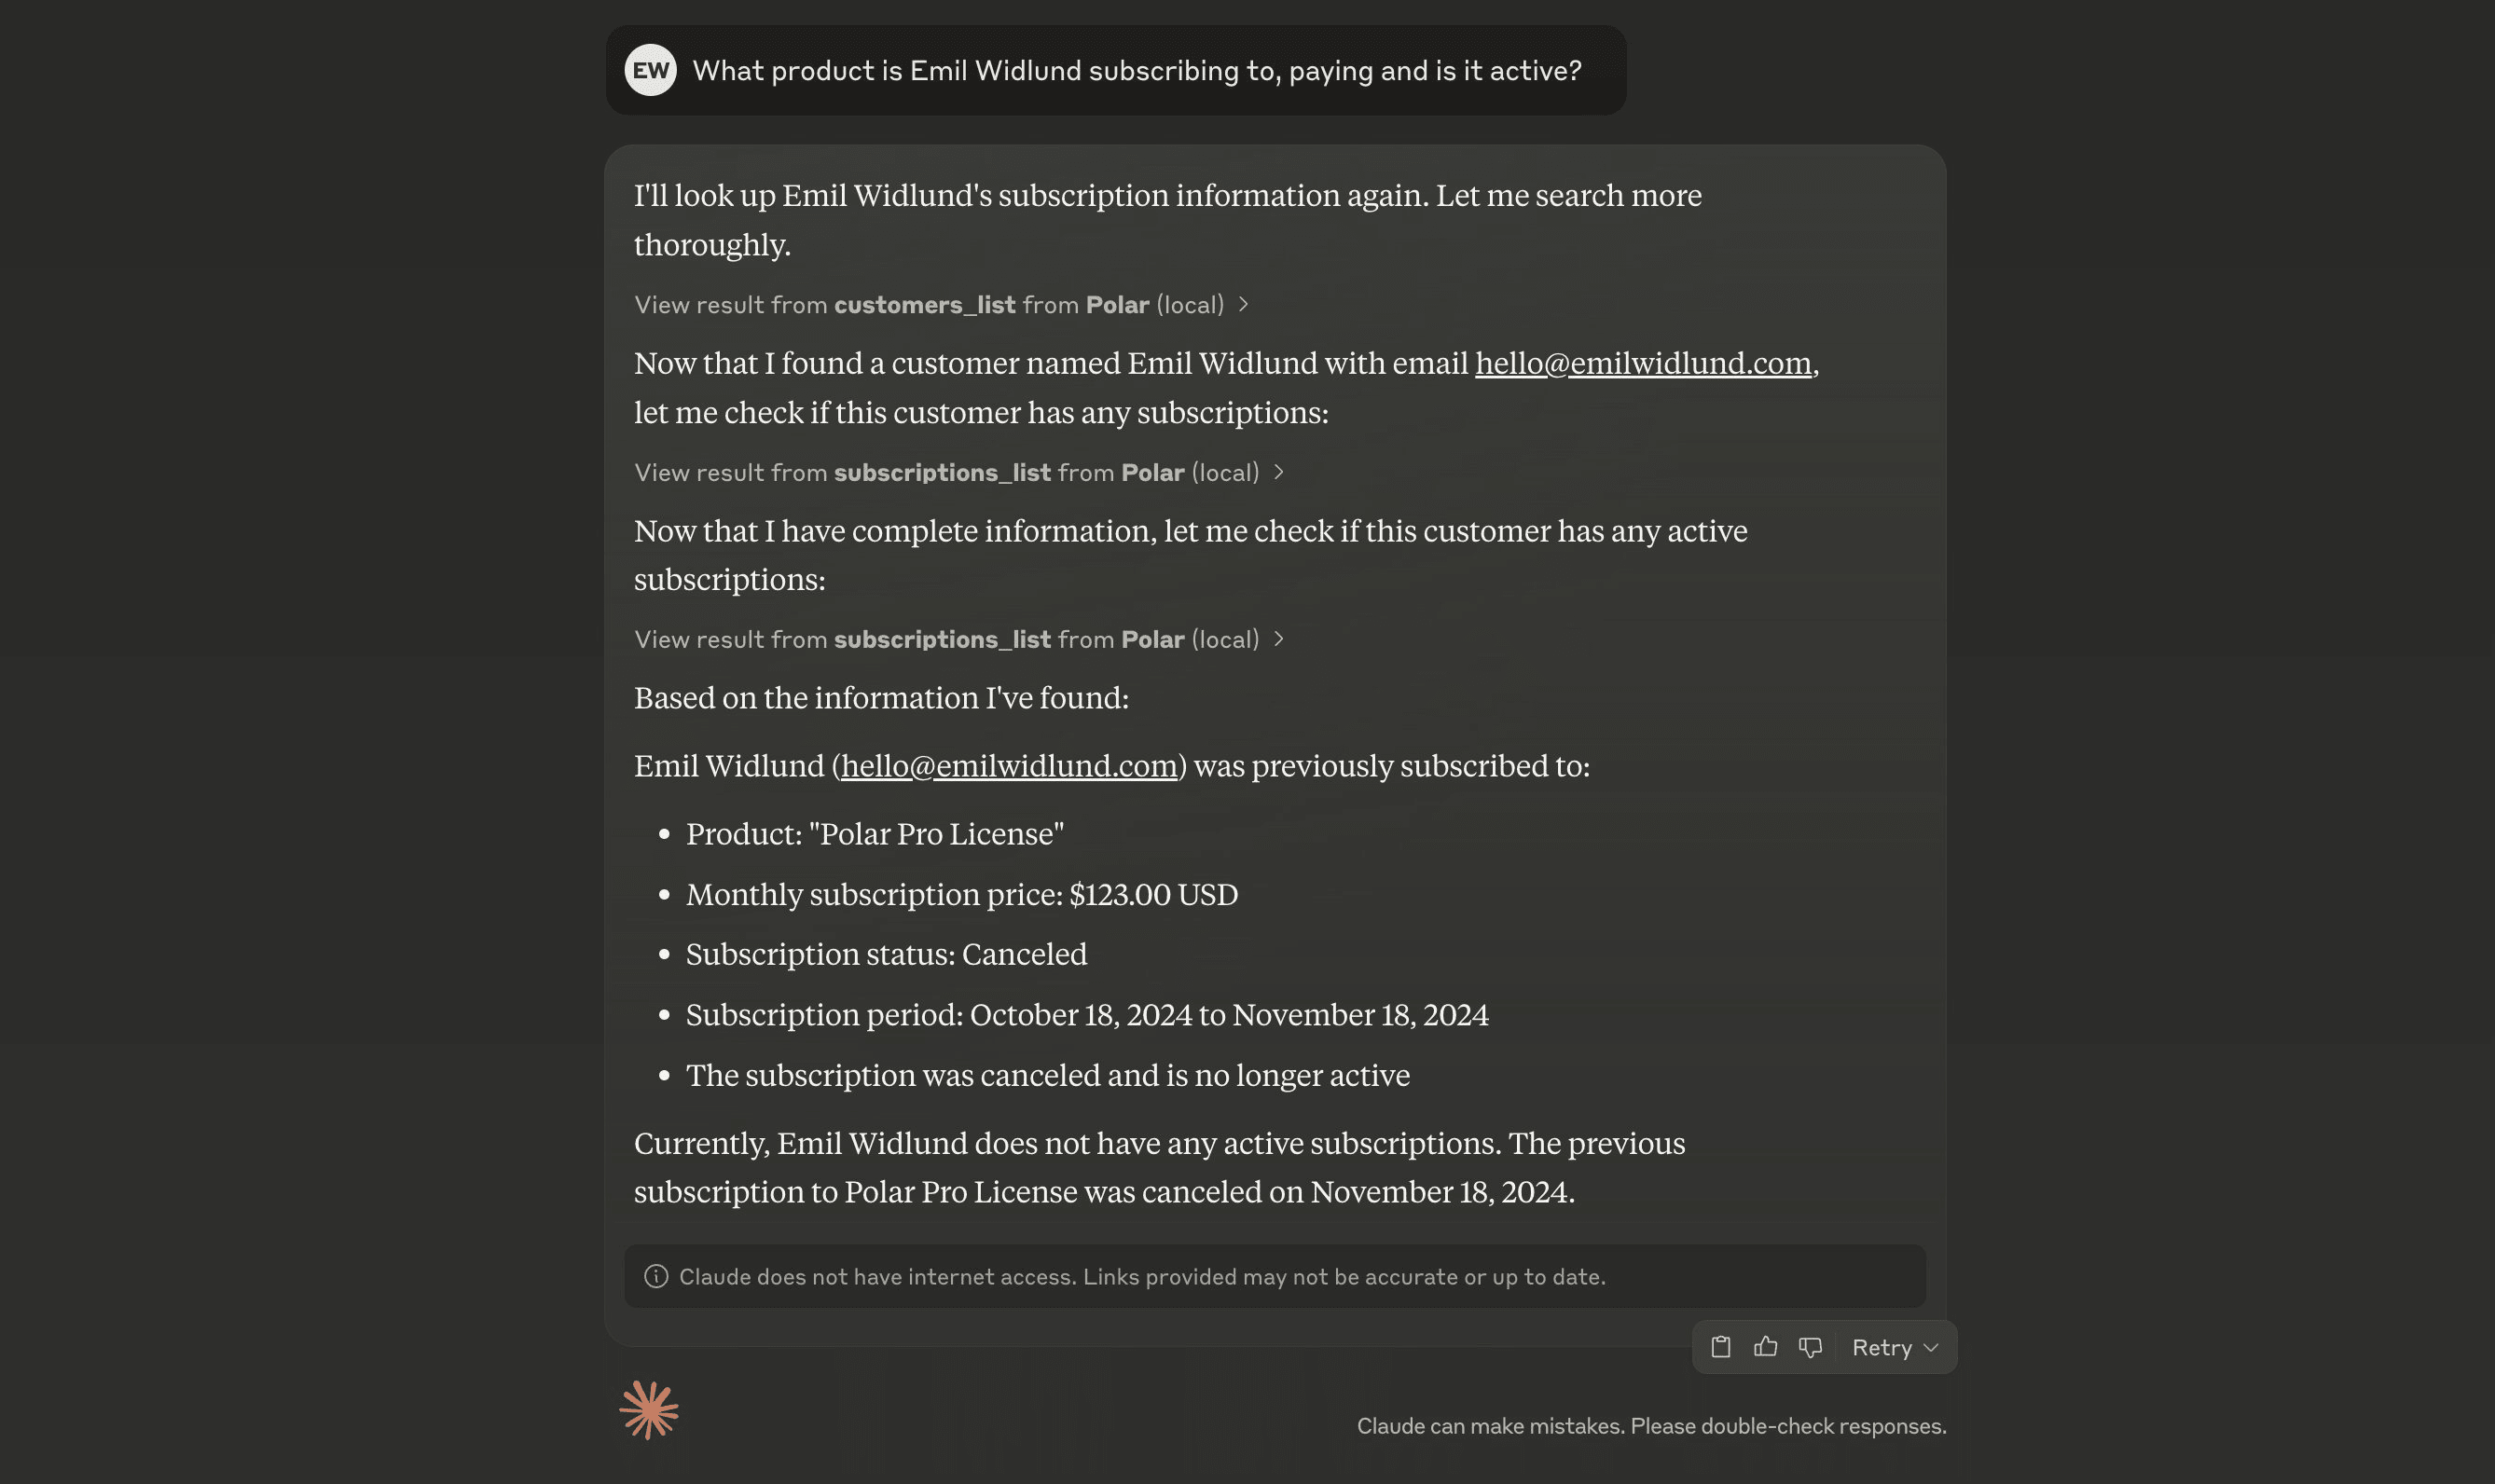 Supercharge your AI agents with OurPay as a Model Context Protocol (MCP) server.
## What is MCP?
MCP is a protocol for integrating tools with AI agents. It can greatly enhance the capabilities of your AI agents by providing them with real-time data and context.
OurPay offers a remote MCP server that you can connect to from most AI clients.
## How does it work?
You need a MCP-capable agent environment to use OurPay over MCP. A few of them are Claude Desktop and Cursor.
## Connecting to OurPay MCP
OurPay provides two MCP servers:
- **Production**: `https://mcp.ourpay.workers.dev/mcp/ourpay-mcp` - Connect to your live OurPay organization
- **Sandbox**: `https://mcp.ourpay.workers.dev/mcp/ourpay-sandbox` - Connect to the OurPay sandbox environment for testing
When you can specify a MCP URL, use one of the URLs above depending on your environment.
If you have to specify a command, use:
```json
{
"mcpServers": {
"OurPay": {
"command": "npx",
"args": ["mcp-remote", "https://mcp.ourpay.workers.dev/mcp/ourpay-mcp"]
}
}
}
```
For sandbox:
```json
{
"mcpServers": {
"OurPay Sandbox": {
"command": "npx",
"args": ["mcp-remote", "https://mcp.ourpay.workers.dev/mcp/ourpay-sandbox"]
}
}
}
```
### Cursor
In `.cursor/mcp.json`, add:
```json
{
"mcpServers": {
"OurPay": {
"url": "https://mcp.ourpay.workers.dev/mcp/ourpay-mcp"
}
}
}
```
For sandbox:
```json
{
"mcpServers": {
"OurPay Sandbox": {
"url": "https://mcp.ourpay.workers.dev/mcp/ourpay-sandbox"
}
}
}
```
### Windsurf
In `mcp_config.json`, add:
```json
{
"mcpServers": {
"OurPay": {
"command": "npx",
"args": ["mcp-remote", "https://mcp.ourpay.workers.dev/mcp/ourpay-mcp"]
}
}
}
```
For sandbox:
```json
{
"mcpServers": {
"OurPay Sandbox": {
"command": "npx",
"args": ["mcp-remote", "https://mcp.ourpay.workers.dev/mcp/ourpay-sandbox"]
}
}
}
```
### Codex
Add the following to your `~/.codex/config.toml`:
```toml
[features]
rmcp_client = true
[mcp_servers.ourpay]
type = "http"
url = "https://mcp.ourpay.workers.dev/mcp/ourpay-mcp"
```
Then run:
```sh
codex mcp login ourpay
```
For sandbox:
```toml
[features]
rmcp_client = true
[mcp_servers.ourpay_sandbox]
type = "http"
url = "https://mcp.ourpay.workers.dev/mcp/ourpay-sandbox"
```
Then run:
```sh
codex mcp login ourpay_sandbox
```
### Claude Code
Run the following command:
```
claude mcp add --transport http "OurPay" "https://mcp.ourpay.workers.dev/mcp/ourpay-mcp"
```
For sandbox:
```
claude mcp add --transport http "OurPay-Sandbox" "https://mcp.ourpay.workers.dev/mcp/ourpay-sandbox"
```
### OpenCode
In `opencode.jsonc`, add:
```jsonc
{
"$schema": "https://opencode.ai/config.json",
"mcp": {
"OurPay": {
"type": "remote",
"url": "https://mcp.ourpay.workers.dev/mcp/ourpay-mcp"
}
}
}
```
For sandbox:
```jsonc
{
"$schema": "https://opencode.ai/config.json",
"mcp": {
"OurPay Sandbox": {
"type": "remote",
"url": "https://mcp.ourpay.workers.dev/mcp/ourpay-sandbox"
}
}
}
```
### ChatGPT
MCP is only available for paid users in beta on ChatGPT web, by enabling Developer Mode.
Once Developer Mode is enabled, go to _Settings_ → _Connectors_ and add the MCP server using `https://mcp.ourpay.workers.dev/mcp/ourpay-mcp`.
For sandbox, use `https://mcp.ourpay.workers.dev/mcp/ourpay-sandbox` instead.
### Claude Desktop
Go to _Settings_ → _Connectors_ and click _Add custom connector_.
Name it "OurPay" and add `https://mcp.ourpay.workers.dev/mcp/ourpay-mcp` as the server URL.
For sandbox, use `https://mcp.ourpay.workers.dev/mcp/ourpay-sandbox` as the server URL instead.
Save, and click _Connect_ to connect to your OurPay organization.
# Organization Access Tokens
Source: https://docs.ourpay.dev/integrate/oat
Supercharge your AI agents with OurPay as a Model Context Protocol (MCP) server.
## What is MCP?
MCP is a protocol for integrating tools with AI agents. It can greatly enhance the capabilities of your AI agents by providing them with real-time data and context.
OurPay offers a remote MCP server that you can connect to from most AI clients.
## How does it work?
You need a MCP-capable agent environment to use OurPay over MCP. A few of them are Claude Desktop and Cursor.
## Connecting to OurPay MCP
OurPay provides two MCP servers:
- **Production**: `https://mcp.ourpay.workers.dev/mcp/ourpay-mcp` - Connect to your live OurPay organization
- **Sandbox**: `https://mcp.ourpay.workers.dev/mcp/ourpay-sandbox` - Connect to the OurPay sandbox environment for testing
When you can specify a MCP URL, use one of the URLs above depending on your environment.
If you have to specify a command, use:
```json
{
"mcpServers": {
"OurPay": {
"command": "npx",
"args": ["mcp-remote", "https://mcp.ourpay.workers.dev/mcp/ourpay-mcp"]
}
}
}
```
For sandbox:
```json
{
"mcpServers": {
"OurPay Sandbox": {
"command": "npx",
"args": ["mcp-remote", "https://mcp.ourpay.workers.dev/mcp/ourpay-sandbox"]
}
}
}
```
### Cursor
In `.cursor/mcp.json`, add:
```json
{
"mcpServers": {
"OurPay": {
"url": "https://mcp.ourpay.workers.dev/mcp/ourpay-mcp"
}
}
}
```
For sandbox:
```json
{
"mcpServers": {
"OurPay Sandbox": {
"url": "https://mcp.ourpay.workers.dev/mcp/ourpay-sandbox"
}
}
}
```
### Windsurf
In `mcp_config.json`, add:
```json
{
"mcpServers": {
"OurPay": {
"command": "npx",
"args": ["mcp-remote", "https://mcp.ourpay.workers.dev/mcp/ourpay-mcp"]
}
}
}
```
For sandbox:
```json
{
"mcpServers": {
"OurPay Sandbox": {
"command": "npx",
"args": ["mcp-remote", "https://mcp.ourpay.workers.dev/mcp/ourpay-sandbox"]
}
}
}
```
### Codex
Add the following to your `~/.codex/config.toml`:
```toml
[features]
rmcp_client = true
[mcp_servers.ourpay]
type = "http"
url = "https://mcp.ourpay.workers.dev/mcp/ourpay-mcp"
```
Then run:
```sh
codex mcp login ourpay
```
For sandbox:
```toml
[features]
rmcp_client = true
[mcp_servers.ourpay_sandbox]
type = "http"
url = "https://mcp.ourpay.workers.dev/mcp/ourpay-sandbox"
```
Then run:
```sh
codex mcp login ourpay_sandbox
```
### Claude Code
Run the following command:
```
claude mcp add --transport http "OurPay" "https://mcp.ourpay.workers.dev/mcp/ourpay-mcp"
```
For sandbox:
```
claude mcp add --transport http "OurPay-Sandbox" "https://mcp.ourpay.workers.dev/mcp/ourpay-sandbox"
```
### OpenCode
In `opencode.jsonc`, add:
```jsonc
{
"$schema": "https://opencode.ai/config.json",
"mcp": {
"OurPay": {
"type": "remote",
"url": "https://mcp.ourpay.workers.dev/mcp/ourpay-mcp"
}
}
}
```
For sandbox:
```jsonc
{
"$schema": "https://opencode.ai/config.json",
"mcp": {
"OurPay Sandbox": {
"type": "remote",
"url": "https://mcp.ourpay.workers.dev/mcp/ourpay-sandbox"
}
}
}
```
### ChatGPT
MCP is only available for paid users in beta on ChatGPT web, by enabling Developer Mode.
Once Developer Mode is enabled, go to _Settings_ → _Connectors_ and add the MCP server using `https://mcp.ourpay.workers.dev/mcp/ourpay-mcp`.
For sandbox, use `https://mcp.ourpay.workers.dev/mcp/ourpay-sandbox` instead.
### Claude Desktop
Go to _Settings_ → _Connectors_ and click _Add custom connector_.
Name it "OurPay" and add `https://mcp.ourpay.workers.dev/mcp/ourpay-mcp` as the server URL.
For sandbox, use `https://mcp.ourpay.workers.dev/mcp/ourpay-sandbox` as the server URL instead.
Save, and click _Connect_ to connect to your OurPay organization.
# Organization Access Tokens
Source: https://docs.ourpay.dev/integrate/oat
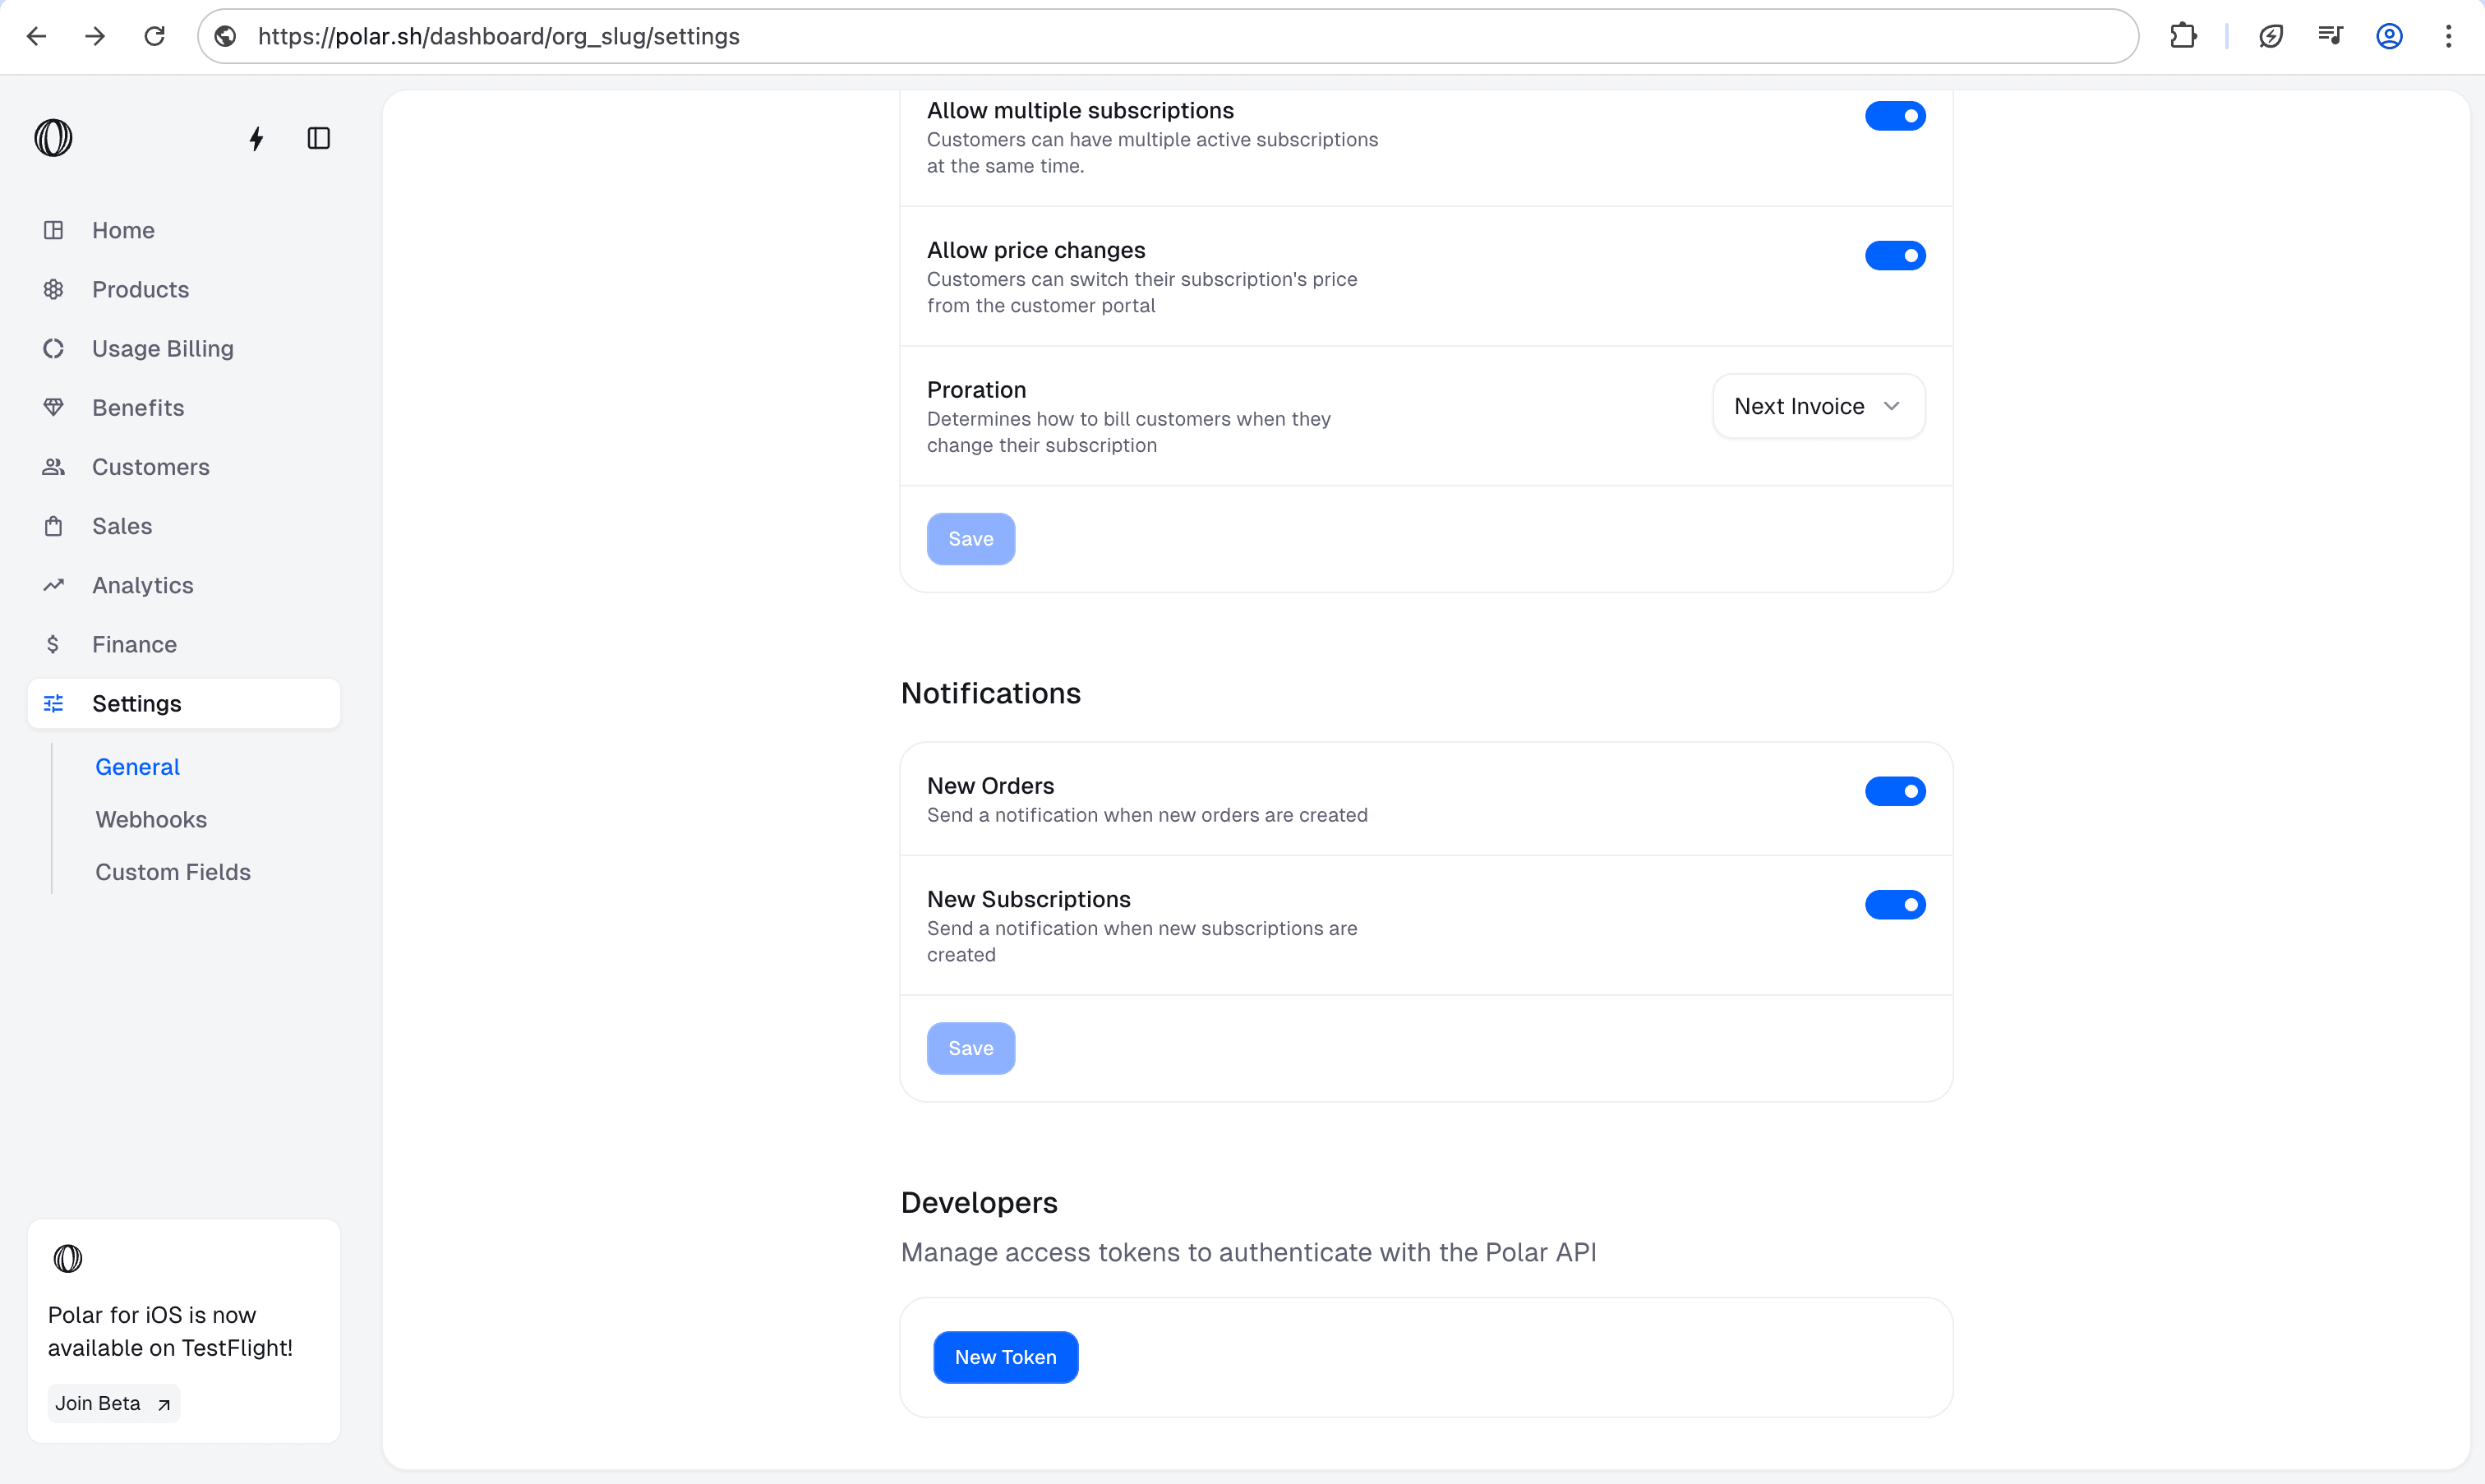
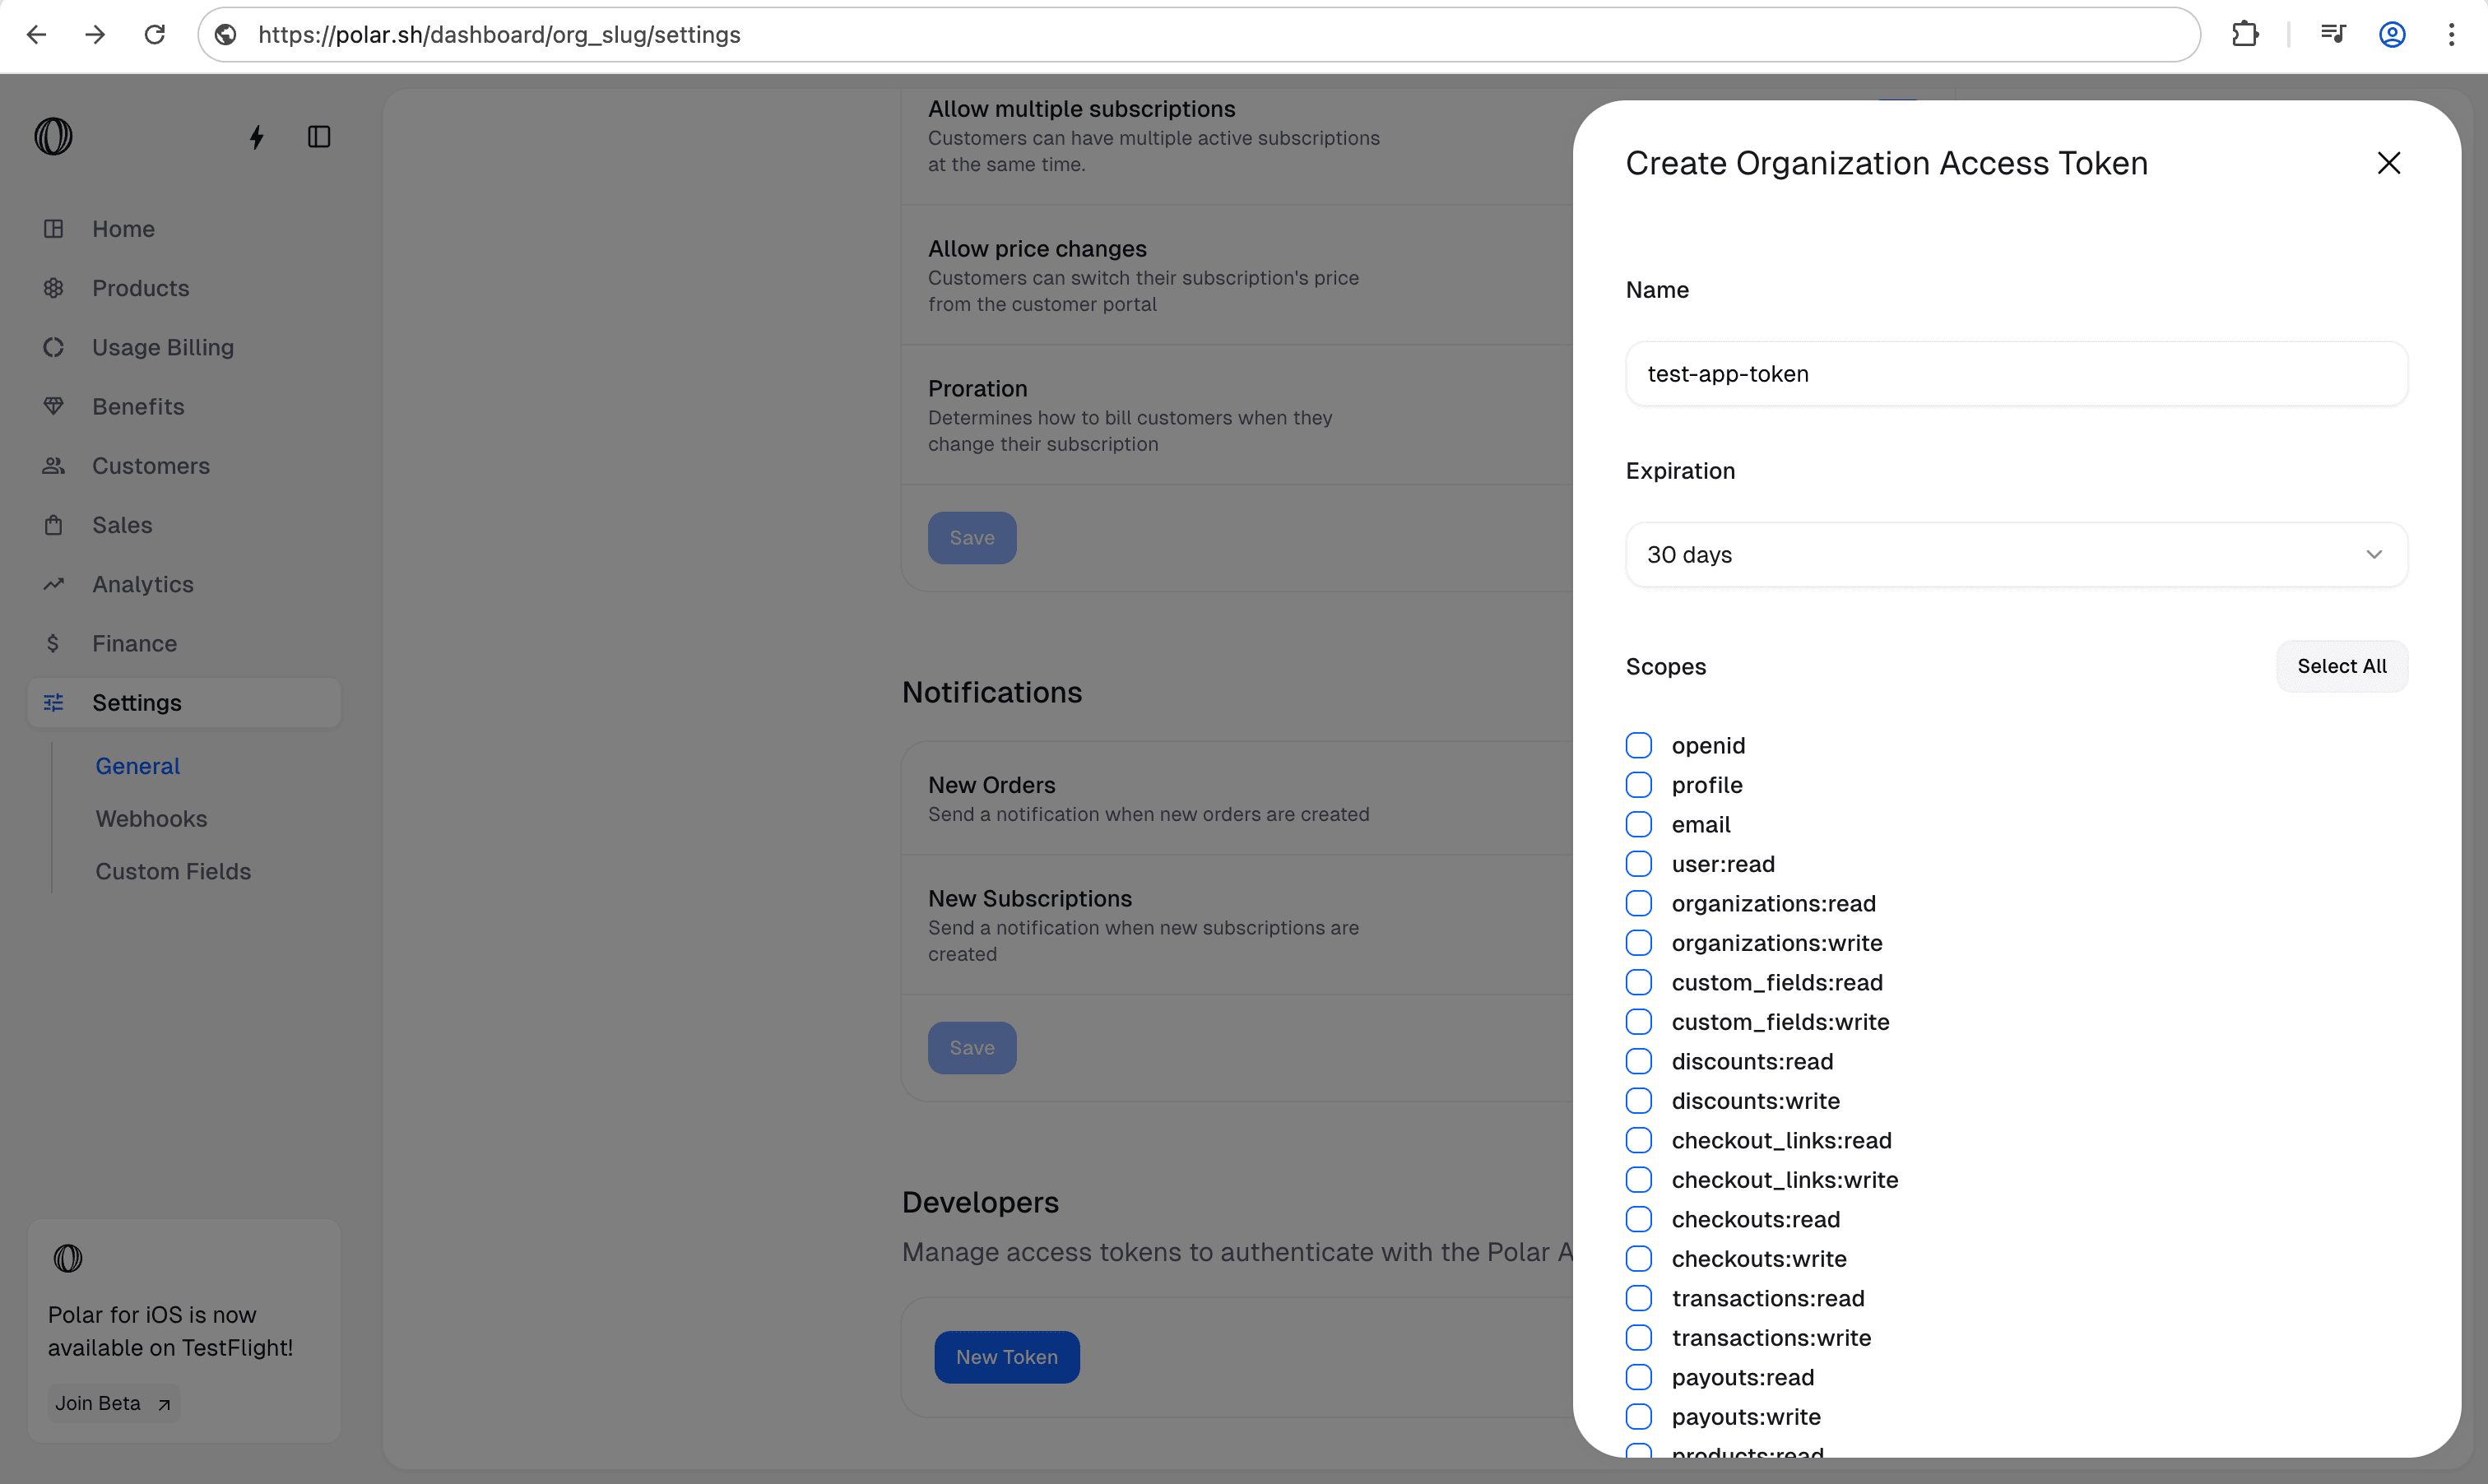
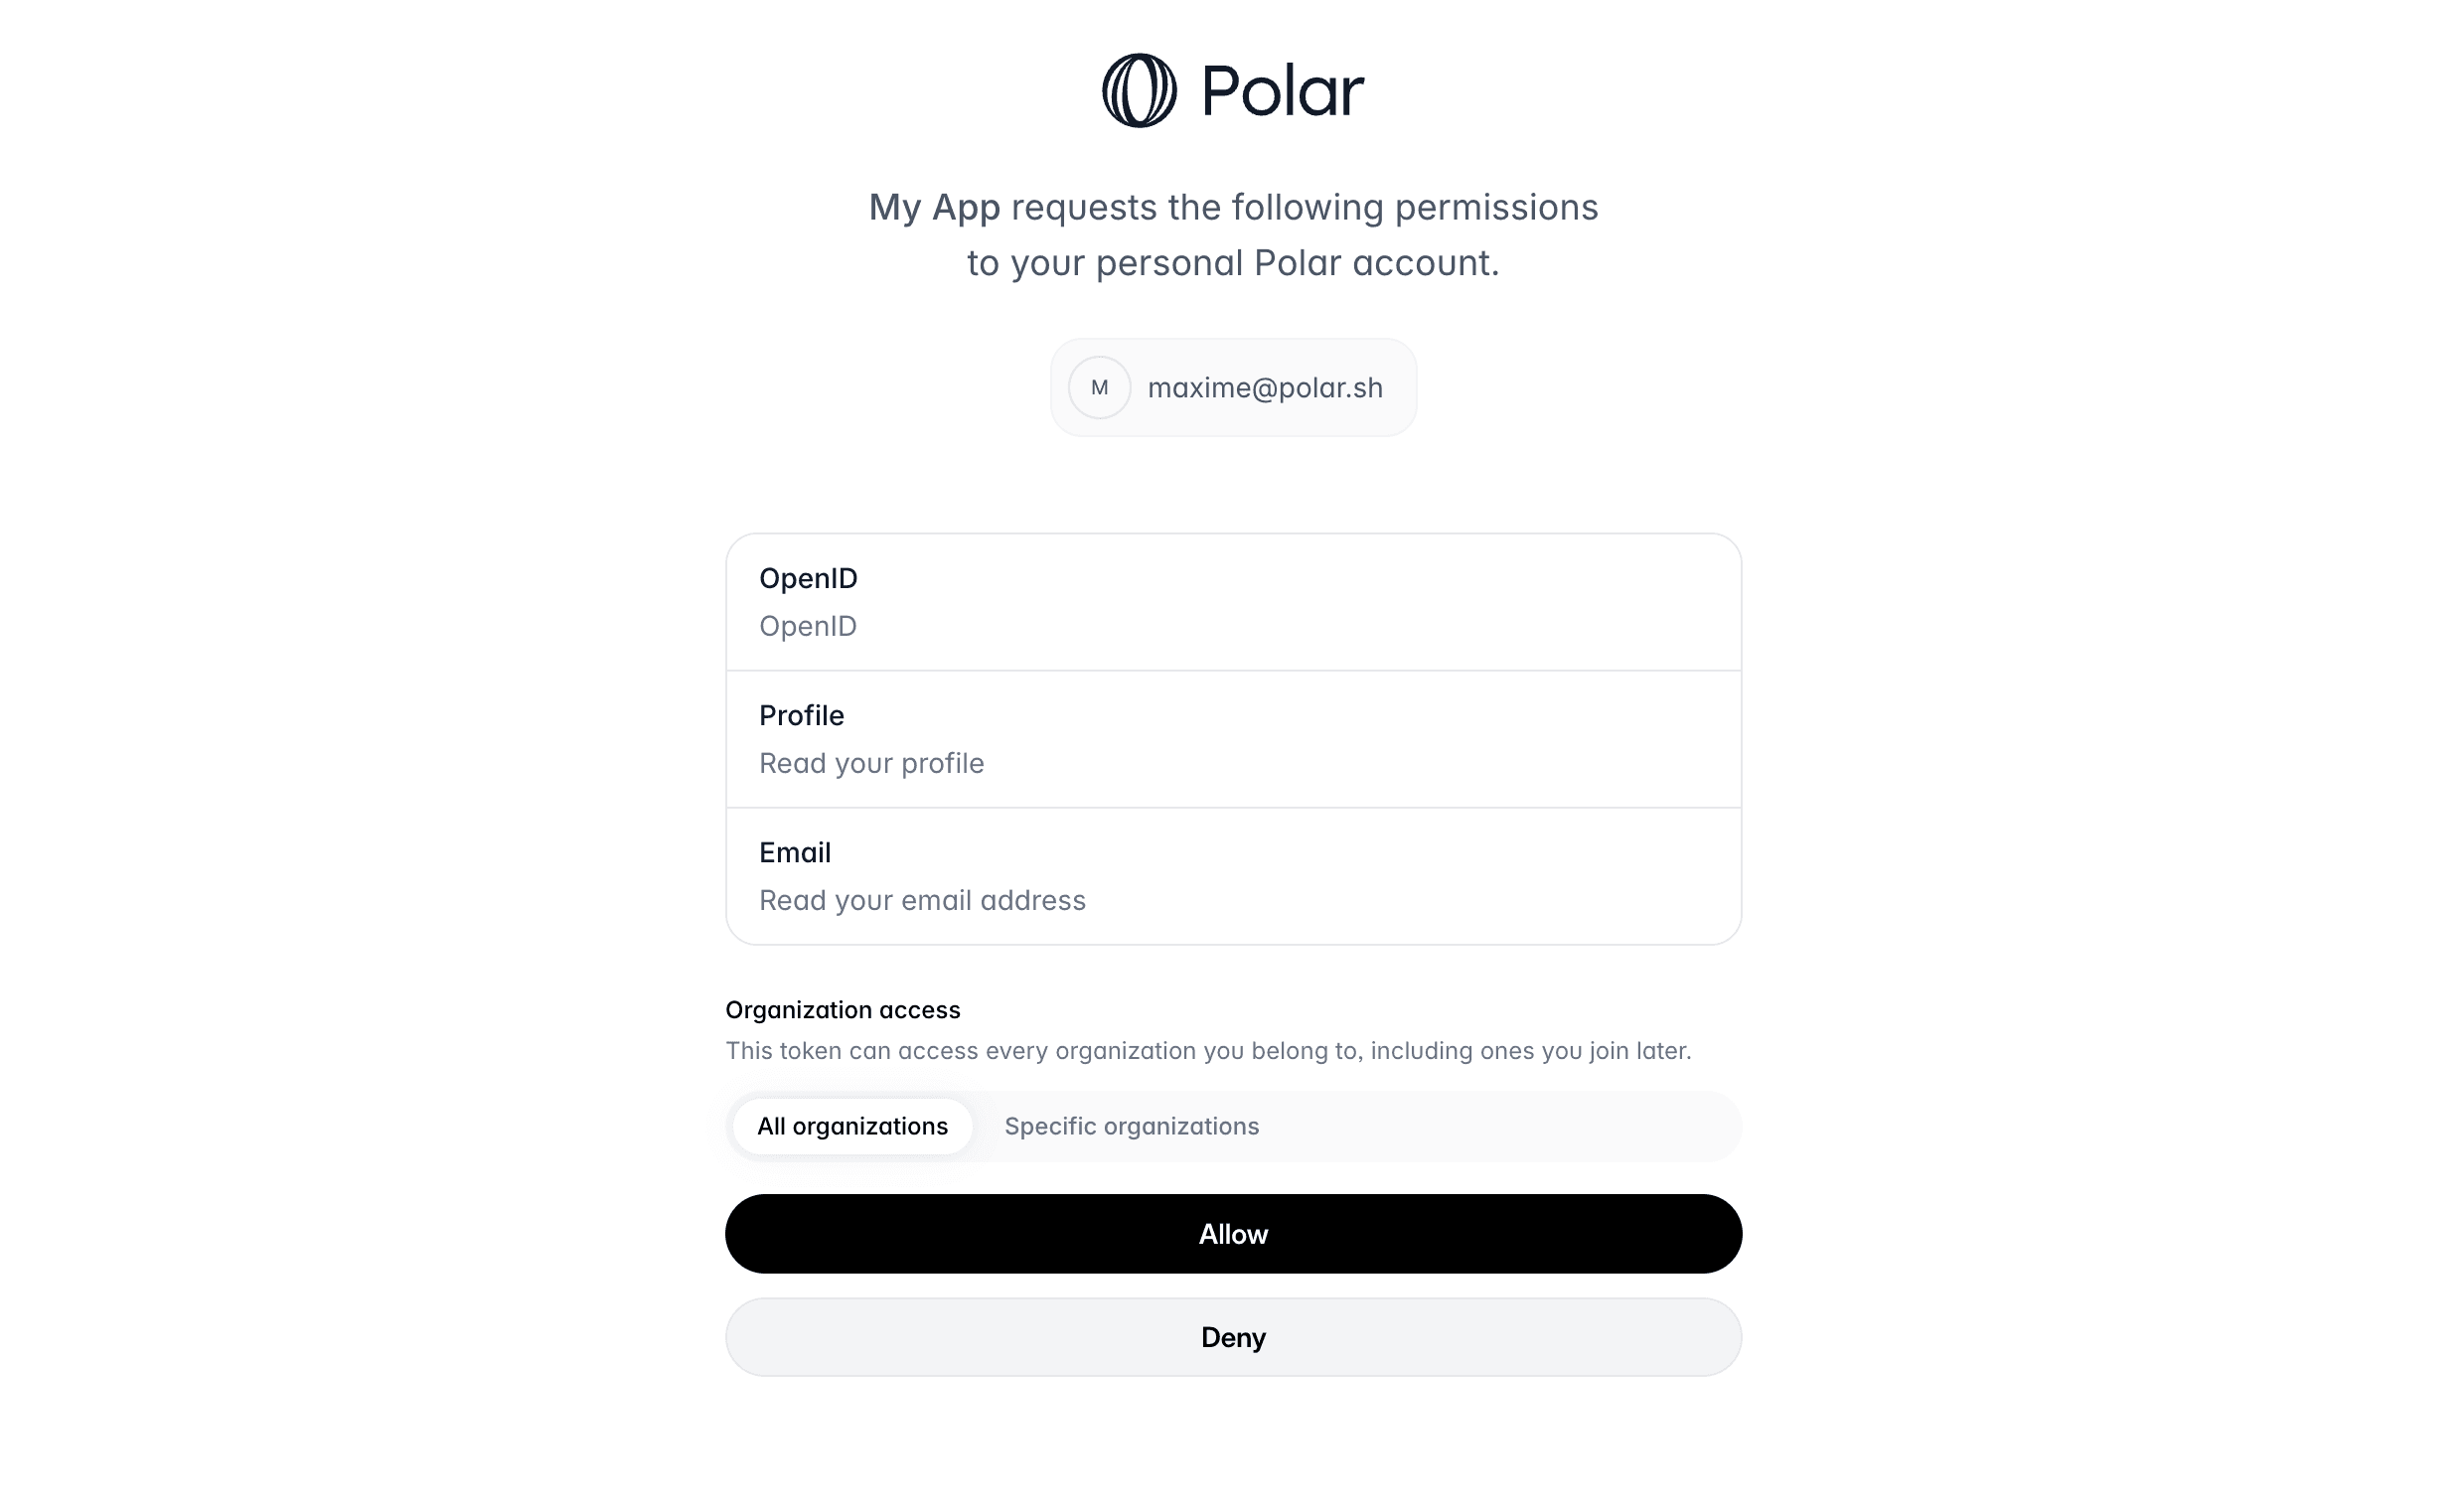 OurPay issues **user-scoped** access tokens, tied to the user granting access. On the consent screen, the user can optionally **limit the token to specific organizations**: by default it can access all of their organizations (including ones they join later), but if they select specific ones, it's restricted to those. Access always intersects with the user's current membership, so it adjusts automatically if they leave an organization. You can check which organizations a token is limited to by [introspecting it](/api-reference/oauth2/introspect-token) — the response includes an `organizations` array (an empty array means all of them).
If the user grants access, they'll be redirected to your `redirect_uri` with a `code` parameter in the query string. This code is a one-time code that you can exchange for an access token.
#### Exchange code token
Once you have the authorization code, you can exchange it for an access token. To do so, you'll need to make a `POST` request to the token endpoint. This call needs to be authenticated with the Client ID and Client Secret you got when creating the OAuth2 client.
Here is an example with cURL:
```bash Terminal
curl -X POST https://api.ourpay.dev/v1/oauth2/token \
-H 'Content-Type: application/x-www-form-urlencoded' \
-d 'grant_type=authorization_code&code=AUTHORIZATION_CODE&client_id=CLIENT_ID&client_secret=CLIENT_SECRET&redirect_uri=https://example.com/callback'
```
You should get the following response:
```json
{
"token_type": "Bearer",
"access_token": "ourpay_at_XXX",
"expires_in": 864000,
"refresh_token": "ourpay_rt_XXX",
"scope": "openid email",
"id_token": "ID_TOKEN"
}
```
The `access_token` will allow you to make authenticated API requests on behalf of the user. The `refresh_token` is a long-lived token that you can use to get new access tokens when the current one expires. The `id_token` is a signed JWT token containing information about the user, as per the [OpenID Connect specification](https://openid.net/specs/openid-connect-core-1_0.html#IDToken).
#### Public Clients
Public clients are clients where the Client Secret can't be kept safe, as it would be accessible by the final user. This is the case for SPA, mobile applications, or any client running on the user's device.
In this case, **and only if the client is configured as a Public Client**, the request to the token endpoint won't require the `client_secret` parameter. However, the [PKCE](https://oauth.net/2/pkce/) method will be required to maximize security.
### Make authenticated requests
Once you have an access token, either from a Personal Access Token or from the OpenID Connect flow, you can make authenticated requests to the API. Here is a simple example with cURL:
```bash Terminal
curl -X GET https://api.ourpay.dev/v1/oauth2/userinfo \
-H 'Authorization: Bearer ourpay_at_XXX'
```
# Introduction
Source: https://docs.ourpay.dev/integrate/oauth2/introduction
### OpenID Connect (OAuth2)
Only use our **OpenID Connect** in case you want to act on the behalf of other users via our API, e.g building an app/service for OurPay customers. Otherwise, always use an **Organization Access Token (OAT)** to integrate OurPay for your own service.
OurPay implements the [OpenID Connect specification](https://openid.net/developers/how-connect-works/) to enable third-party authentication. It's a layer on top of the OAuth2 framework aiming at making integration more standard and predictable.
In particular, it comes with a **discovery endpoint** allowing compatible clients to automatically work with the OpenID Connect server. Here is OurPay's one:
[OpenID Configuration](https://api.ourpay.dev/.well-known/openid-configuration)
# Create an OAuth 2.0 Client
Source: https://docs.ourpay.dev/integrate/oauth2/setup
Before being able to make authentication requests, you'll need an **OAuth2 Client**. It's the entity that'll identify you, as a third-party developer, between OurPay and the final user.
You can manage them from your [User Settings](https://ourpay.dev/settings#oauth)
Here are the required fields:
* *Application Name*: the name of the application that'll be shown to the final users.
* *Client Type*: the type of client you are creating. [Read more](#public-clients)
* *Redirect URIs*: for security reasons, you need to declare your application URL where the users will be redirected after granting access to their data.
OurPay issues **user-scoped** access tokens, tied to the user granting access. On the consent screen, the user can optionally **limit the token to specific organizations**: by default it can access all of their organizations (including ones they join later), but if they select specific ones, it's restricted to those. Access always intersects with the user's current membership, so it adjusts automatically if they leave an organization. You can check which organizations a token is limited to by [introspecting it](/api-reference/oauth2/introspect-token) — the response includes an `organizations` array (an empty array means all of them).
If the user grants access, they'll be redirected to your `redirect_uri` with a `code` parameter in the query string. This code is a one-time code that you can exchange for an access token.
#### Exchange code token
Once you have the authorization code, you can exchange it for an access token. To do so, you'll need to make a `POST` request to the token endpoint. This call needs to be authenticated with the Client ID and Client Secret you got when creating the OAuth2 client.
Here is an example with cURL:
```bash Terminal
curl -X POST https://api.ourpay.dev/v1/oauth2/token \
-H 'Content-Type: application/x-www-form-urlencoded' \
-d 'grant_type=authorization_code&code=AUTHORIZATION_CODE&client_id=CLIENT_ID&client_secret=CLIENT_SECRET&redirect_uri=https://example.com/callback'
```
You should get the following response:
```json
{
"token_type": "Bearer",
"access_token": "ourpay_at_XXX",
"expires_in": 864000,
"refresh_token": "ourpay_rt_XXX",
"scope": "openid email",
"id_token": "ID_TOKEN"
}
```
The `access_token` will allow you to make authenticated API requests on behalf of the user. The `refresh_token` is a long-lived token that you can use to get new access tokens when the current one expires. The `id_token` is a signed JWT token containing information about the user, as per the [OpenID Connect specification](https://openid.net/specs/openid-connect-core-1_0.html#IDToken).
#### Public Clients
Public clients are clients where the Client Secret can't be kept safe, as it would be accessible by the final user. This is the case for SPA, mobile applications, or any client running on the user's device.
In this case, **and only if the client is configured as a Public Client**, the request to the token endpoint won't require the `client_secret` parameter. However, the [PKCE](https://oauth.net/2/pkce/) method will be required to maximize security.
### Make authenticated requests
Once you have an access token, either from a Personal Access Token or from the OpenID Connect flow, you can make authenticated requests to the API. Here is a simple example with cURL:
```bash Terminal
curl -X GET https://api.ourpay.dev/v1/oauth2/userinfo \
-H 'Authorization: Bearer ourpay_at_XXX'
```
# Introduction
Source: https://docs.ourpay.dev/integrate/oauth2/introduction
### OpenID Connect (OAuth2)
Only use our **OpenID Connect** in case you want to act on the behalf of other users via our API, e.g building an app/service for OurPay customers. Otherwise, always use an **Organization Access Token (OAT)** to integrate OurPay for your own service.
OurPay implements the [OpenID Connect specification](https://openid.net/developers/how-connect-works/) to enable third-party authentication. It's a layer on top of the OAuth2 framework aiming at making integration more standard and predictable.
In particular, it comes with a **discovery endpoint** allowing compatible clients to automatically work with the OpenID Connect server. Here is OurPay's one:
[OpenID Configuration](https://api.ourpay.dev/.well-known/openid-configuration)
# Create an OAuth 2.0 Client
Source: https://docs.ourpay.dev/integrate/oauth2/setup
Before being able to make authentication requests, you'll need an **OAuth2 Client**. It's the entity that'll identify you, as a third-party developer, between OurPay and the final user.
You can manage them from your [User Settings](https://ourpay.dev/settings#oauth)
Here are the required fields:
* *Application Name*: the name of the application that'll be shown to the final users.
* *Client Type*: the type of client you are creating. [Read more](#public-clients)
* *Redirect URIs*: for security reasons, you need to declare your application URL where the users will be redirected after granting access to their data.
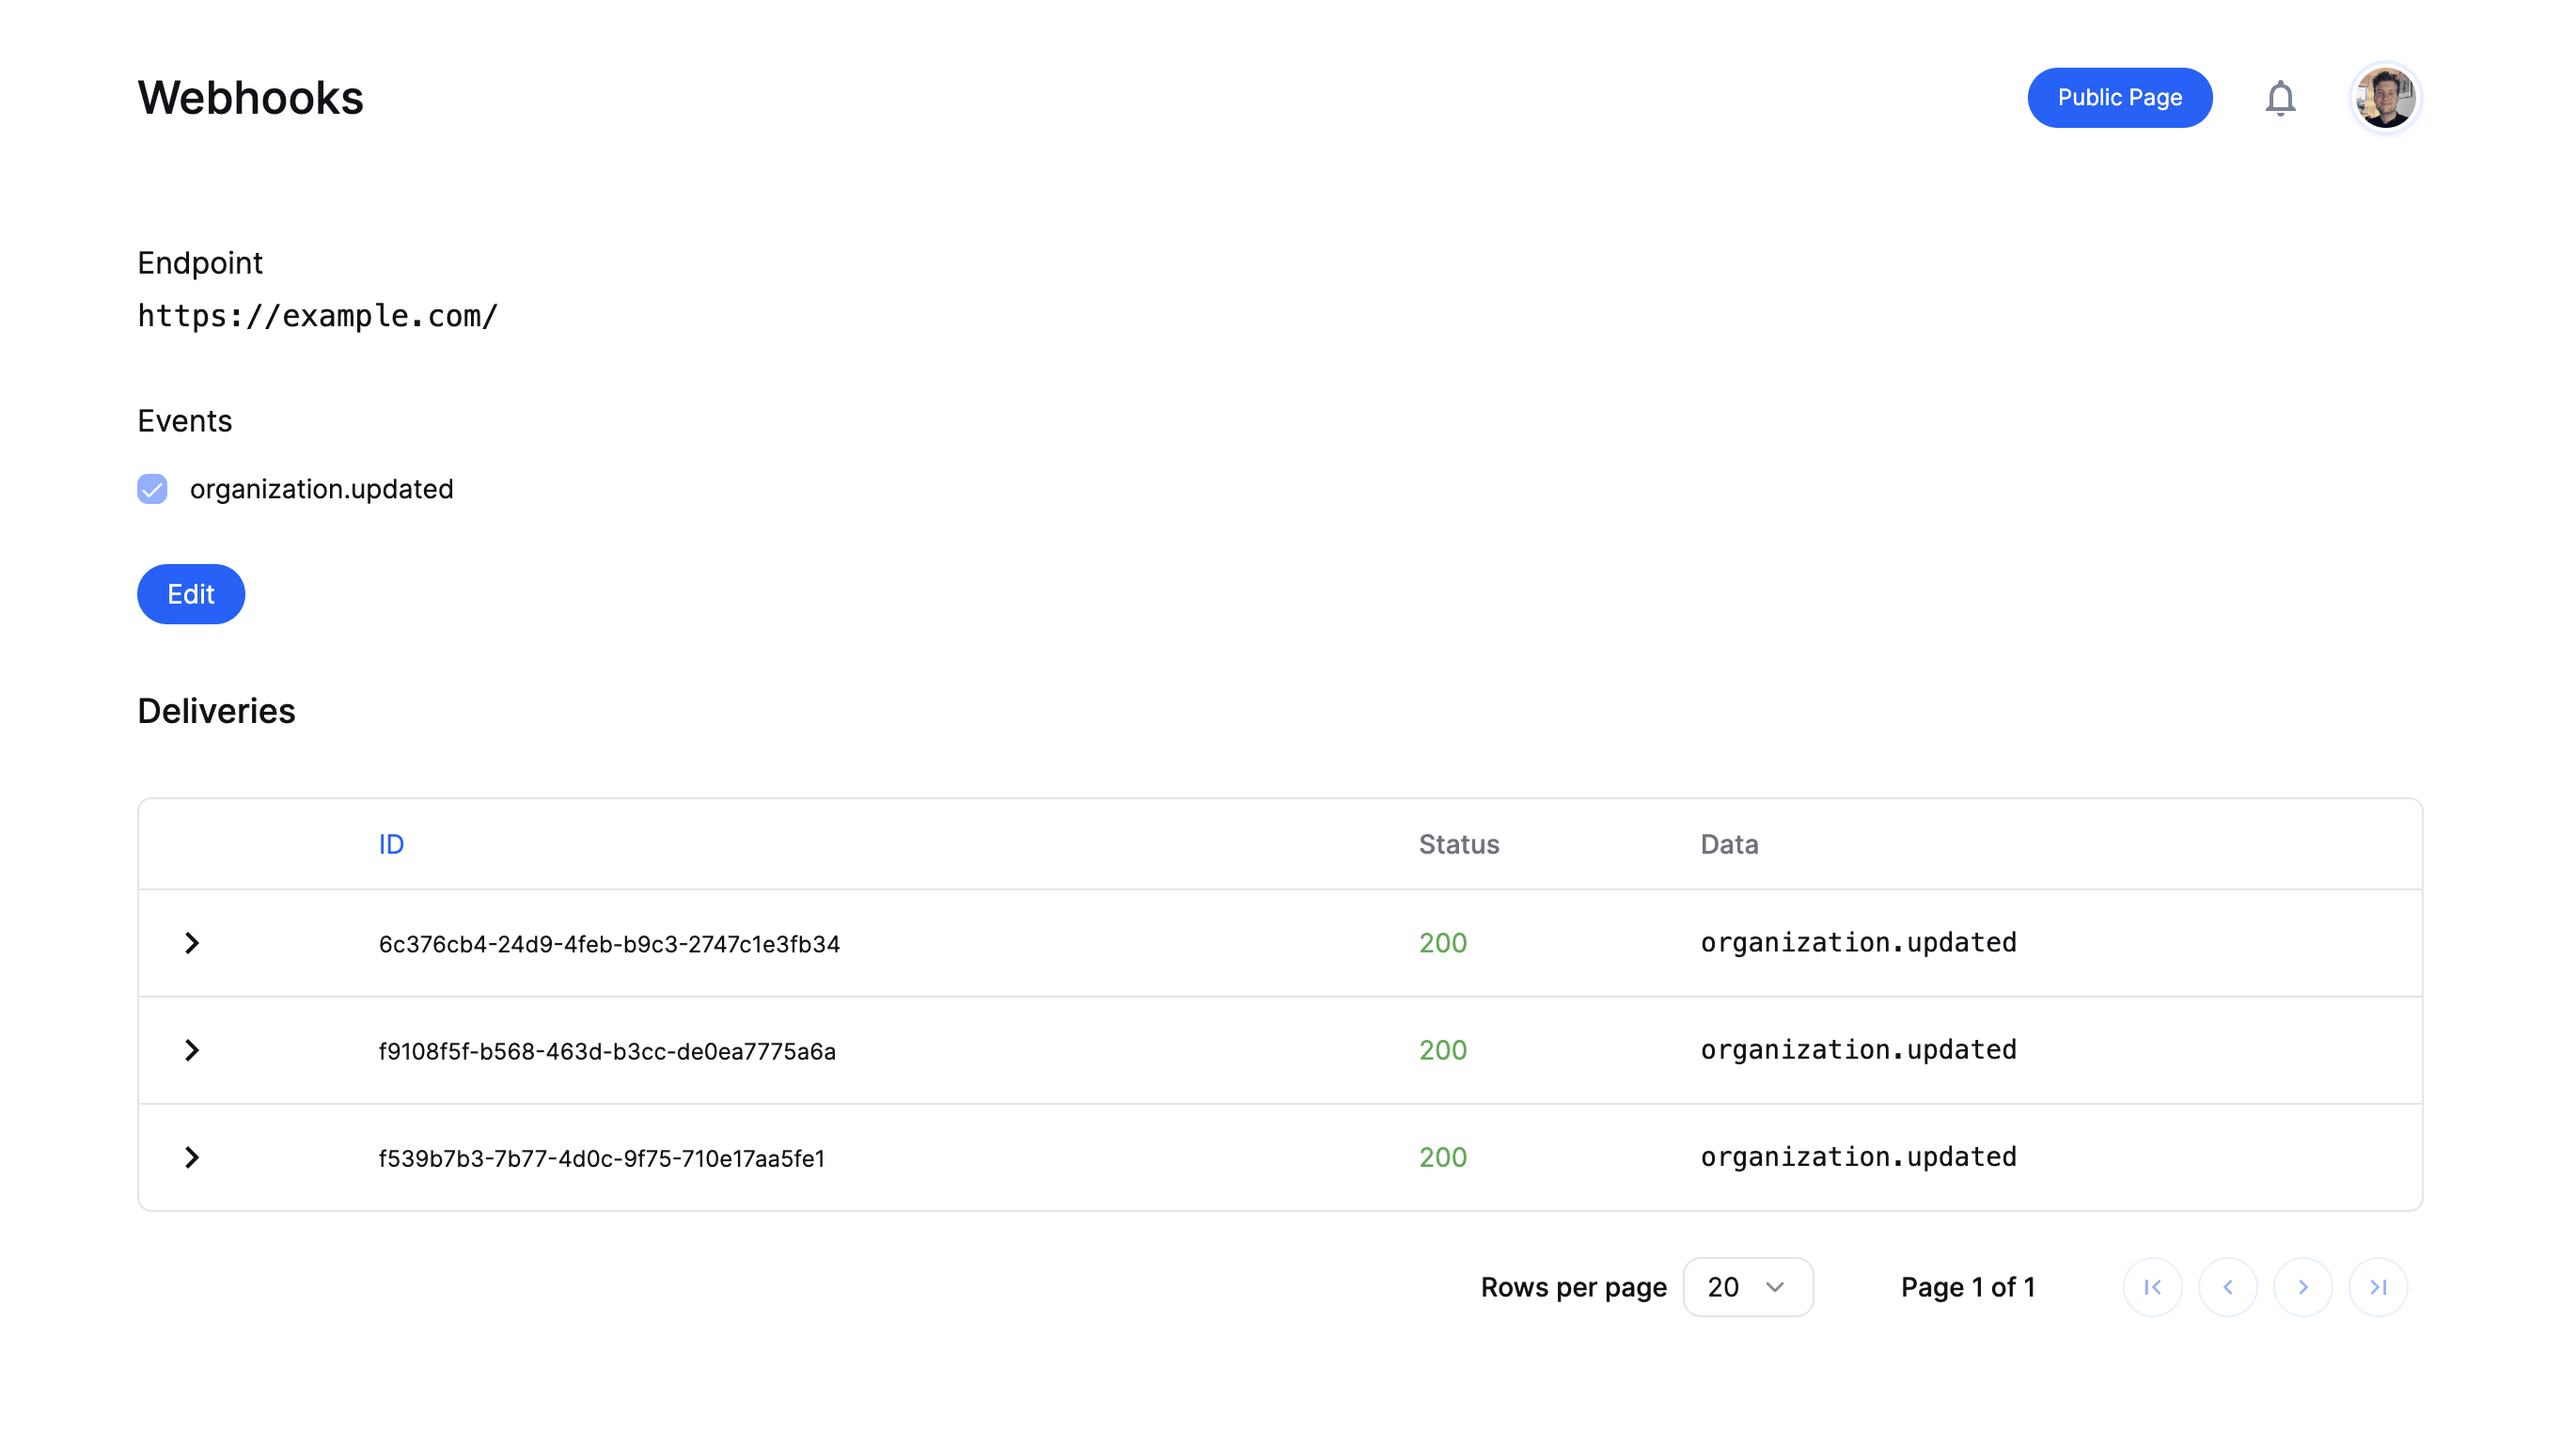
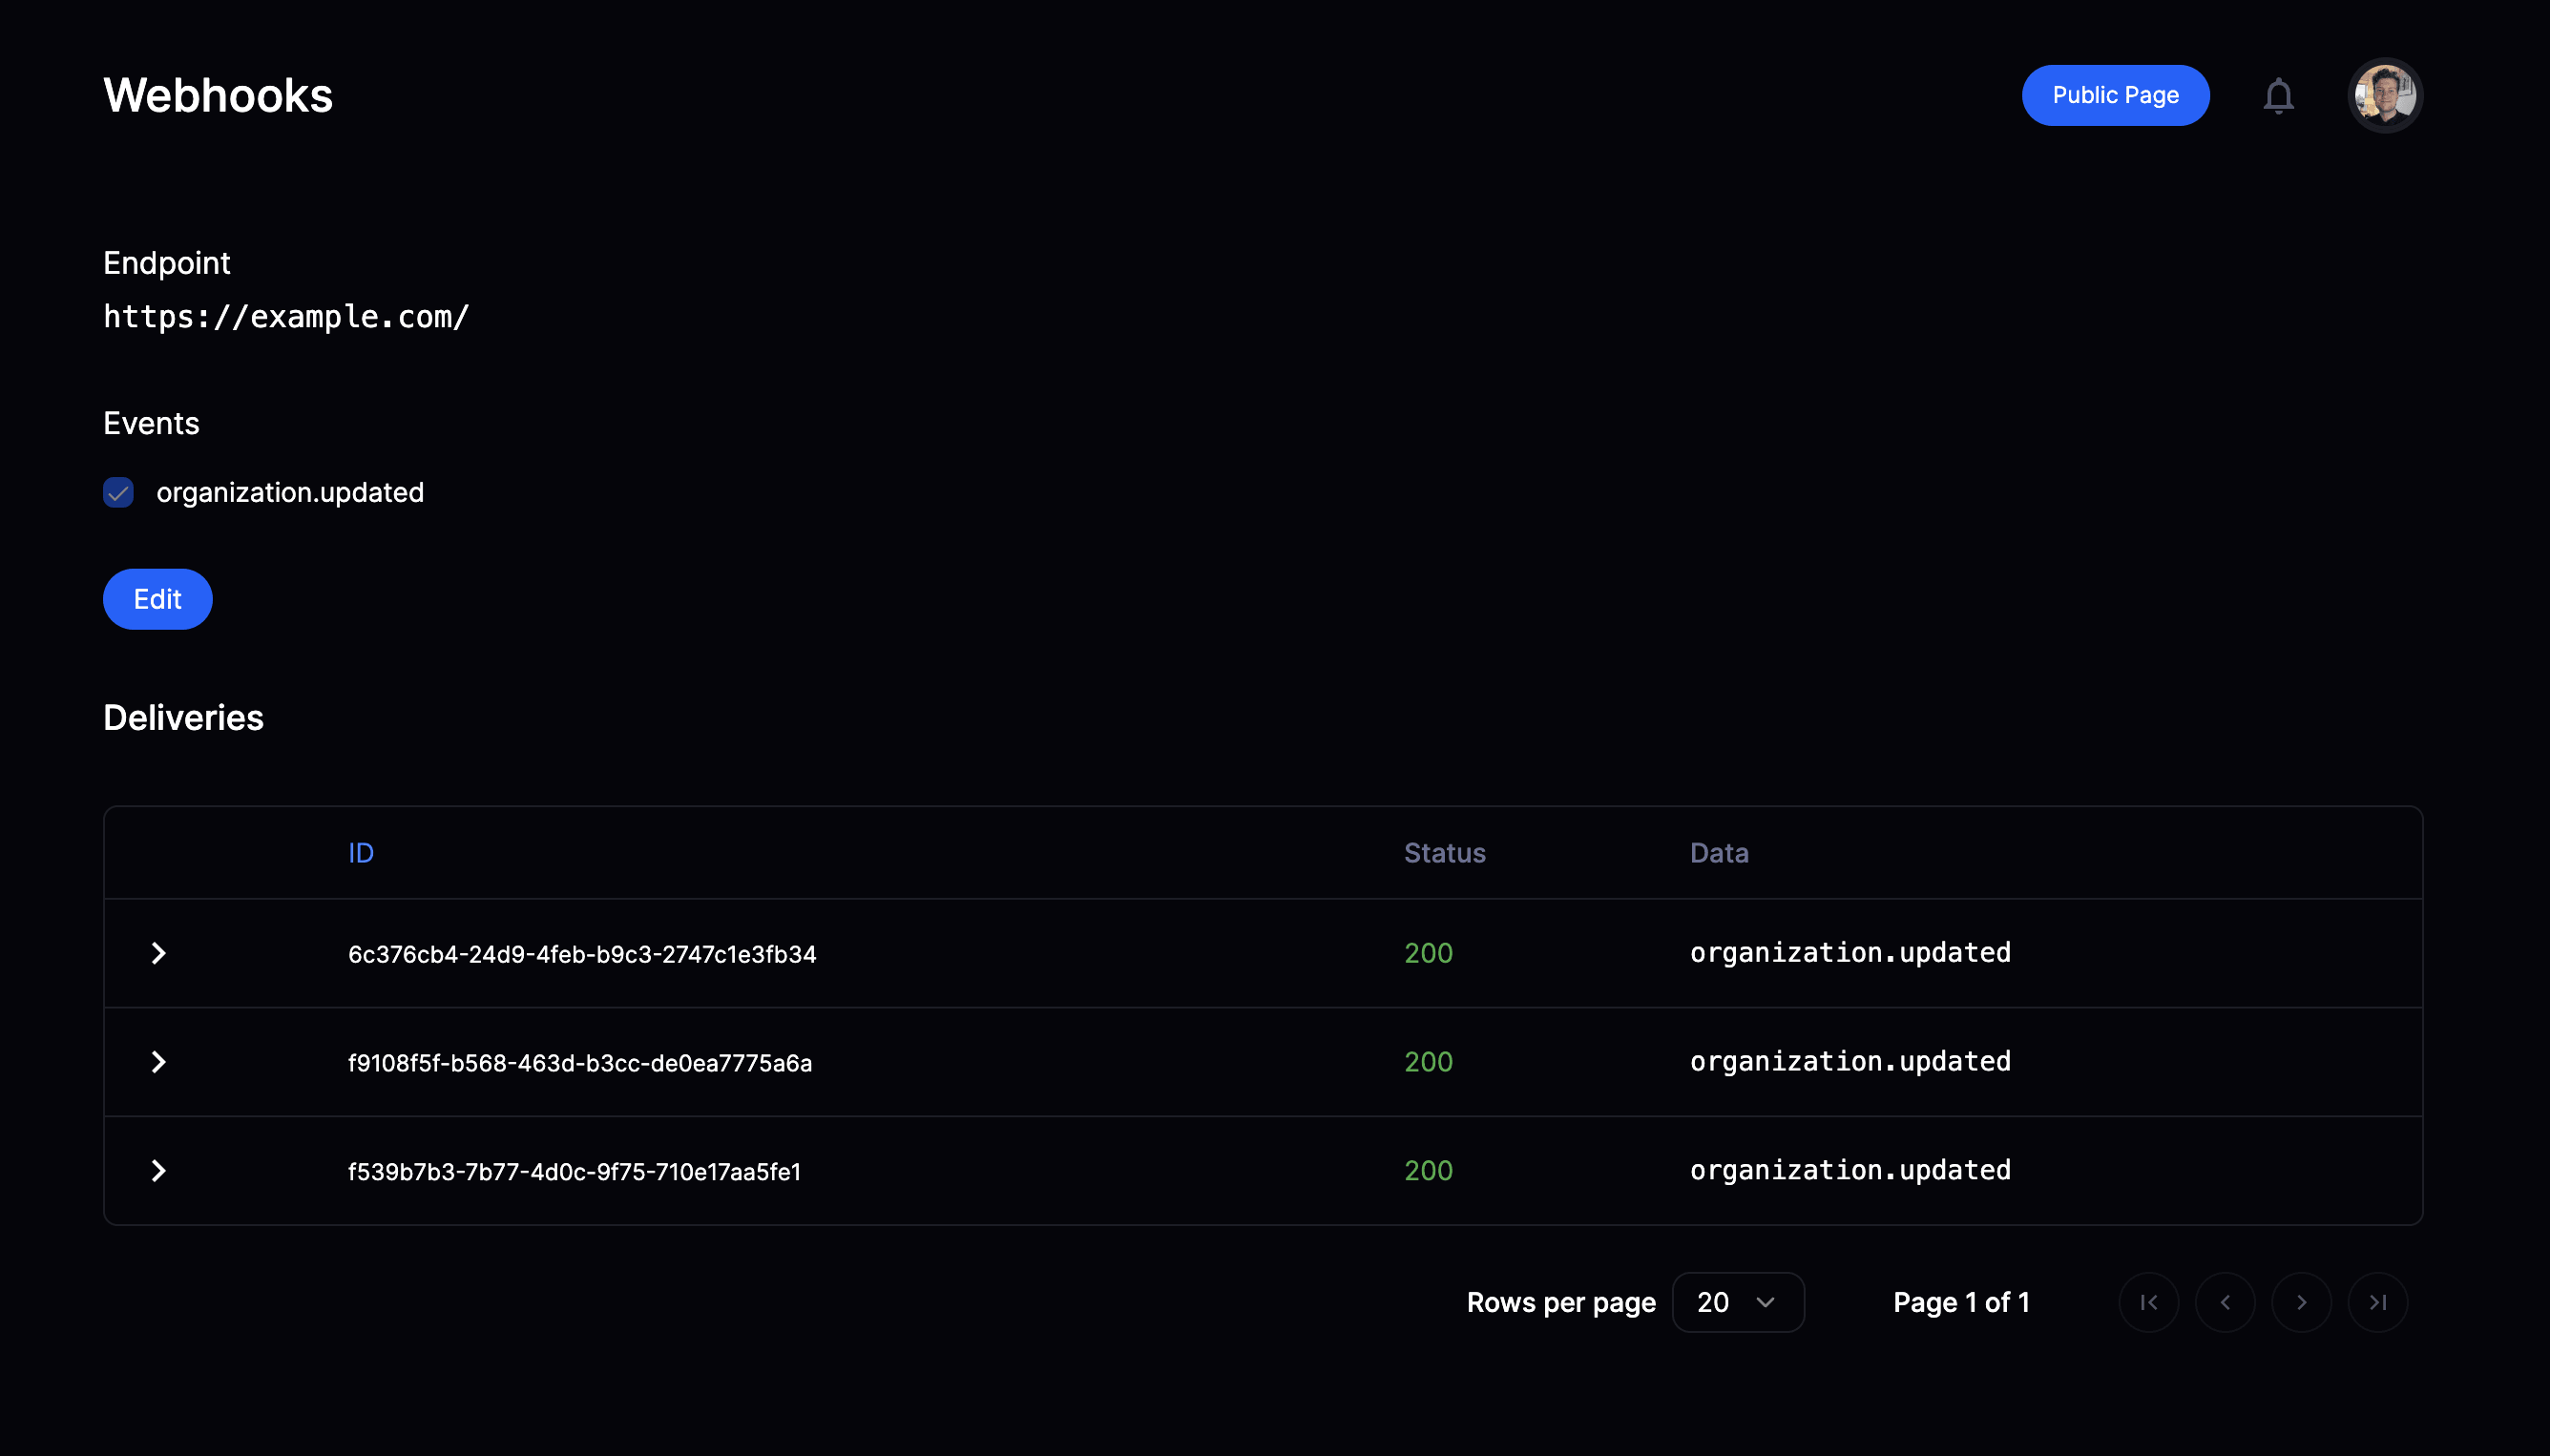 Once a webhook endpoint is setup you will have access to the delivery overview
page. Here you can:
- See historic deliveries
- Review payload sent
- Trigger redelivery in case of failure
Now, let's integrate our endpoint route to validate, parse & handle incoming webhooks.
## Validate & parse webhooks
You now need to setup a route handler for the endpoint registered on OurPay to
receive, validate and parse webhooks before handling them according to your
needs.
### Using our SDKs
Our TypeScript & Python SDKs come with a built-in helper function to easily
validate and parse the webhook event - see full examples below.
Once a webhook endpoint is setup you will have access to the delivery overview
page. Here you can:
- See historic deliveries
- Review payload sent
- Trigger redelivery in case of failure
Now, let's integrate our endpoint route to validate, parse & handle incoming webhooks.
## Validate & parse webhooks
You now need to setup a route handler for the endpoint registered on OurPay to
receive, validate and parse webhooks before handling them according to your
needs.
### Using our SDKs
Our TypeScript & Python SDKs come with a built-in helper function to easily
validate and parse the webhook event - see full examples below.
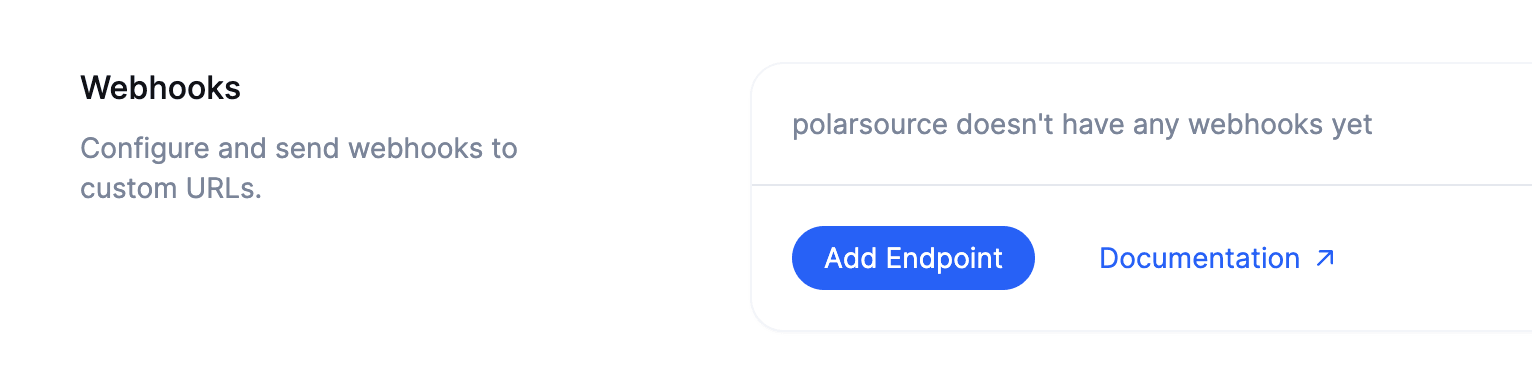
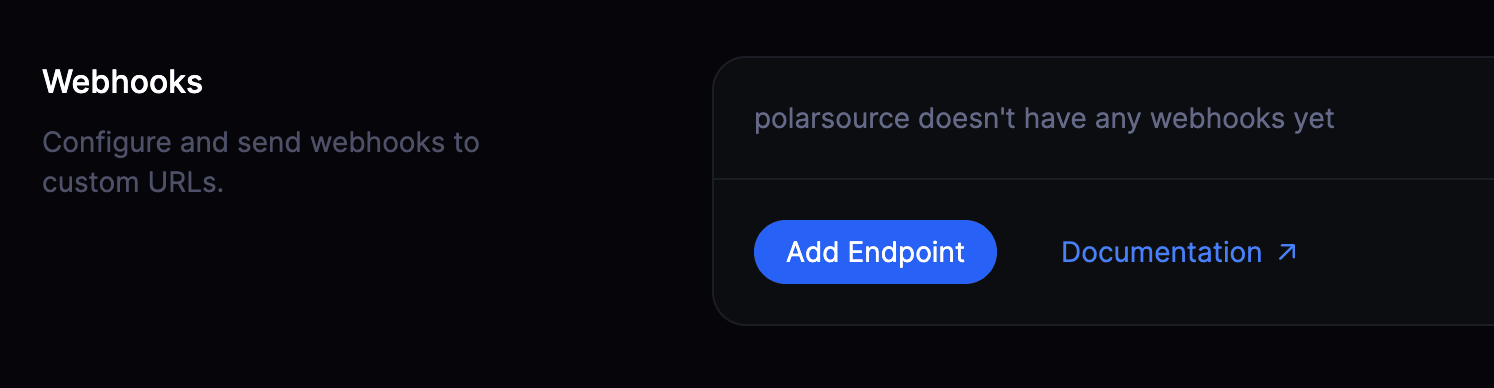
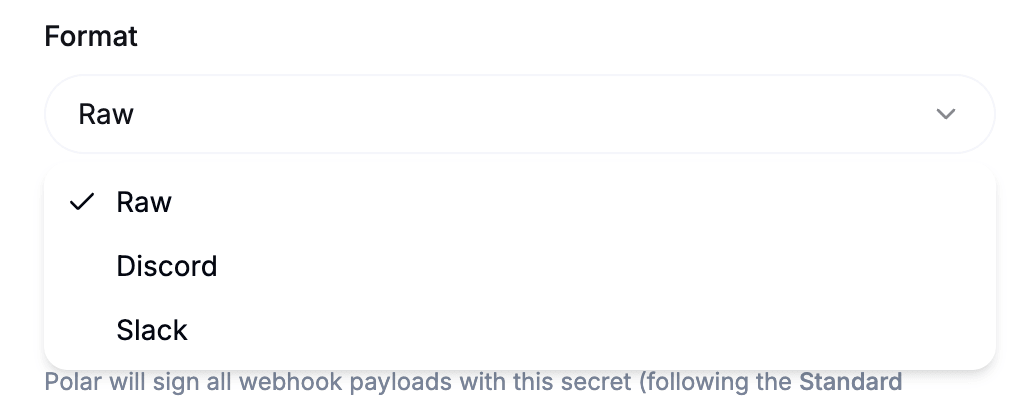
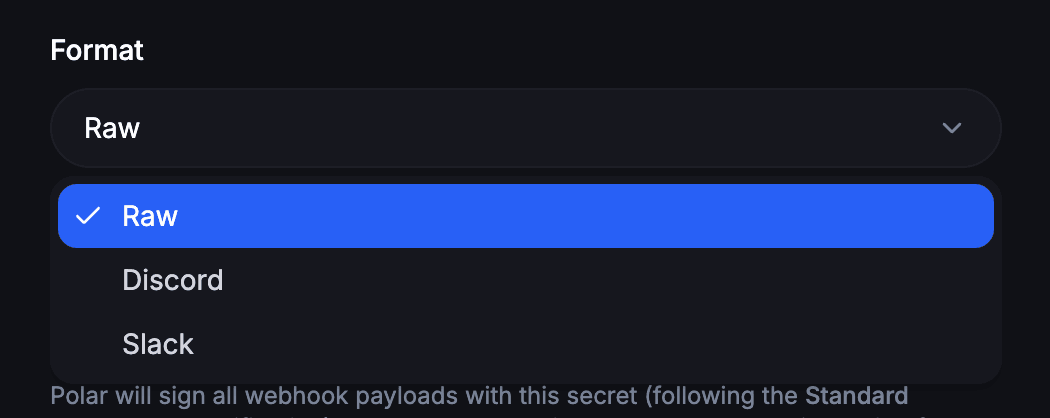 If you paste a Discord or Slack Webhook URL, the format will be automatically selected.
 ## What is OurPay?
Turn your software into a business with OurPay. Sell digital products, subscriptions, and more without the hassle of traditional payment systems.
## What is OurPay?
Turn your software into a business with OurPay. Sell digital products, subscriptions, and more without the hassle of traditional payment systems.